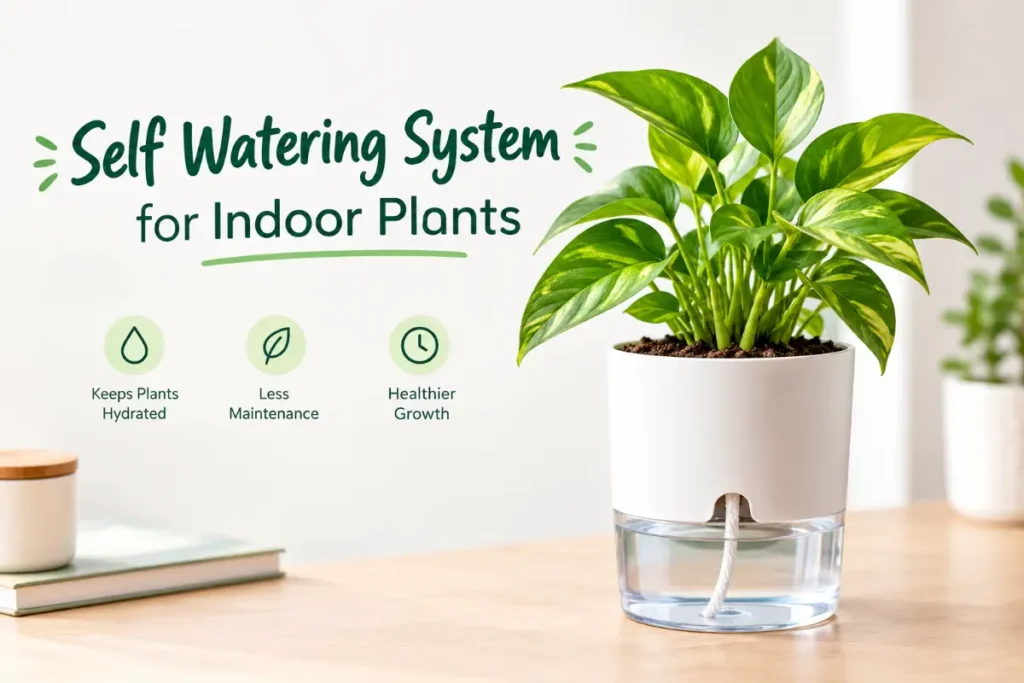
A self watering system for indoor plants is one of the most practical upgrades you can make to your indoor growing setup — whether the goal is consistent moisture delivery for plants that dislike boom-and-bust watering, low-maintenance care for a busy week, or keeping plants alive through a two-week holiday without calling in a favour from a neighbour. The term covers a wide range of approaches: from a simple terracotta spike connected to a recycled wine bottle, to a multi-plant drip irrigation setup controlled by a timer, to purpose-built self-watering pots with built-in reservoirs.
This guide covers the main categories of self watering system for indoor plants available to UK growers, explains how each works, and helps you match the right approach to your situation — plant type, budget, how long you need autonomous watering, and how much you want to set up and monitor.
Why Use a Self Watering System for Indoor Plants?
Manual watering is the most common cause of both overwatering and underwatering. Watering on a fixed schedule — every Sunday morning, say — ignores the fact that a plant’s water needs vary with season, temperature, and growth rate. A self watering system for indoor plants delivers water in response to conditions rather than the calendar:
Wicking and capillary systems draw water only as the growing medium dries out — the plant effectively controls its own water intake through the physics of capillary action.
Reservoir-based self-watering pots keep the lower growing medium consistently moist without ever fully saturating it, allowing roots to absorb moisture from below at their own rate.
Drip irrigation systems deliver measured quantities of water on a timer — precision delivery without the unpredictability of hand watering.
The common thread is consistency. Plants that receive consistent moisture at the root zone — rather than alternating between wet and dry extremes — grow more steadily, develop stronger root systems, and are more resistant to the stress that makes them susceptible to pests and disease.
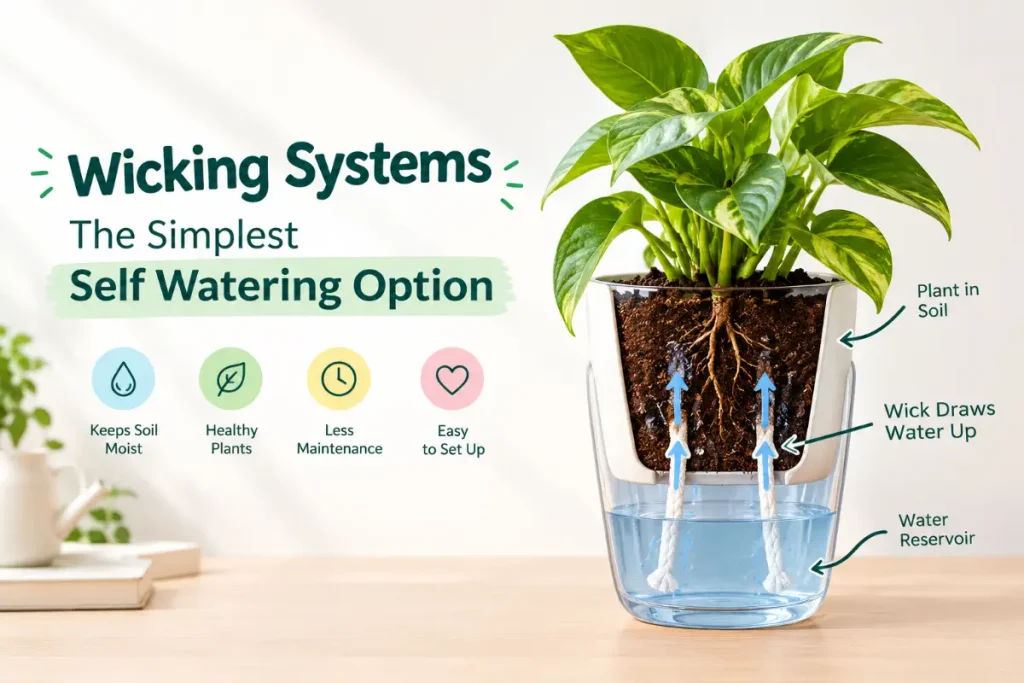
Wicking Systems: The Simplest Self Watering Option
A wicking system uses a length of absorbent cord — cotton, nylon, or purpose-made capillary matting — to draw water from a reservoir into the growing medium by capillary action. Water moves along the wick from the wet end (submerged in the reservoir) to the dry end (buried in the compost), automatically slowing as the compost moistens and accelerating as it dries.
DIY bottle wicking method:
- Fill a clean glass or plastic bottle with water
- Thread a length of cotton wick (or several strands of cotton string) through the bottle opening, securing with a rubber band
- Push the free end of the wick 5–8 cm into the growing medium, threading it toward the root zone
- Invert the bottle and place it beside the pot, or support it inverted in the pot with the neck submerged in the growing medium
The bottle delivers water over 3–7 days depending on plant size, growing medium moisture level, and ambient temperature — a perfectly functional short-term holiday watering solution using no specialist equipment.
Commercial wicking inserts: Products such as Blumat Tropf systems and various terracotta spike sets operate on the same principle — a porous terracotta spike inserted in the growing medium connects to a reservoir bottle. As the compost dries, the spike wicks water from the bottle into the root zone. These are reliable, reusable, and require no electricity.
Best for: Small to medium houseplants in standard potting compost; holiday periods of 1–2 weeks; low-cost self-watering solution; moisture-loving plants (ferns, peace lilies, tradescantia) that benefit from consistent moisture delivery.
Not ideal for: Very large containers (insufficient wick volume for big root zones); succulents and cacti (wick systems maintain higher moisture levels than these plants prefer); plants in very free-draining growing media (bark mixes, gritty cactus compost) where capillary action is reduced.
Self-Watering Pots: Reservoir-Based Watering
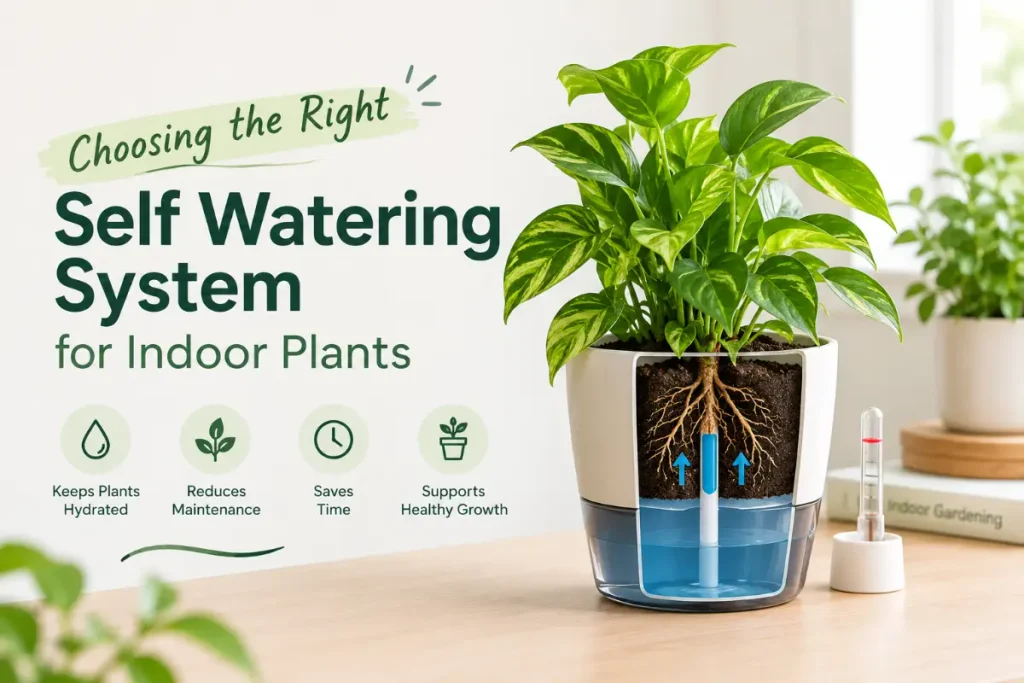
Purpose-built self-watering pots include a built-in water reservoir in the base, separated from the growing medium by a capillary barrier. A wicking section draws water upward from the reservoir as roots absorb moisture from the compost above. A fill tube (usually visible at the side of the pot) allows refilling the reservoir without disturbing the soil surface.
How they work:
- The reservoir holds several days’ to several weeks’ worth of water, depending on pot size and plant demand
- The capillary barrier ensures roots can access moisture without sitting in standing water — a key distinction from simply sitting a pot in a saucer of water, which promotes root rot at the base of the pot
- Roots grow downward toward the reservoir over time, developing an extensive lower root system that further stabilises water access
Advantages of self-watering pots:
- No electricity required
- No timer programming
- Highly suitable for moisture-loving food plants — herbs, lettuce, tomatoes — where consistent moisture directly improves productivity
- Easy to monitor: a visible water level indicator or fill tube makes reservoir level immediately clear
Disadvantages:
- Higher cost than standard pots (£15–50 for quality self-watering pots versus £3–10 for standard equivalents)
- Not suitable for plants that need pronounced dry periods between waterings (succulents, cacti, orchids in bark)
- In winter, when plant water demand is low, reservoir water can sit for extended periods — emptying and refilling periodically prevents stagnation
Reservoir capacity and refill frequency:
- Small self-watering pots (15–20 cm): reservoir holds 0.5–1 litre; refill every 5–14 days depending on plant and season
- Large self-watering pots (30–40 cm): reservoir holds 2–5 litres; refill every 1–3 weeks
The post on drainage for indoor plants explains the capillary barrier principle in more detail — understanding how moisture moves upward through the growing medium clarifies why self-watering pots work without waterlogging.
Drip Irrigation: Timer-Controlled Delivery
A drip irrigation system for indoor plants delivers water to each pot individually through thin tubing and micro-drippers, controlled by a programmable timer. This is the most technically involved self watering system for indoor plants, but also the most scalable — a single timer can run water to 10, 20, or 30 pots simultaneously.
System components:
- Timer: Connects to a tap or water container; programmes watering frequency (daily, every 2 days, etc.) and duration (1–60 minutes typically)
- Main tubing: 13 mm or 16 mm diameter tube connecting the timer to the distribution network
- Micro-tubing and stakes: 4 mm diameter tubes with adjustable micro-drippers inserted into each pot
- Water source: Can connect to a mains tap (most reliable for extended periods) or a raised reservoir container (more flexible positioning, no tap required)
The full guide to drip irrigation for indoor plants covers timer selection, flow rate calibration, and multi-pot setup in detail. Key considerations for an indoor drip system:
Pressure regulation: Mains water pressure (typically 3–5 bar in UK homes) must be reduced before reaching micro-drippers — a pressure reducer fitting prevents drippers from spraying rather than dripping. Most indoor drip kits include a pressure reducer or are gravity-fed from a raised reservoir at lower pressure.
Dripper flow rate calibration: Each pot requires a different dripper flow rate depending on pot size and plant type. Adjustable drippers (0.5–8 litres per hour) allow fine-tuning per plant. Run a test cycle and check each pot after 10 minutes — adjust until delivery matches each plant’s needs.
Best for: Large plant collections (5+ plants) where manual watering is genuinely time-consuming; extended holidays (2–4 weeks) where wicking bottle solutions would need multiple refills; productive growing setups with herbs, tomatoes, or salad crops requiring precise moisture delivery.
Key maintenance: Flush the system with clean water every 4–6 weeks to prevent algae or mineral deposits blocking micro-drippers. Check every dripper delivers as expected at the start of each growing season.
Terracotta Ollas and Spikes: Slow-Release Clay Watering
An olla (pronounced “oy-ya”) is a sealed terracotta vessel buried in the growing medium that slowly seeps water through its porous walls directly into the root zone. The tradition is ancient — ollas have been used in arid-region agriculture for thousands of years — and the principle transfers effectively to indoor container growing.
Terracotta spikes are the modern, indoor-adapted equivalent: a porous terracotta cone or spike inserted into the growing medium with a bottle attached above, allowing water to seep slowly through the clay directly into the root zone around the spike.
Advantages:
- Delivers water at the root zone rather than the surface — efficient uptake, minimal surface evaporation
- Self-regulating: water seeps more quickly when the surrounding compost is dry and slows as it moistens
- No electricity, no programming, no tubing
- Aesthetically unobtrusive in a decorative pot
Limitations:
- Flow rate depends on terracotta porosity — quality varies between products; cheap versions either seep too fast (emptying the bottle in 24 hours) or too slow (minimal delivery)
- Maximum reservoir capacity limited to bottle size — typically 0.5–1 litre; adequate for 7–10 days on small/medium plants in cool conditions, potentially only 3–5 days in summer or for large thirsty plants
- Requires a stable bottle support — inverted bottles can tip without adequate support
Choosing the Right Self Watering System for Indoor Plants
Matching the system to the situation determines whether the setup genuinely reduces watering work or simply adds complexity:
| Situation | Recommended system |
|---|---|
| 1–2 week holiday, few plants | DIY bottle wick or terracotta spikes |
| 1–2 week holiday, many plants | Timer drip irrigation |
| Year-round consistent moisture | Self-watering pots |
| Herbs and edibles for productivity | Self-watering pots or drip system |
| Succulents and cacti | None — these need dry periods; use a timer at very low frequency if needed |
| Budget-conscious solution | DIY wicking from household items |
| Large collection, maximum automation | Timer drip with gravity reservoir |
Self Watering Systems and Water Quality
The water quality used in any self watering system for indoor plants affects plant health over time — particularly relevant for closed reservoir systems where mineral accumulation is gradual but significant.
UK tap water is moderately to highly hard in most regions (London and south-east England particularly so) — calcium and magnesium deposits accumulate in self-watering pot reservoirs and drip tubing. The post on whether rainwater is good for indoor plants covers the benefits of soft rainwater for reducing mineral accumulation — particularly important for plants sensitive to limescale, such as ferns and moisture-loving tropical aroids.
Practical water quality management for self watering systems:
- Flush self-watering pot reservoirs with clean water monthly to prevent mineral concentrate accumulating in the base
- Collect and use rainwater in gravity-fed drip systems where tap water hardness is high
- Descale drip system tubing and drippers with a dilute citric acid flush at the start of each season
Monitoring Self Watering Systems
A self watering system for indoor plants does not eliminate the need for monitoring — it changes what you monitor. Rather than checking whether to water each plant, you check whether the system is working as intended.
Weekly checks:
- Reservoir levels in wicking bottles and self-watering pots
- Dripper output — is each dripper delivering at the expected rate?
- Growing medium moisture at the root zone
A moisture meter for indoor plants provides accurate root-zone moisture readings without surface soil assessment — particularly useful for self-watering pot setups where the growing medium surface may appear dry while the root zone receives moisture from below.
Signs a self watering system is underperforming:
- Wilting despite full reservoir — wick may have become disconnected or dried out; re-wet and reinsert
- Consistently wet surface compost despite reservoir emptying quickly — dripper flow rate too high; reduce output or increase interval between cycles
- Algae in reservoir or tubing — flush system with diluted hydrogen peroxide solution; use opaque reservoir containers to block light
Self Watering Systems for Edible Indoor Plants
Self watering setups deliver particular value for edible plants grown indoors — herbs, salad crops, tomatoes, chillies — where consistent moisture has a direct effect on yield and flavour.
Herbs such as basil and coriander growing in self-watering pots produce noticeably more consistently than in standard pots, where the drying-out between waterings stresses the plant and triggers premature bolting. Lettuce and salad crops in self-watering window boxes maintain consistent hydration without the wilting that reduces leaf quality in hand-watered setups.
For indoor tomato and chilli growing — which benefit enormously from consistent moisture particularly during fruiting — a drip irrigation system on a timer provides precise, reliable delivery that is difficult to replicate with manual watering, especially during summer when plants may require watering daily.
Setting Up a Self Watering System Step by Step
Whether you are installing a single self-watering pot or wiring up a multi-plant drip system for the first time, a methodical setup process avoids the most common first-run problems — drippers that run dry, wicks that fail to draw, reservoirs that overflow.
Setting Up a Wicking System
- Choose the wick material: Cotton cord, nylon string, or strips of old cotton fabric all work. Synthetic fibres with a tight weave wick water more reliably than loose-weave natural fibres that deteriorate quickly.
- Thread the wick through the bottle cap: Make a small hole in the cap and thread 30–40 cm of wick through it, leaving 5–10 cm outside for insertion into the growing medium.
- Prime the wick before use: Soak the entire wick in water for 5 minutes before installation. A dry wick placed in moist compost may take 12–24 hours to begin drawing water consistently — a primed wick starts working immediately.
- Insert wick into the growing medium: Push the free end 5–8 cm into the compost, angled toward the root zone. Do not coil the wick at the surface — run it straight down where roots will encounter it.
- Fill the bottle and invert: Fill with room-temperature water, invert, and position. Some water may flow quickly at first as air bubbles escape — this normalises within a few minutes and the system settles into steady capillary delivery.
Setting Up a Self-Watering Pot
- Fill the capillary medium section: Most self-watering pots have a lower wicking chamber that connects reservoir to growing medium. Fill this with compost as directed — ensuring full contact between the wick material and the compost in the upper chamber.
- Fill the pot with appropriate growing medium: Use the compost type suited to your plant. Peat-free multipurpose compost works well for most tropical houseplants and edibles. Very free-draining mixes (cactus compost, orchid bark) are ineffective in self-watering pots — the capillary action fails across the air pockets in coarse growing media.
- Water from above initially: For the first watering, water from above to wet the full growing medium column and activate capillary contact between the compost and the wicking chamber. Subsequent refills go into the fill tube only.
- Fill the reservoir: Fill through the fill tube until water appears at the indicator or overflow port. Note the date — track how long the reservoir lasts for your specific plant, as refill frequency varies significantly by plant type, pot size, and season.
Setting Up a Drip Irrigation Timer System
- Connect the timer: Most indoor drip timers connect to a standard 3/4-inch garden tap. Set the timer to run a test cycle — usually achievable by pressing “manual” or “test” — to confirm water flows before connecting any tubing.
- Run the main tubing: Connect 13 mm main tubing to the timer outlet and run it along the base of the area where plants are positioned, using clips to hold it in place against the skirting or shelf.
- Insert T-connectors for each plant position: At each plant position, insert a T-connector or barbed take-off and run 4 mm micro-tubing to each pot. Cut tubing lengths to reach each pot with minimal excess — long loose runs catch on other plants.
- Insert drippers and stakes: Place a micro-dripper at the end of each 4 mm tube, attached to a stake pushed into the growing medium approximately 5 cm from the pot edge. Angling drippers toward the centre of the pot delivers water closer to the root zone.
- Programme the timer: Start conservatively — shorter duration and lower frequency than you think necessary. Monitor plant moisture with a moisture meter for the first two weeks and adjust the programme based on observed root-zone moisture.
- Run a calibration cycle: After programming, observe the system delivering a full watering cycle — check each dripper is flowing, no tubing has come loose, and no pooling is occurring on pot surfaces. Adjust before leaving the system unattended.
Long-Term Care and Maintenance
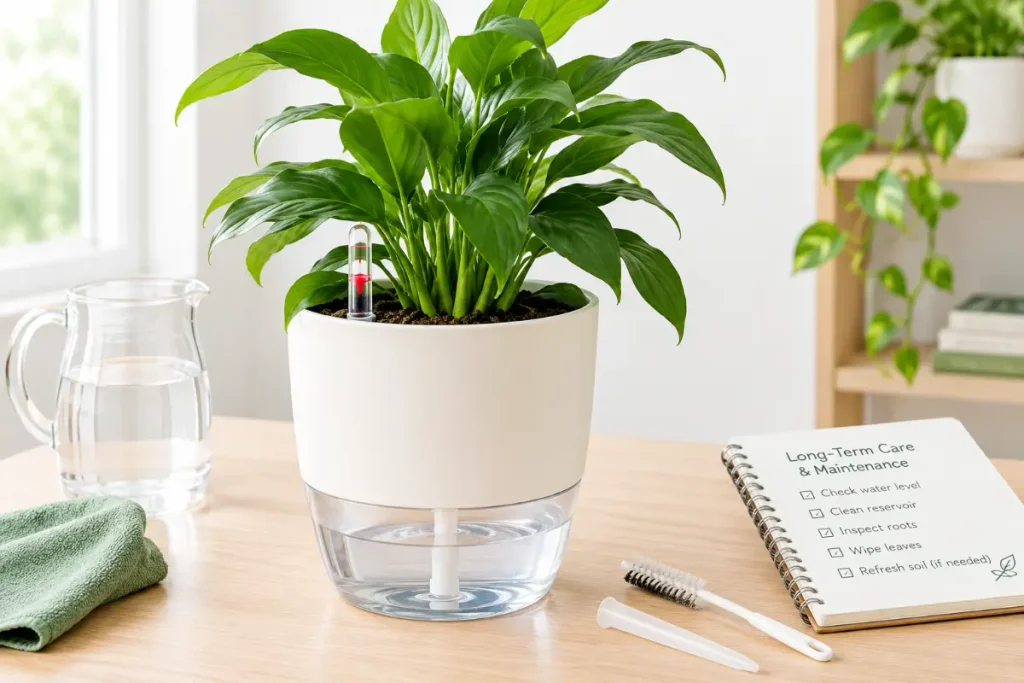
A self watering system for indoor plants requires periodic maintenance to remain effective — the “fit and forget” expectation is realistic for short periods but not indefinitely.
Monthly maintenance:
- Inspect wicks for deterioration — cotton wicks may become slimy or partially blocked over time; replace every 3–4 months
- Flush self-watering pot reservoirs with fresh water to prevent mineral concentration
- Check dripper output in drip systems — blocked drippers are common in hard water areas
Seasonal maintenance:
- At the start of the growing season (March), increase timer frequency or reservoir refill frequency to match increased plant water demand
- At the end of the season (October), reduce frequency — plants in slow growth or dormancy require significantly less water; a self watering system continuing at summer rates will waterlog plants through winter
- Flush drip irrigation tubing with dilute citric acid at the start and end of the growing season to remove mineral deposits
Annual maintenance:
- Replace cotton wicks and any tubing showing algae staining or mineral crust that flushing cannot clear
- Check timer battery (most indoor drip timers use AA batteries that need replacement annually)
- Clean self-watering pot reservoirs with a mild bleach solution if staining has developed, then rinse thoroughly before refilling
Conclusion
Finding the right self watering system for indoor plants depends on your collection size, budget, and the problem you’re solving — whether that’s holiday cover, consistent moisture for fussy plants, or reducing the daily watering routine for a large collection. Wicking systems solve the holiday problem cheaply and reliably; self-watering pots provide the most consistent moisture delivery for individual plants year-round; drip irrigation scales across a whole collection with precision. Whichever approach you choose, the result — plants that receive water when they need it, in the right quantity — is one of the most impactful changes you can make to how your indoor plants grow.
For in-depth guidance on drip system setup and timer programming, the RHS guidance on irrigation systems covers the principles that apply equally to indoor container growing.
FAQs
What is the best self watering system for indoor plants?
For most indoor growers, self-watering pots with built-in reservoirs are the most reliable year-round system for individual plants. For collections of 5 or more plants, a timer-controlled drip irrigation system offers better scalability. For holiday cover on a budget, DIY wicking bottle setups work well for 7–14 days.
How long can a self watering system keep plants watered?
It depends on the system and plant. A 1-litre wicking bottle lasts 3–7 days for a medium pot plant. A self-watering pot with a 3-litre reservoir lasts 7–21 days depending on plant size and season. A drip irrigation system connected to a mains tap can run indefinitely without refilling.
Can I make a self watering system at home?
Yes — the simplest effective DIY solution is an inverted bottle with a cotton wick: fill a bottle with water, thread cotton string through the cap, insert the free end into the growing medium, and invert the bottle beside the pot. This delivers water for 3–10 days at minimal cost.
Are self watering pots good for all plants?
No — self-watering pots maintain consistently moist conditions at the root zone and are excellent for moisture-loving plants (herbs, tropical aroids, ferns, lettuces). They are not suitable for plants requiring pronounced dry periods between waterings, including succulents, cacti, and Mediterranean herbs like rosemary and lavender.
Do self watering systems work for large indoor plants?
Yes, but the system needs to match the plant’s water demand. A single wicking bottle is insufficient for a large fiddle-leaf fig or tall monstera — a self-watering pot with a large reservoir (3–5 litres) or a drip system with an adjustable dripper set to a higher flow rate is more appropriate.
How do I stop algae growing in my self watering system?
Use opaque containers for reservoirs (algae requires light to grow), flush reservoirs monthly, and if algae develops in tubing, flush with a dilute hydrogen peroxide solution (1 part 3% hydrogen peroxide to 10 parts water) then rinse thoroughly.
Can I use a self watering system for orchids?
Orchids in bark growing medium require a specific watering approach — soaking rather than trickle irrigation — and benefit from drying out between waterings. Standard self-watering systems are not well-suited to orchid cultivation. Bottom-watering (placing the pot in water for 30 minutes then draining) is more appropriate than a continuous-feed system.
How do I calibrate a drip irrigation system for indoor plants?
Run the system for a known period (10 minutes) and collect output from each dripper in a measuring jug. Adjust each dripper until 10 minutes of output represents approximately 10–20% of the pot’s typical watering volume. This prevents both under-delivery and waterlogging over a full watering cycle.