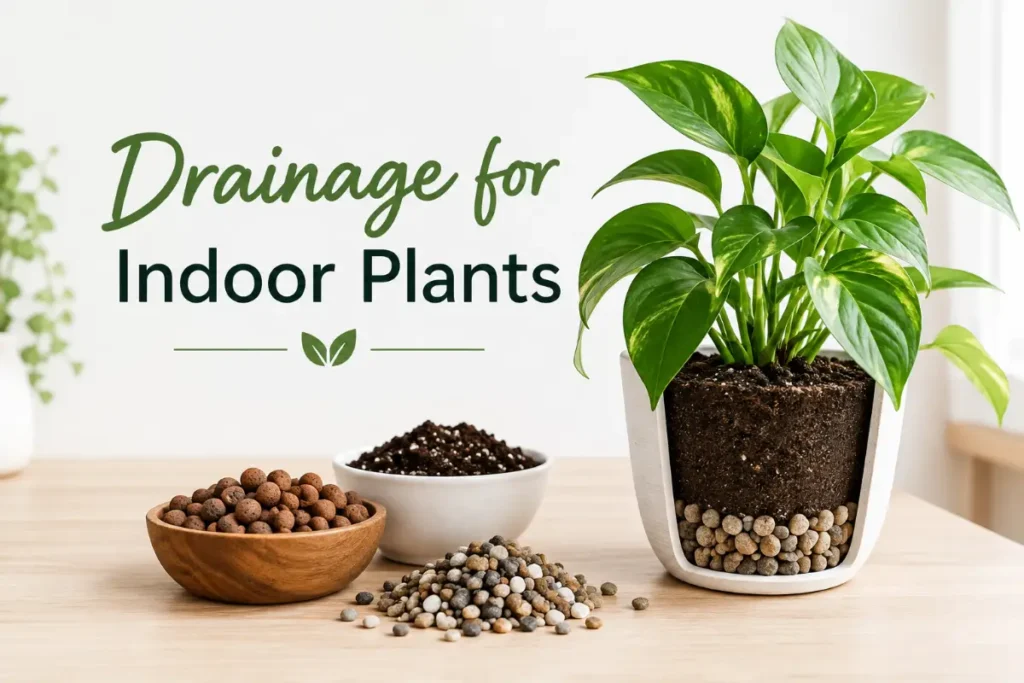
Drainage for indoor plants is the single most important physical factor in keeping a houseplant alive long term. More plants die from inadequate drainage than from any other cause including pests, light deficiency, or incorrect watering. The reason is straightforward: you can correct a watering mistake by watering more or less frequently, you can add light with a grow light, and you can treat most pests with appropriate products. But chronically poor drainage kills roots through oxygen deprivation in ways that cannot be corrected after the fact — the damage is done before symptoms appear.
This guide covers every aspect of drainage for indoor plants: why it matters at the root level, what good drainage looks like in practice, the myths that lead people to create poor drainage conditions despite good intentions, and the specific practices that ensure every plant in your collection has the drainage it needs.
Quick Answer
Good drainage for indoor plants requires pots with multiple adequately sized drainage holes, appropriate soil mix that drains freely for the specific plant type, saucers that are emptied within thirty minutes of watering, and no physical obstructions in the drainage path. The gravel-in-the-bottom myth actively worsens drainage rather than improving it. Most drainage problems are solved by ensuring pot holes are unobstructed, using appropriate soil mix, and emptying saucers consistently.
Why Drainage Matters: The Root-Level Mechanism
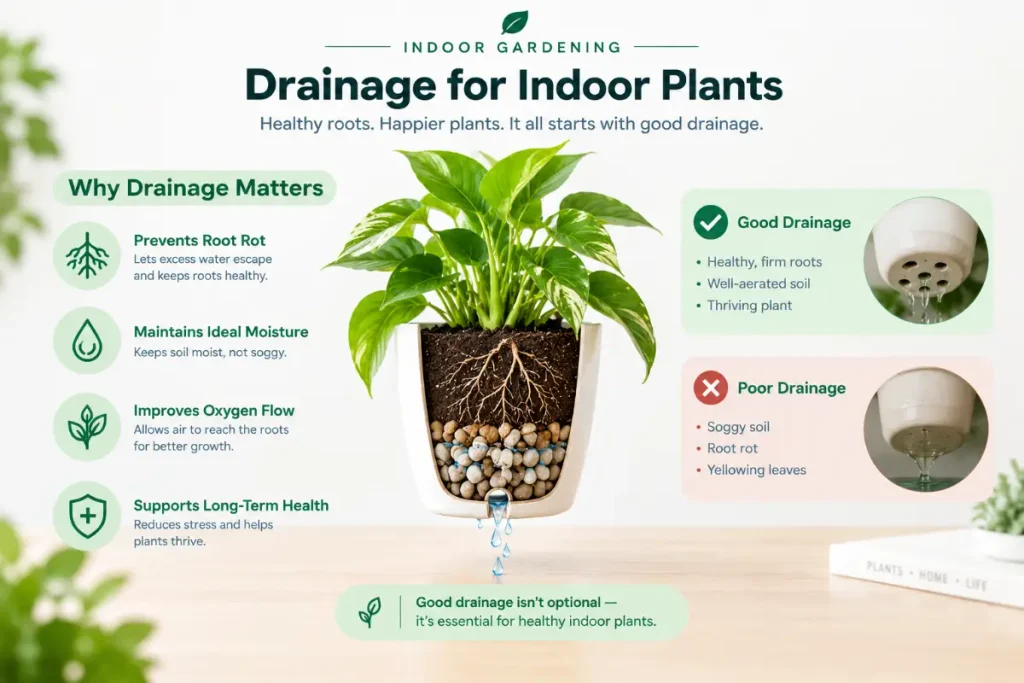
Plant roots absorb both water and oxygen. In well-draining soil with appropriate dry periods between waterings, the soil structure contains both water-filled pores (providing moisture) and air-filled pores (providing oxygen). After thorough watering, the excess water drains out through the drainage holes, and the remaining water is held against gravity by the capillary tension of the soil structure. As roots absorb this held water over days, air gradually replaces the water in the pores, maintaining the oxygen supply that roots need.
When drainage fails — whether because holes are absent, blocked, or the soil mix is too water-retentive — water fills all soil pores including those that should contain air. This creates anaerobic (oxygen-free) conditions. Without oxygen, roots cannot perform the aerobic respiration that powers their function. Anaerobic bacteria and fungi activate, attacking and decomposing root tissue. The resulting root rot destroys the plant’s ability to absorb water and nutrients, leading to the decline and death described in the overwatering guide.
The timeline: Healthy roots in well-draining soil maintain adequate oxygen between waterings and can sustain a plant for years or decades. Roots in chronically poor drainage conditions begin showing damage within weeks. The insidious aspect is that above-ground symptoms appear weeks after root damage begins, giving the impression of sudden decline when the damage actually accumulated gradually.
What Good Drainage Looks Like
Drainage holes: Every pot intended for long-term plant growth must have drainage holes. Multiple holes of adequate size are better than a single small hole. Drainage holes should be large enough to allow free water flow rather than restricted trickle. For standard plastic nursery pots, the pre-molded holes are typically adequate. For ceramic, terracotta, and decorative pots, check that holes are present and unobstructed before planting.
Drainage hole size: The minimum practical hole diameter is approximately half an inch. Smaller holes can become blocked by soil particles, root growth, or mineral deposits. Multiple quarter-inch holes collectively provide similar drainage to a single half-inch hole and are common in commercial pot manufacturing. What matters is total hole area and whether flow is free or restricted.
Drainage test: After potting and watering, water should begin flowing from the drainage holes within sixty seconds of thorough top watering in appropriate soil. If water takes more than two minutes to appear at the drainage holes, drainage is restricted. If no water flows despite thorough watering, drainage is severely compromised and the soil or pot configuration needs correction.
The complete drainage system: Adequate drainage requires three components working together: drainage holes in the pot, soil that drains freely without blocking the holes, and a clear path for drained water to escape (saucers emptied, no blockages below the pot).
The Gravel Layer Myth: Why It Makes Drainage Worse
The advice to place a layer of gravel, pebbles, or broken pottery at the bottom of a pot before adding soil persists in gardening guidance despite being both incorrect and actively harmful. Understanding the physics explains why.
The perched water table effect: Water moves through different soil layers by capillary action. When water drains downward through potting mix, it will not cross the interface between the fine-textured potting mix and the coarse-textured gravel below until the capillary tension in the potting mix is fully satisfied — meaning the soil directly above the gravel layer must become completely saturated before any water moves into the gravel layer.
This creates a “perched water table” — a zone of saturated soil immediately above the gravel layer that is chronically wet regardless of how the rest of the soil is managed. The gravel layer does not improve drainage; it raises the level of the waterlogged zone closer to the root zone.
Documented research: This effect has been documented in peer-reviewed horticultural research. A study published in the Journal of Environmental Horticulture specifically found that pots with gravel layers had smaller volumes of well-aerated soil (the zone where roots thrive) and larger zones of waterlogged soil than equivalent pots without gravel layers.
What to do instead: Simply use appropriate potting mix without a gravel layer. The drainage holes allow water to exit freely from the potting mix when the soil has appropriate composition. If additional drainage is needed for a specific plant, add perlite or coarse sand to the potting mix itself rather than creating a separate drainage layer.
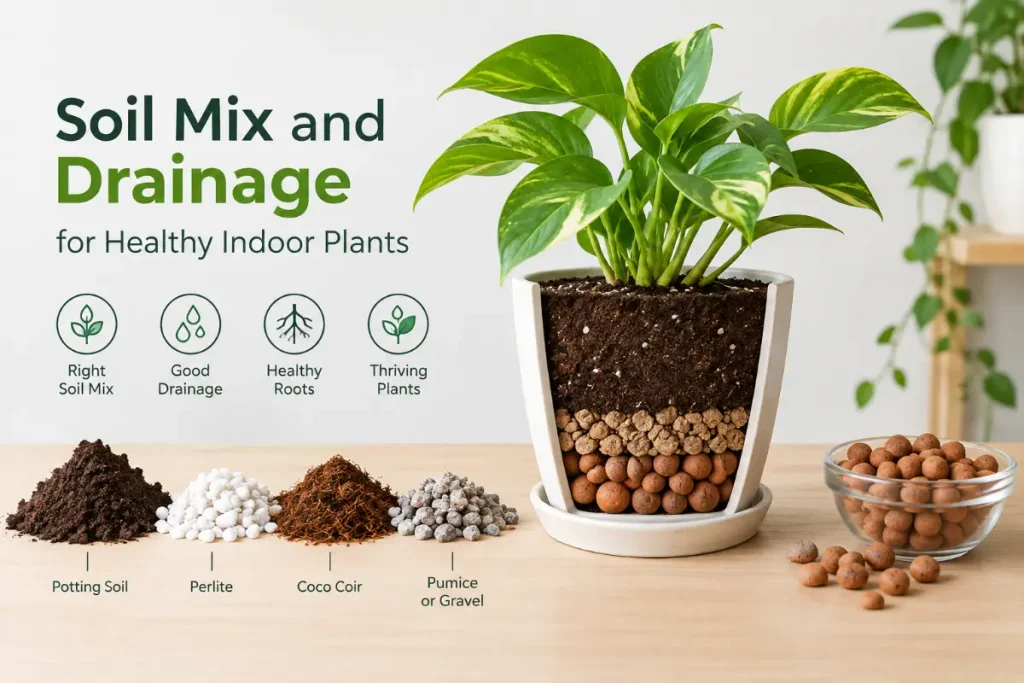
Soil Mix and Drainage: The Most Controllable Variable
The water-retention characteristics of potting mix are the most controllable factor in soil drainage for indoor plants. Different plants need dramatically different drainage profiles, and matching the soil to the plant is more important than any pot feature.
Standard potting mix: Retains moisture for three to seven days after watering in typical indoor conditions. Appropriate for moisture-loving tropical plants. Too water-retentive for cacti, succulents, and Mediterranean herbs.
Standard mix with 20% perlite: Drains more quickly than unmodified standard mix. Appropriate for most common tropical houseplants including monstera, pothos, philodendron, and rubber plant. Reduces root rot risk compared to unmodified mix.
Standard mix with 30 to 40% perlite: Fast-draining mix appropriate for Mediterranean herbs including rosemary, lavender, and thyme. Soil reaches appropriate dryness at two inches within four to six days of watering in typical indoor conditions.
Cactus mix or standard mix with 50% perlite: Very fast-draining mix appropriate for cacti, succulents, and aloe vera. Soil reaches complete dryness at two to three inches within seven to fourteen days or longer of watering. Provides the extended dry period these plants need.
Testing your mix: After potting in any mix, water thoroughly and observe: water should flow freely from drainage holes within sixty seconds, the soil surface should look dry within twenty-four to forty-eight hours of watering, and the appropriate check depth (one inch for most tropicals, two inches for drought-tolerant plants) should reach dryness within the expected timeframe for the plant type. If drying takes significantly longer than expected, add more perlite to the mix at the next repotting.
For the complete guide to building appropriate soil mixes for every indoor plant type, soil mixture for indoor plants covers every ingredient with specific ratios for plants across the full moisture tolerance spectrum.
Saucer Management: The Most Overlooked Drainage Practice
Proper drainage does not end when water flows from the pot’s drainage holes — it ends when that drained water is removed from the saucer and cannot re-enter the root zone.
The re-entry problem: A pot sitting in a saucer of water has roots in the bottom of the pot that are continuously exposed to water that has re-entered through the drainage holes. The drainage holes that should allow water to exit become pathways for saucer water to continuously re-enter, creating a persistently wet zone at the pot base even when the upper soil feels dry at the checking depth.
The drainage-check disconnect: This saucer water re-entry explains why some plants decline despite soil feeling appropriately dry at one to two inches depth. The surface checks dry. But the root zone at pot base remains chronically wet from saucer water. Root rot develops in the bottom third of the pot while the grower believes they are managing moisture correctly.
The thirty-minute rule: Empty all saucers within thirty minutes of watering. This is the single most impactful practice for preventing the saucer-drainage problem. After thirty minutes, any water remaining in saucers is returned to the pot to maintain bottom-zone wetness. After thirty minutes with the saucer empty, the drainage period is complete and the soil can begin its appropriate drying cycle.
Decorative outer pots: Many indoor plant displays use decorative outer pots without drainage holes as sleeves around plastic nursery pots. These outer pots act as saucers without any drainage at all. The drained water collects in the bottom of the outer pot and re-enters the nursery pot continuously. Remove the inner pot from the outer sleeve for watering, allow to drain completely in a sink for thirty minutes, then return to the outer sleeve with no standing water inside.
Adding Drainage Holes to Pots That Lack Them
Decorative ceramic, terracotta, and composite pots are sometimes sold without drainage holes or with inadequate drainage. Adding holes is straightforward with appropriate tools.
Drilling ceramic: Use a diamond-tipped drill bit designed for ceramic and glass. Mark the desired hole location with tape to prevent the bit from skating. Drill at low speed with steady gentle pressure. Applying water to the drilling area keeps the bit cool and reduces cracking risk. A half-inch hole in the base of a standard pot takes approximately two to three minutes of careful drilling.
Drilling terracotta: Use a masonry bit at low speed with steady pressure. Terracotta is softer than ceramic and drills more easily. Soak the pot in water before drilling to reduce cracking risk. The moisture softens the clay slightly and reduces the heat generated by friction.
When not to drill: Some high-fired ceramic and glazed pottery is more prone to cracking during drilling than others. Very thin-walled pots risk shattering. For pots where drilling is too risky, use them as decorative outer sleeves following the inner-pot-removal approach described above.
Special Drainage Considerations for Specific Situations
Hanging baskets: Hanging baskets have the most critical drainage requirements of any indoor plant display because excess water has no saucer to collect it — it drips onto floors, shelves, or whatever is below. Use coco coir or moss-lined baskets where drainage is distributed through the basket walls rather than concentrated at a single bottom hole. Always water hanging baskets over a sink or outdoors, or use hanging saucers designed to catch drainage.
Terrariums: Closed terrariums with no drainage holes use the ecosystem water cycle rather than drainage to manage moisture — water cycles between evaporation from the soil and condensation on the glass walls and drips back to soil. This works in truly closed systems for appropriate plant types (mosses, ferns, small tropical plants) but requires careful initial moisture calibration. Open terrariums need drainage and should be treated as shallow standard pots for drainage purposes.
Self-watering pots: Self-watering pots have a reservoir that intentionally holds water below the growing chamber. The growing chamber itself has drainage openings into the reservoir rather than to the outside. These are designed to work without traditional drainage hole management — the reservoir handles the excess water. Do not add a saucer to a self-watering pot or block the connection between the growing chamber and the reservoir. For the complete guide to self-watering pot use and selection, self-watering pots for indoor plants covers every aspect of how these work.
Very large floor pots: Floor pots above fourteen inches in diameter are heavy when filled with soil and impractical to lift for saucer emptying after each watering. Options include: using a turkey baster or aquarium siphon to remove saucer water without lifting the pot, elevating the pot on a stand or feet that allow drainage to flow into a large drainage tray that is emptied less frequently, or using a built-in drainage system where the pot sits above a drainage reservoir that is accessed through a tap or siphon.
The Relationship Between Drainage and Repotting Timing
Drainage quality changes over time as potting mix ages, compacts, and accumulates mineral deposits. Understanding how this relates to repotting timing helps maintain good drainage throughout a plant’s life rather than only at the initial potting.
How potting mix degrades drainage over time: Fresh potting mix has a loose, open structure with good pore space for both water and air. Over twelve to twenty-four months of normal use, the organic components of potting mix break down into finer particles. These fine particles fill the air pockets in the soil structure, reducing drainage speed and air porosity. The same soil that drained appropriately when fresh may drain significantly more slowly after two years of use.
Mineral accumulation reducing drainage: Hard water minerals and fertilizer salts that accumulate in potting mix over time create a crust or hardening at the soil surface and throughout the soil profile. This hardening reduces water penetration rates — water poured on top of heavily mineralized old potting mix pools at the surface before slowly percolating down rather than absorbing immediately.
Signs that drainage has degraded: Water taking longer to drain than when the plant was first potted. Surface water pooling for more than a minute before absorbing. The need to water more carefully to avoid surface overflow that did not occur when the mix was fresh. Increased yellowing and decline despite what appears to be the same care routine as before.
The repotting solution: Fresh potting mix with appropriate perlite content restores the drainage profile that was present when the plant was first potted. This is one of the most underappreciated reasons for the improvement in plant health that follows repotting — not primarily because the roots have more room, but because they now have the air porosity and drainage speed that old compacted soil had lost.
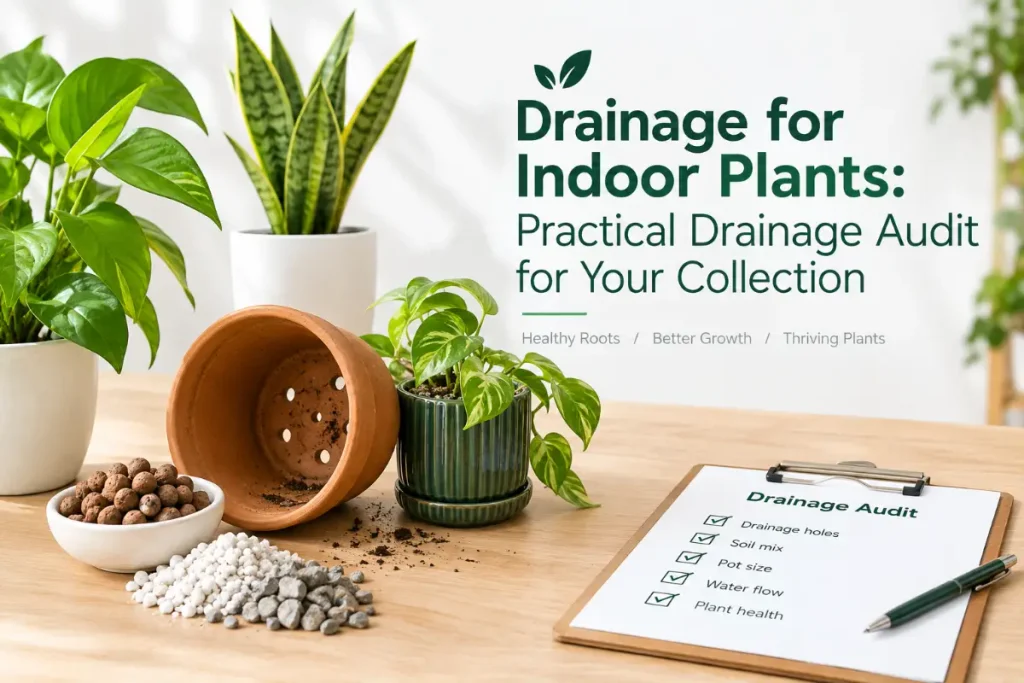
Practical Drainage Audit for Your Collection
Conducting a drainage audit of your entire indoor plant collection identifies drainage issues before they cause visible plant decline. The audit takes thirty to sixty minutes for a typical home collection and provides actionable information about each plant’s drainage status.
The audit process: For each plant in your collection, assess four things: Are there drainage holes and are they unobstructed? When did you last water and is the soil at the appropriate dryness level given the time elapsed? Does the pot have a saucer and is it currently dry? How long has the plant been in its current potting mix?
What to do with audit findings: Pots without drainage holes or with blocked holes need immediate action. Pots where soil is wetter than expected for the elapsed time since watering indicate drainage or watering frequency problems. Saucers with standing water need immediate emptying. Plants in potting mix older than eighteen to twenty-four months should be scheduled for repotting within the next growing season.
The seasonal timing: Conduct drainage audits in spring before the active growing season when repotting, if needed, can happen at the optimal time for root establishment. A spring audit that identifies plants needing repotting allows time to source appropriate materials and repot before peak growth demand begins.
For the complete guide to the watering practices that work hand-in-hand with good drainage to produce the moisture cycles that healthy indoor plant roots need, how often to water indoor plants covers the soil check method and plant-type specific guidance that makes good drainage most effective — because drainage creates the conditions for appropriate drying cycles, but correct watering frequency determines whether those cycles actually occur.
Conclusion
Drainage for indoor plants is not a single feature — it is a system of interconnected components that all must function correctly simultaneously. Drainage holes large enough for free water flow. Soil mix appropriate for the plant’s drought tolerance. Saucers emptied within thirty minutes of every watering. No gravel layers creating perched water tables. No water re-entry through decorative outer pot accumulation.
Each component matters independently. A pot with excellent drainage holes but inappropriate soil that holds water for two weeks produces root rot as reliably as a pot without holes. A pot with perfect soil and appropriate holes but a saucer that is never emptied creates the same bottom-zone wetness as no holes at all.
Get all components right simultaneously and drainage becomes the invisible, always-functioning foundation of healthy indoor plant care that it should be — the condition that makes appropriate watering actually work rather than the overlooked gap that makes even careful watering fail.
Frequently Asked Questions
Do all indoor plant pots need drainage holes?
Yes. All pots intended for long-term plant growth need drainage holes. Plants can survive short periods in pots without drainage, but chronic waterlogged conditions from inadequate drainage cause root rot that kills plants over weeks to months. Decorative pots without holes can be used as outer sleeves with a draining inner pot removed for watering and drainage before being returned.
Does putting gravel at the bottom of a pot help drainage?
No. The gravel layer creates a perched water table effect where the soil directly above the gravel becomes saturated before any water moves into the gravel, creating a chronically wet zone in the root area. Well-draining soil mix without a gravel layer provides better drainage than soil with a gravel layer. If drainage needs improvement, add perlite to the soil mix rather than creating a separate gravel layer.
How do I know if my indoor plant has drainage problems?
Signs of drainage problems include soil that stays wet for more than a week after watering, a musty smell from the pot, yellowing lower leaves, wilting despite moist soil, and root rot visible when the plant is removed from its pot. Water should flow from drainage holes within sixty seconds of thorough watering. If water takes several minutes to appear or does not appear at all, drainage is restricted.
How often should I empty the saucer under my indoor plant?
Empty saucers within thirty minutes of watering. Water remaining in saucers after thirty minutes re-enters the pot through drainage holes, creating chronically wet root zone conditions regardless of how well the soil is draining from the surface down. Emptying saucers promptly after every watering session is one of the most impactful single practices for preventing root rot.
What is the best soil mix for drainage in indoor plants?
Standard potting mix with 20% coarse perlite suits most common tropical houseplants. Standard mix with 30 to 40% perlite suits Mediterranean herbs. Cactus and succulent mix or standard mix with 50% perlite suits cacti, succulents, and aloe vera. Matching the drainage speed of the soil mix to the plant’s drought tolerance is more important than any specific brand or ingredient.
Can I use a pot without drainage holes if I’m careful about watering?
Technically possible for short periods but not recommended for long-term plant health. Even experienced plant owners miscalculate watering amounts without drainage feedback, and the accumulated excess water has nowhere to go. The drainage hole provides both a watering feedback mechanism (water appearing confirms thorough saturation) and an escape route for excess moisture. Pots without holes rely entirely on precise water volume calibration that is impractical to maintain consistently across months and seasons.