
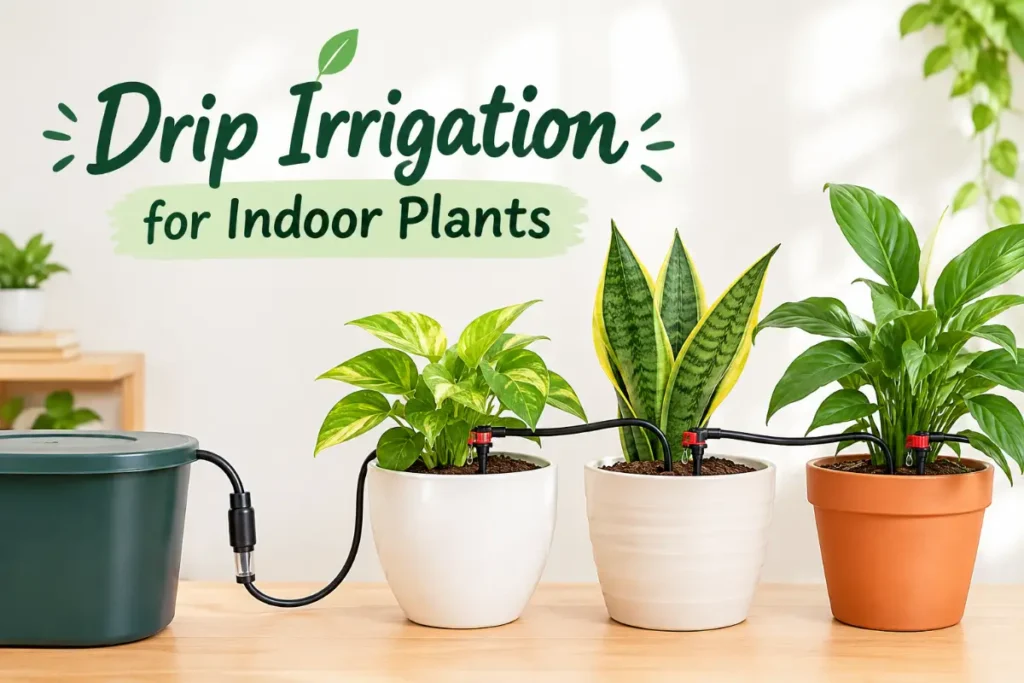
Drip irrigation for indoor plants transforms how a large collection is watered — replacing daily pot-by-pot checking with a set-and-monitor system that delivers precise water to each plant’s root zone on a programmed schedule. For growers with more than five or six plants, a busy household, or regular travel, a drip system removes the single biggest variable in indoor growing: inconsistent watering frequency.
This guide covers everything needed to plan and install drip irrigation for indoor plants in a UK home — from choosing a timer and water source to calibrating individual drippers for different plant types, laying out tubing across shelves or windowsills, and maintaining the system through the seasons.
Why Drip Irrigation Works for Indoor Plants
Most indoor plant problems trace back to irregular watering — too much water too quickly after a period of dryness, or the reverse. Drip irrigation for indoor plants removes that inconsistency:
- Controlled delivery: Each dripper releases a measured flow — adjustable from 0.5 to 8 litres per hour — so a thirsty tomato receives far more than a neighbouring cactus, despite running on the same timer
- Root-zone targeting: Stakes position drippers at the growing medium surface, delivering water directly to the root zone rather than across leaf surfaces
- Programmable frequency: Timers can water daily, every 2 days, or every 3 days — adapting to seasonal plant needs by adjusting the programme, not refilling a reservoir manually
- Scalable: One timer can feed 20–30 pots through branched tubing; adding a new plant means inserting a new T-connector and cutting one more micro-tube length
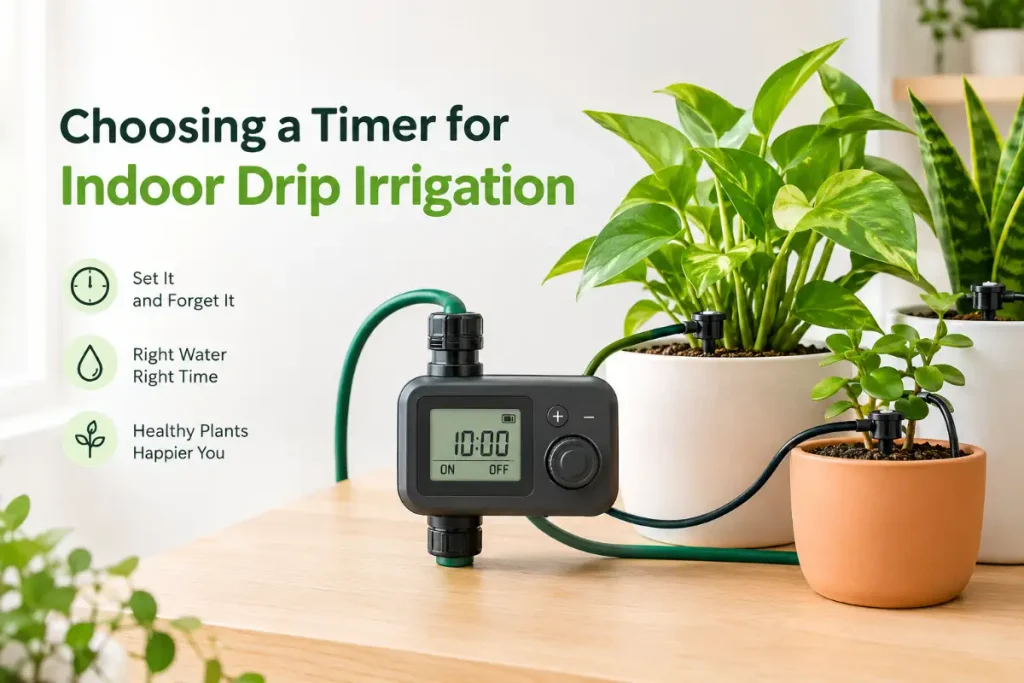
Choosing a Timer for Indoor Drip Irrigation
The timer is the core of any drip irrigation for indoor plants setup — and the component most worth spending on. A cheap timer that misfires or sticks open will either starve or flood the collection.
Key timer specifications for indoor use:
- Minimum run time: Look for timers that run for as little as 1–2 minutes per cycle. Outdoor garden timers often start at 10–15 minutes, which is far too long for indoor pot volumes. Indoor-rated or micro-irrigation timers typically allow 1-minute minimum durations
- Multiple cycles per day: Essential for summer or for plants with high water demand — a single 2-minute cycle every 48 hours suits a fern in spring; a daily 3-minute cycle suits a fruiting tomato in summer
- Battery reliability: Most indoor drip timers run on AA batteries. Choose models with battery life indicators; unexpected battery failure during a holiday is the most common failure mode. Some timers allow USB or mains adaptor power — worth the additional cost for critical setups
- Manual override: A manual trigger button lets you run a test cycle or water immediately without re-programming — useful during setup and calibration
Gravity-fed vs mains-connected timers:
Mains connection gives unlimited water supply and consistent pressure — ideal for large collections or extended holiday periods where a reservoir would need refilling. Connects to a standard garden tap with a 3/4-inch fitting.
Gravity-fed reservoir (a raised bucket or water container) avoids needing a tap in the same room as the plants, makes the system portable, and allows use of filtered or rainwater — better for hard-water-sensitive plants. Pressure is lower (determined by height of reservoir above drippers), which requires drippers designed for low-pressure operation.
Components of an Indoor Drip System
A complete drip irrigation for indoor plants setup uses a hierarchy of tubing sizes:
13 mm main tubing: Connects from timer or reservoir to the distribution area. Runs along shelves, windowsills, or staging. Flexible PVC, UV-resistant. Held in place with adhesive clips or cable ties.
4 mm micro-tubing: Branches off the main line via barbed T-connectors or take-off fittings. One length per plant, running from the main line to each individual pot.
Adjustable micro-drippers: Attached to the end of each 4 mm tube, inserted into a pot stake. Flow rate adjustable by twisting the dripper head — typically 0.5 to 8 litres per hour.
Pot stakes: Hold the dripper at the growing medium surface. Angled stakes (45°) direct water toward the root zone; vertical stakes deliver to a fixed point at the surface.
End caps: Seal unused branches in the main tubing.
Pressure reducer (mains-fed systems): Reduces household mains pressure (3–5 bar) to the 1–2 bar micro-drippers require. Most indoor drip kits include one; purchasing separately if not included is essential — without pressure reduction, drippers spray rather than drip.
Calculating Water Requirements per Plant
Before calibrating drippers, establish how much water each plant needs per watering. This determines the dripper flow rate and run duration.
General indoor plant watering volumes by pot size:
| Pot diameter | Approximate water per watering |
|---|---|
| 10–12 cm | 100–150 ml |
| 15–18 cm | 200–350 ml |
| 20–25 cm | 400–700 ml |
| 30+ cm | 800–1,500 ml |
These are starting estimates — actual volumes depend on growing medium, plant type, and season. Use a moisture meter for indoor plants to check root-zone moisture 24 hours after a programmed cycle. If still very wet: reduce run time or dripper flow rate. If dry: increase one or the other.
Matching dripper flow rate to run time:
- A 1 litre/hour dripper running for 15 minutes delivers approximately 250 ml
- A 2 litre/hour dripper running for 15 minutes delivers approximately 500 ml
- Adjust either the dripper (twist to increase or decrease flow) or the timer run duration to hit target volumes
Run different dripper rates across the same system to account for variation: a 0.5 litre/hour dripper for a 12 cm succulent pot, a 4 litre/hour dripper for a large monstera, all running from the same timer for the same duration.
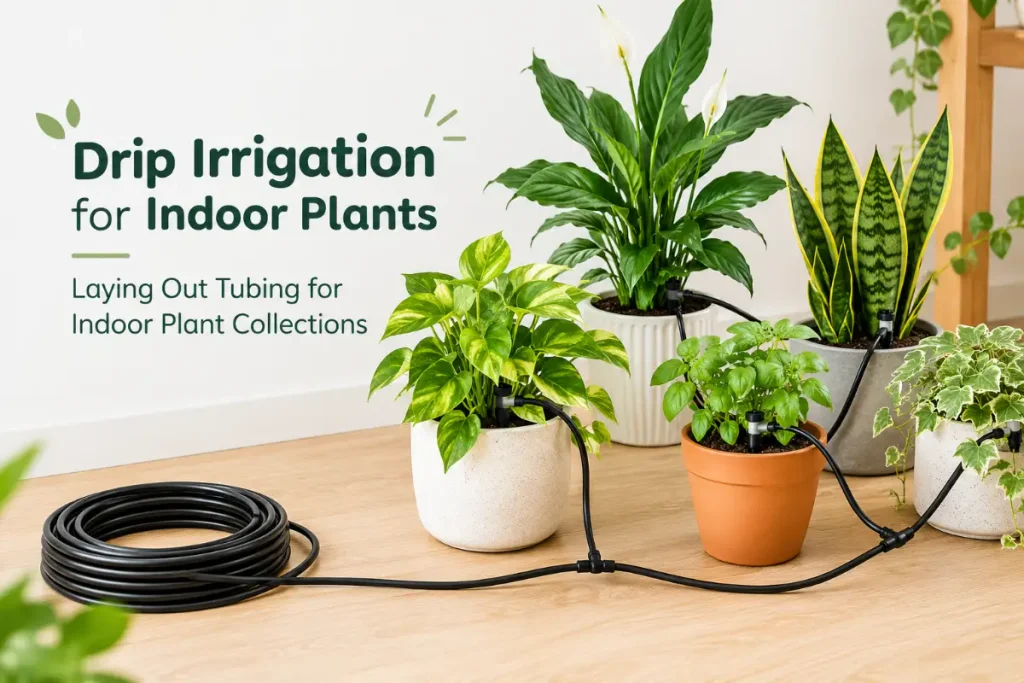
Laying Out Tubing for Indoor Plant Collections
The physical layout of drip irrigation for indoor plants depends on where plants are positioned — windowsills, shelving units, grow tents, or conservatory staging all present different routing challenges.
Windowsill layout: Run main 13 mm tubing along the back of the windowsill at wall height. Branch 4 mm micro-tubes forward to each pot. Secure tubing with adhesive clips that grip the window frame or sill edge. Route the tube away from the window glass where condensation could affect fittings.
Shelving unit layout: Run main tubing vertically up the side of the shelving unit, with a horizontal branch at each shelf level. Use zip ties through existing shelf holes or adhesive clips to hold the main run. Branch 4 mm micro-tubes to each pot on each shelf. This layout requires a T-connector at each shelf height plus end caps for each shelf’s horizontal run terminus.
Grow tent layout: Run main tubing in through a tent port at the top or side. A perimeter loop of main tubing inside the tent, held by hooks to the tent frame, allows 4 mm branches to reach every pot position. This completely enclosed setup simplifies humidity management and protects tubing from UV degradation.
Drip Irrigation for Edible Indoor Plants
Drip irrigation delivers particularly clear benefits for edible plants grown indoors — herbs, tomatoes, chillies, salad crops — where consistent moisture directly affects productivity and flavour quality.
Indoor tomatoes and chillies: Both require consistent root-zone moisture during flowering and fruiting — moisture stress during fruit development causes blossom drop and fruit cracking. A drip system running daily at an appropriate rate eliminates this stress entirely. The guide to grow lights for indoor tomato plants pairs well with drip irrigation setup for a complete productive indoor tomato growing system.
Herbs: Basil bolts (runs to seed prematurely) under moisture stress. Drip irrigation with a short daily cycle keeps basil consistently productive through the growing season. Parsley and coriander are similarly stress-sensitive.
Salad crops: Lettuce and mustard leaves in window boxes or grow trays benefit from a low-output dripper or a perforated 4 mm tube laid across the surface — a simple soaker arrangement that keeps the growing medium evenly moist without waterlogging.
Watering frequency for indoor edibles:
- Spring/autumn: every 2 days
- Summer: daily for tomatoes and chillies; every 2 days for herbs and salads
- Winter (for year-round growing under lights): every 2–3 days
Holiday Mode: Extended Drip Irrigation
One of the strongest arguments for installing drip irrigation for indoor plants is extended holiday cover. A properly calibrated drip system can maintain a plant collection for 2–4 weeks without intervention — far beyond what wicking bottles or self-watering pots can reliably cover for a large collection.
Pre-holiday checklist:
- Run a test cycle 3–4 days before departure and check every dripper is delivering correctly
- Check battery level in the timer (replace regardless of age if departure is more than 2 weeks)
- Verify reservoir water volume if gravity-fed — calculate consumption for the planned absence (daily flow × number of days) and ensure sufficient capacity, or switch to mains connection
- Set timer frequency conservatively — slightly dry is far preferable to waterlogged for most plants during a low-light, low-growth holiday period
- Move plants away from radiators or direct sun — lower evaporation reduces water demand and makes dripper calibration more accurate
Adjusting for season: If travelling in summer, increase frequency slightly versus spring settings. If in winter, reduce — plants in slow growth need significantly less water than in the growing season.
Common Problems and Fixes
Dripper not flowing: Check for kinks in the 4 mm micro-tubing — bends sharper than approximately 90° collapse the tube bore. Check that the dripper stake is not blocked with compost or algae — rinse under tap water. In hard water areas, descale with dilute citric acid solution.
Water pooling on compost surface rather than absorbing: Dripper flow rate is too high for the compost to absorb — reduce the dripper to the lowest setting or shorten the run time. Alternatively, check that drainage is adequate — the post on drainage for indoor plants covers the relationship between compost mix and drainage rate.
Timer not triggering: Battery failure is the most common cause — replace immediately. Check that the timer clock shows correct time (UK clocks changing in late October/March can shift timer schedules on models that do not auto-adjust).
Algae in tubing: Flush with dilute hydrogen peroxide (1:10 with water), then rinse with clean water. Switch to opaque (black or grey) tubing — algae requires light, and clear tubing promotes growth. Gravity reservoir containers should also be opaque.
Uneven delivery across the system: In mains-fed systems, drippers at the start of the line (closest to the timer) receive higher pressure than those at the end. Use a pressure-compensating dripper type for systems longer than approximately 5 metres, or keep total line length short with a central manifold layout.
Maintenance Schedule
After every watering cycle (weekly check): Visually confirm drippers are operating — look for wet growing medium surface at each stake position.
Monthly: Run clean water through the system and inspect tubing connections for seepage. Check dripper flow rates against calibration (collect output in a jug for 1 minute).
Each season change: Adjust timer frequency to match seasonal plant water demand. Flush tubing with dilute citric acid in areas with hard tap water.
Annually: Replace any tubing that has become brittle or shows permanent kinks. Replace battery regardless of apparent level if timer is battery-powered. Full descale flush of the system.
Water Quality and Drip Irrigation for Indoor Plants
Water quality matters more in a drip system than with manual watering — because the same water, with the same mineral content, is delivered to the same root zones repeatedly over weeks and months. Mineral accumulation in both the growing medium and the tubing is a realistic long-term concern.
Hard water and mineral buildup in compost: UK tap water in hard-water areas (London, the south-east, East Anglia, the Midlands) contains dissolved calcium and magnesium carbonate. Over months of drip irrigation with hard tap water, these minerals accumulate as white deposits on the growing medium surface and progressively raise soil pH — alkalinising the root zone and reducing nutrient availability. Plants sensitive to high pH (gardenias, camellias, most ferns, azaleas) show yellowing leaves (chlorosis) as iron and manganese become unavailable.
Practical water quality management:
- Use collected rainwater in the gravity-fed reservoir if your mains water is very hard — soft rainwater avoids mineral accumulation entirely. The post on whether rainwater is good for indoor plants covers collection and storage in detail
- Flush the growing medium with two to three pot volumes of clean water every 3–4 months to leach accumulated minerals through the drainage holes
- Use a slightly acidic liquid fertiliser (pH 6.0–6.5) during the growing season to counteract alkalinisation in hard water areas
- For the most sensitive plants, consider a gravity-fed setup using exclusively rainwater or filtered water
Hard water and tubing: Mineral deposits (limescale) accumulate inside drip tubing and drippers over time, reducing flow rate and eventually blocking narrow bore components entirely. A citric acid flush (dissolve 5g citric acid per litre of water, run through the system for 10 minutes, then flush with clean water) descales the entire system efficiently. Do this at the start and end of each growing season in hard-water areas.
Integrating Drip Irrigation with Other Indoor Growing Systems
Drip irrigation for indoor plants works most effectively as part of an integrated growing approach — combined with appropriate lighting, humidity management, and the growing media best suited to each plant type.
Drip irrigation and grow lights: In a grow tent or under high-output grow lights, plant water demand is significantly higher than in ambient indoor conditions. Stronger light drives faster growth and higher transpiration — meaning the same plant may need twice as much water under lights as it would on a windowsill. Calibrate dripper settings after the grow light setup is complete and stable, not before.
Drip irrigation and self-watering pots: These two approaches are compatible rather than competing — a self-watering pot with its own reservoir can still receive supplemental water from a drip line that fills the reservoir rather than top-watering the pot. In this combined setup, the drip system fills the reservoir and the pot’s capillary mechanism handles delivery to the root zone — an especially reliable arrangement for plants that prefer consistent sub-irrigation. The guide to self-watering systems for indoor plants covers the capillary pot mechanism in detail.
Drip irrigation and growing medium choice: Drip irrigation works best with growing media that absorb water readily and allow it to move through the root zone by gravity. Standard peat-free multipurpose compost, coco coir-based mixes, and perlite-amended composts all perform well. Very coarse mixes (orchid bark, gritty cactus compost) allow water to channel down the sides of the pot without distributing through the root zone — drip irrigation is less effective in these media and hand watering or bottom watering is more reliable.
Monitoring soil moisture alongside drip systems: The indoor plant watering schedule provides a framework for understanding plant water needs across different types — useful context for setting initial dripper calibrations for a mixed collection.
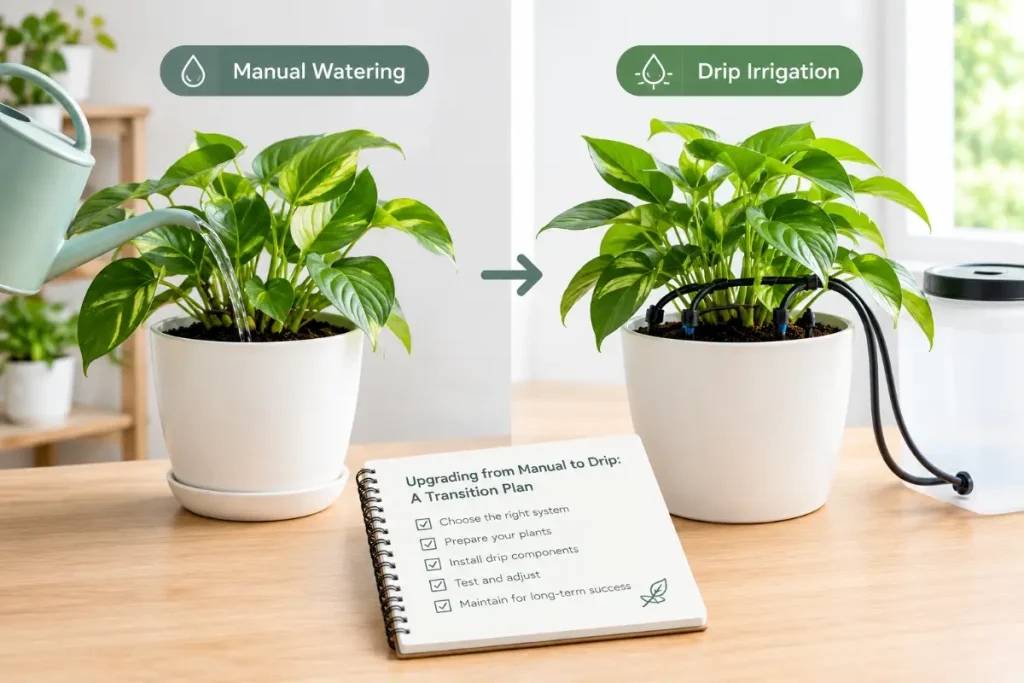
Upgrading from Manual to Drip: A Transition Plan
Moving from manual watering to a drip irrigation system requires a two-to-three week transition period — time to calibrate individual drippers against known plant water needs before the system operates fully autonomously.
Week 1: Install the system but continue hand watering. Run one test cycle and observe — check every dripper is flowing, confirm no leaks, note which plants receive more or less than expected. Adjust dripper rates.
Week 2: Allow the drip system to do half the watering — run cycles on your programmed schedule, and hand water plants that appear to need supplemental moisture. Note which dripper settings are too low or too high.
Week 3: Switch to full drip irrigation. Check root-zone moisture with a moisture meter 24 hours after each programmed cycle. Make final adjustments. By the end of week 3, the system should be calibrated for autonomous operation.
This staged approach prevents both underwatering (if drippers are set too low) and overwatering (if too high) during the learning period — both are recoverable from quickly, but starting with a week of observation before committing to full autonomy makes calibration considerably more accurate.
Conclusion
Drip irrigation for indoor plants is the most scalable, precise, and reliable watering system available to UK indoor growers — particularly for collections of five or more plants, productive edible setups, or any situation requiring reliable plant care during travel. The investment in components is modest (a complete 10-plant starter kit typically costs £25–50) and the time saved and consistency gained repay that investment in a single growing season.
For reference on drip system principles used commercially in the UK, the RHS guidance on irrigation and water management provides a thorough foundation applicable to indoor container growing.
FAQs
What is the best drip irrigation system for indoor plants in the UK?
For most UK growers, a battery-powered timer with a gravity reservoir (a raised bucket or container) offers the best combination of flexibility, ease of positioning, and water quality control — particularly useful for hard-water areas where rainwater can be used without a tap connection. Mains-connected timers suit larger collections.
How often should drip irrigation run for indoor plants?
Frequency depends on plant type and season. Most tropical houseplants benefit from watering every 2–3 days in the growing season (spring–summer) and every 3–5 days in autumn–winter. Edible plants (tomatoes, herbs) may need daily watering in summer. Start conservatively and increase if plants show moisture stress.
Can drip irrigation overwater indoor plants?
Yes — if dripper flow rate or run duration is set too high, or if frequency is not reduced in winter. Use a moisture meter to check root-zone conditions 24 hours after watering and adjust until readings stay in the correct range for your plant type.
How much does a drip irrigation system cost for indoor plants?
Starter kits for 5–10 plants cost £20–40 from UK garden centres or online retailers. A quality timer adds £15–30. For a complete 10-plant setup including timer, tubing, drippers, and stakes, budget £40–70. This compares favourably with the cost of replacing plants lost to inconsistent watering.
Do I need a pressure reducer for indoor drip irrigation?
Yes, if connecting to mains water. Household water pressure (3–5 bar) is far too high for micro-drippers, causing them to spray rather than drip. A pressure reducer fitting (included in most kits, or available separately for approximately £5) brings pressure to the 1–2 bar drippers require. Gravity-fed systems run at low pressure naturally.
Can I use drip irrigation for succulents and cacti?
Yes, but with very low dripper flow rates and infrequent cycles — once every 7–14 days in summer, once every 14–28 days in winter. The dripper should deliver a small amount (50–100 ml per cycle for a 10–12 cm pot) that allows the growing medium to dry fully before the next cycle. Standard drip settings will overwater succulents.
How long can drip irrigation keep plants alive during a holiday?
A properly calibrated drip system connected to mains water can maintain a plant collection indefinitely. A gravity-fed system is limited by reservoir capacity — calculate daily consumption (flow rate × run time × number of drippers) and ensure the reservoir holds sufficient volume for the planned absence, plus a safety margin of 20%.
What size tubing do I need for indoor drip irrigation?
Standard indoor drip systems use 13 mm (1/2 inch) main tubing and 4 mm (1/8 inch) micro-tubing. These are the UK standard sizes and are widely available. Ensure all fittings (T-connectors, take-offs, end caps) match the tubing diameter purchased — 13 mm and 16 mm fittings are not interchangeable.
Pingback: Self Watering for Indoor Plants: Smarter Care in 2026 - Plant Quill
Pingback: Automatic Water System for Indoor Plants: 7 Best Options (2026) - Plant Quill