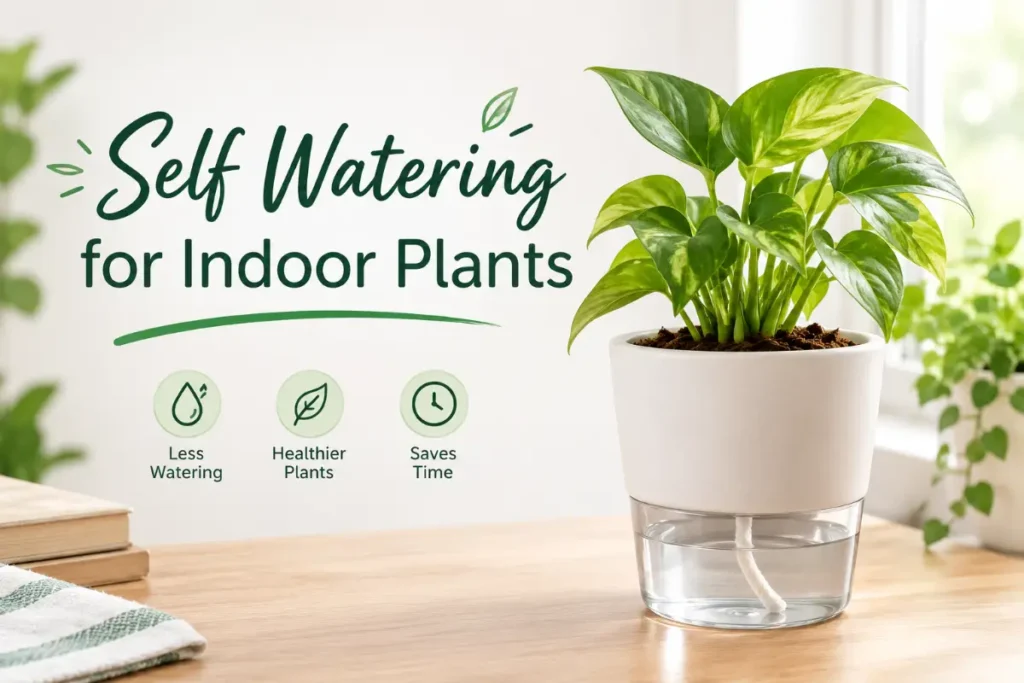
Self watering for indoor plants is the idea that plants should receive moisture when they need it — not when a weekly reminder goes off, not when you happen to remember, and not in a panicked over-drenching after a period of neglect. The range of methods that deliver on this principle spans from a simple capillary mat under a seed tray to a purpose-built self-watering pot with a visible reservoir, and choosing the right approach for each plant and situation makes the difference between a system that genuinely removes watering stress and one that adds complexity without solving the problem.
This guide covers the full range of self watering for indoor plants — the underlying principles, the main delivery methods, plant suitability, seasonal management, and common mistakes — so you can build a setup that works for your collection with minimal daily intervention.
The Principle Behind Self Watering
Every effective self watering system for indoor plants operates on one of two physical principles:
Capillary action — water moves from a wet source (reservoir, wet mat, wet wick) into a drier growing medium by surface tension. The movement is automatic and continuous, slowing as the growing medium moistens and accelerating as it dries. No pump, no timer, no power required. The plant effectively regulates its own water supply by absorbing moisture from the growing medium, which is replenished from the reservoir by capillary action.
Gravity-fed delivery — water flows from a raised source (an inverted bottle, an elevated reservoir) into the growing medium or a drip system under gravity. Flow rate is controlled by the height differential and the resistance of the delivery point (a porous spike, a narrow tube, an adjustable dripper).
Most self watering methods combine both principles to some degree. A self-watering pot uses capillary action to draw water from a base reservoir upward into the compost; a terracotta spike connected to a bottle uses gravity to feed the spike and capillary action to distribute water from the spike through the growing medium.
Self-Watering Pots: The Most Reliable Year-Round Method
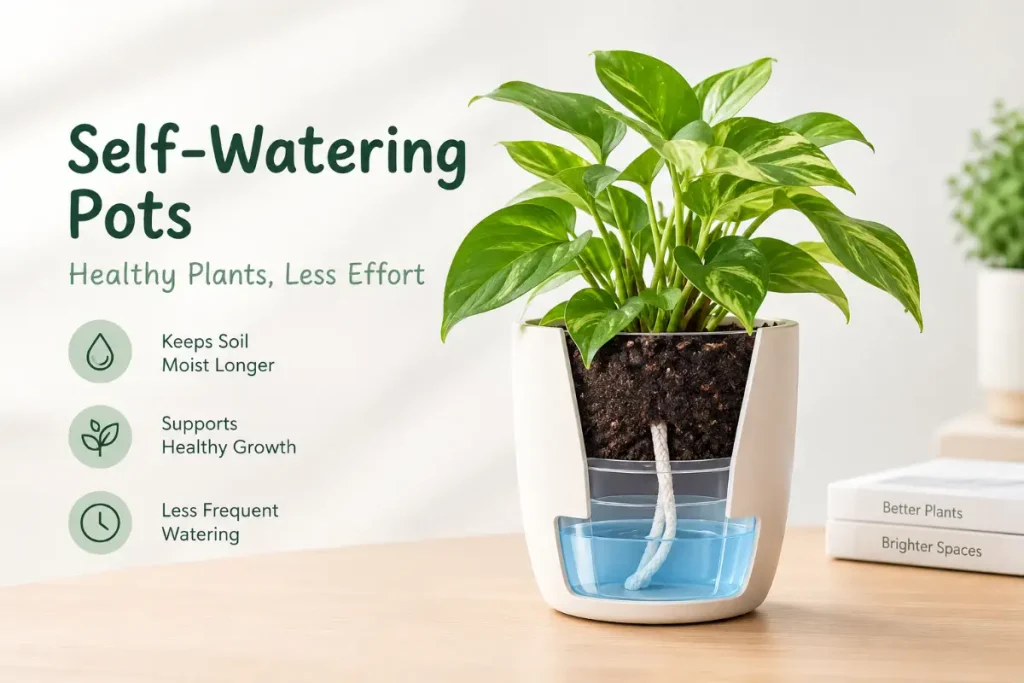
Self-watering pots are purpose-built containers with a lower water reservoir separated from the growing medium by a capillary barrier. A wicking section bridges the barrier, drawing water upward from the reservoir as roots absorb moisture from the compost above.
What makes them effective: The capillary barrier ensures roots access moisture without sitting in standing water — a critical distinction. Plants in standard pots sat in saucers of water develop basal root rot because the lowest roots are permanently waterlogged. In a self-watering pot, the capillary mechanism delivers water at a rate the roots can absorb, maintaining consistent moisture without saturation.
Reservoir capacity in practice:
- 15 cm self-watering pot: reservoir holds 400–600 ml; typically lasts 5–10 days in summer, 10–20 days in winter
- 25 cm pot: reservoir holds 1.5–2.5 litres; typically lasts 10–21 days
- Large 35 cm pots: reservoir holds 3–5 litres; typically lasts 2–4 weeks
Track reservoir refill dates for the first month to establish each plant’s actual consumption rate — it varies significantly by plant type, growing medium, and season.
Matching growing medium to self-watering pots: Self watering for indoor plants via capillary pots depends on the growing medium conducting moisture upward effectively. Standard peat-free multipurpose compost and coco coir-based mixes work well. Very coarse or free-draining mixes (orchid bark, gritty cactus compost, pure perlite) are ineffective — the air pockets in coarse media break the capillary chain and water fails to rise from the reservoir.
Which plants benefit most: Herbs, lettuces, and salad crops — where consistent moisture directly improves yield. Ferns, peace lilies, and other moisture-loving tropical plants that suffer from the boom-and-bust of irregular manual watering. Tomatoes and chillies growing indoors — consistent moisture during fruiting prevents blossom drop and fruit cracking.
Which plants to avoid: Succulents, cacti, lavender, rosemary, orchids in bark — all require a pronounced dry period between waterings that self-watering pots do not provide.
Capillary Mats and Trays: Self Watering for Seed Trays and Window Boxes
A capillary mat is a felt-like horticultural fabric that absorbs and holds water, delivering it upward into any pot placed on its surface. Set a tray of seed pots or small herb pots on a capillary mat in a drip tray, keep the drip tray topped up, and the mat maintains consistent moisture in every pot placed on it — no individual pot checking required.
Applications:
- Seed trays and propagation setups — consistent moisture is critical during germination and early root development
- Collections of small herb pots on a windowsill — a single tray of capillary mat covering the windowsill delivers self watering for indoor plants to 6–10 small pots simultaneously
- Succulent collections — used with less water in the tray (partial wetting of the mat rather than a standing water level) to deliver controlled, limited moisture rather than constant supply
Setting up a capillary mat: Cut the mat to fit the drip tray. Wet the mat thoroughly before placing pots on it — a dry mat will not wick to dry compost; both surfaces must have initial moisture contact. Fill the drip tray with 1–2 cm of water (the mat should be wet throughout but the tray should not be flooding the mat surface). Replenish the tray every 3–5 days, checking by lifting a corner of the mat to see whether the lower surface is still moist.
Wicking Systems: Simple and Effective Self Watering
A wick draws water from a reservoir to the growing medium by capillary action — the same principle as a self-watering pot, delivered by an external wick rather than a built-in capillary section. The most accessible entry point to self watering for indoor plants.
Materials that wick effectively:
- Cotton cord or braided cotton string (most effective — dense weave maintains capillary contact)
- Strips of cotton fabric (old T-shirt material works well; synthetic fabrics wick less reliably)
- Commercial capillary wicks (pre-cut lengths available from hydroponics suppliers, with consistent wicking rate)
- Nylon paracord (effective but does not biodegrade — a consideration for sustainability)
DIY bottle wick method: Fill a glass or plastic bottle with water and thread a length of cotton wick through a small hole in the cap, leaving 5–8 cm extending outside the cap. Push the extending wick into the growing medium, angled toward the root zone. Invert the bottle and place it beside the pot. Prime the wick thoroughly before use — soak the entire length in water for 10 minutes before installation. A primed wick begins drawing water immediately; a dry wick may take 12–24 hours to establish capillary contact.
Wick longevity: Cotton wicks function effectively for 2–4 months before fibres degrade and wicking capacity reduces. Replace at this interval rather than waiting for failure. Nylon wicks last longer but are less pleasant to handle and dispose of.

Terracotta Stakes and Spikes: Self Watering Through Clay
Porous terracotta has been used for slow water delivery for thousands of years — the traditional olla buried in garden soil seeps water to surrounding roots by osmosis. The same principle applied to indoor containers uses terracotta spikes or cones inserted into the growing medium, connected to a water bottle above.
How terracotta stakes work: As the growing medium dries, water is drawn through the porous clay walls of the stake into the surrounding compost by osmotic pressure. The drier the compost, the greater the pressure differential and the faster the seepage rate. As compost moistens, the flow slows — a self-regulating delivery that closely matches the plant’s actual uptake rate.
Advantages:
- Self-regulating — delivers water in proportion to need
- No electricity or timer
- Delivers water at the root zone rather than the surface
- Attractive in terracotta or ceramic pots as they are unobtrusive
Limitations:
- Flow rate varies by terracotta quality — cheap stakes may seep too fast (emptying the bottle overnight) or too slow (minimal delivery even in dry compost). Test new stakes in a glass of water — look for a steady, slow seep rather than a rapid drip or no movement at all
- Maximum reservoir size is limited to bottle capacity — typically 500 ml to 1 litre, adequate for 5–10 days on a medium pot in normal conditions
Self Watering and Holiday Plant Care
The most common reason growers invest in self watering for indoor plants is holiday cover — the plants cannot be manually watered and a neighbour is not an option. Matching the method to the holiday duration is essential:
Weekend (2–3 days): Any method suffices — simply water thoroughly before leaving. In summer, group plants together away from direct sun to reduce evaporation.
Short holiday (4–7 days): DIY bottle wicks with primed cotton wicks, terracotta stakes with 500 ml bottles. Most moisture-loving plants comfortably covered.
1–2 weeks: Self-watering pots with reservoirs, commercial Blumat-type wicking systems, or terracotta stakes with 1-litre bottles. Test the system 5–7 days before departure to calibrate delivery rate — observe how much water the reservoir loses and whether plants show any stress.
2–4 weeks: A timer-controlled drip irrigation system connected to a mains tap. This is beyond the capacity of passive self-watering methods for most collections — a drip system with a reliable timer provides the only genuinely autonomous watering for this duration. The guide to drip irrigation for indoor plants covers timer selection and multi-plant setup in detail.
Water Quality in Self Watering Systems
Water quality deserves attention in any self-watering setup — particularly for closed systems where the same water source is repeatedly delivered to the same root zone over weeks.
UK tap water in hard-water areas (London, south-east, East Midlands) contains calcium and magnesium that accumulate as white residue in reservoirs, on compost surfaces, and in wick materials over time. The gradual alkalinisation of the root zone — as calcium carbonate deposits raise pH — reduces nutrient availability and can cause yellowing even in fertilised plants.
Practical management:
- Use collected rainwater where practical — soft, slightly acidic, and free of the mineral content that causes accumulation. The post on whether rainwater is good for indoor plants covers collection and storage
- Flush growing medium with 2–3 pot volumes of plain water every 2–3 months to leach accumulated minerals
- Clean self-watering pot reservoirs with a mild citric acid solution (5g per litre of water) every 3–4 months to remove limescale deposits
Monitoring Self Watering Setups
Self watering for indoor plants changes what monitoring is needed — not whether monitoring is needed. Shifting from “does each plant need water today” to “is the system working correctly” is the practical change.
Weekly monitoring:
- Reservoir levels in all self-watering pots — refill before the reservoir empties completely (an empty reservoir breaks capillary contact and can take 24 hours to re-establish)
- Wick condition — check that bottle wicks have not dried out (if the bottle empties without the compost receiving moisture, the wick has failed; re-prime and replace)
- Terracotta spike water levels — invert the bottle and check the level through the glass
Monthly monitoring:
- Growing medium moisture with a moisture meter for indoor plants — even with self-watering systems in place, periodic root-zone checks confirm the system is delivering appropriately and the plant is absorbing as expected
- Inspect wicks for discolouration, sliminess, or reduced flow — replace if in doubt
Seasonal adjustment: Self-watering setups calibrated for summer will overwater in winter — plant water demand drops by 30–60% as light levels and growth rates fall. Reduce reservoir refill volumes, empty self-watering pot reservoirs fully before refilling in winter, and extend the interval between wick and reservoir checks.
Choosing Between Self Watering Methods: A Decision Guide
The range of self-watering options available can make choosing the right approach feel more complicated than it needs to be. These questions narrow the choice quickly:
How many plants need covering?
- 1–3 plants: self-watering pots or individual bottle wicks — no infrastructure, no tubing
- 4–10 plants: capillary mat for small pots on a surface, or self-watering pots per plant
- 10+ plants: a drip irrigation system scales more efficiently than individual pot solutions
How long do you need autonomous coverage?
- Up to 1 week: any passive system (wick bottle, terracotta spike, self-watering pot)
- 1–2 weeks: self-watering pots with larger reservoirs, commercial Blumat wicking systems
- 2–4 weeks: timer-controlled drip irrigation connected to mains — passive systems cannot reliably cover this duration for a full collection
What is your budget?
- Minimal cost: DIY cotton wick in an inverted bottle — essentially free
- Low cost (£5–15 per plant): terracotta spike kits or small self-watering pots
- Mid-range (£15–40 per plant): quality self-watering pots with large reservoirs
- Higher investment (£40–100 for the full system): drip irrigation timer setup covering 10–20 plants
What type of plants?
- Moisture-loving plants (ferns, peace lily, herbs): self-watering pots — consistent moisture is what they need
- Mixed collection: a combination of self-watering pots for moisture-lovers and careful manual watering for drought-tolerant plants
- Edibles (tomatoes, lettuce): self-watering pots or drip system — productivity improvement is measurable
- Succulents and cacti: no self-watering system — manual watering with long intervals is more appropriate
Combining Self Watering with Good Growing Practice
Self watering for indoor plants works best as part of a broader approach to indoor plant care — not as a complete replacement for attentive growing.
Soil quality: A well-structured, free-draining compost is essential regardless of watering method. Self-watering systems cannot compensate for a dense, compacted growing medium that blocks drainage and suffocates roots. The drainage for indoor plants guide covers compost selection and drainage improvement in detail — the principles apply equally to manually and self-watered plants.
Light and watering: Plant water demand is directly linked to light intensity — plants in bright light transpire faster and need more water than the same plant in a dim corner. Self-watering setups calibrated for a sunny windowsill position will under-deliver if the plant is moved to a shadier position. Recalibrate (reduce reservoir refill frequency or dripper rate) whenever plant positioning changes significantly.
Seasonal awareness: The most important single adjustment to any self-watering system is seasonal — reducing delivery rate in autumn and winter to match reduced plant water demand. A system left at summer settings through winter is the most common cause of overwatering-related problems in self-watered collections.
Fertilising alongside self-watering: Self-watering systems deliver water reliably but do not replace feeding. Liquid fertiliser added to the reservoir or applied as a foliar spray every 2–4 weeks during the growing season provides the nutrients that water alone does not. A regular watering schedule for fertiliser application complements the autonomous water delivery of a self-watering system.
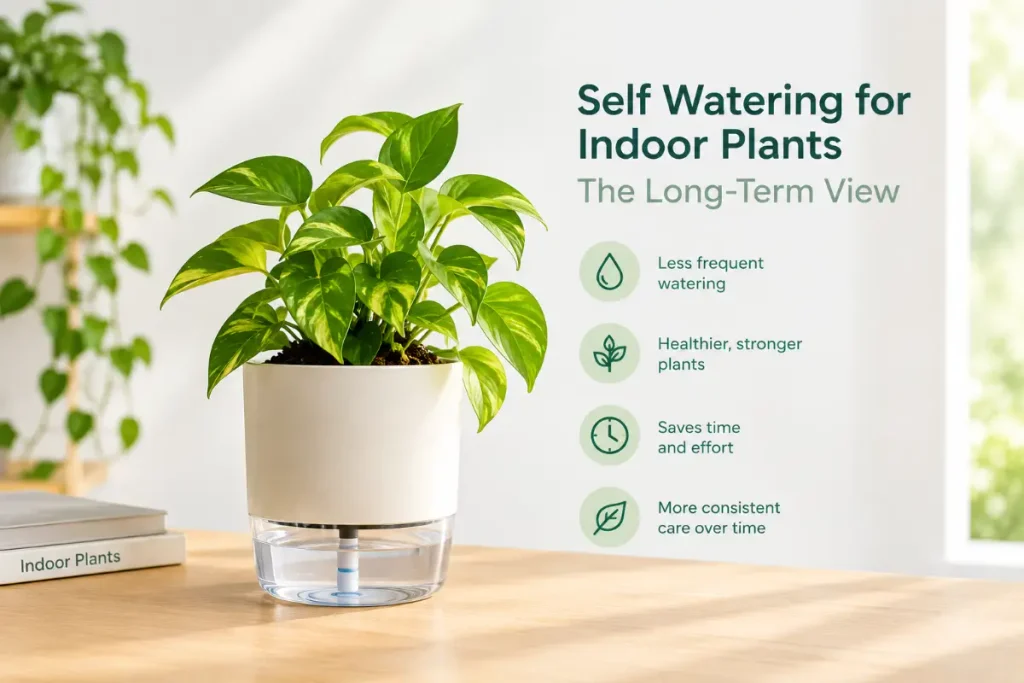
The Long-Term View: Building a Self Watering Indoor Garden
Building self watering for indoor plants into the core structure of how you grow — rather than retrofitting it as an afterthought — produces the most consistent results. Starting new plants in self-watering pots from the beginning, installing drip lines in grow tents at setup rather than after, and choosing capillary mats before seed trays are full of established seedlings that would be disturbed by the changeover — these decisions make the system work with your growing practice rather than around it.
The result, over a growing season, is visible in plant quality: more consistent leaf size, better colour, stronger root development, and fewer of the stress events (wilting, leaf drop, yellowing) that interrupt growth and reduce the visual impact of an indoor plant collection. Self-watering is not a shortcut — it is a structural improvement to how water reaches plants, and the plants respond accordingly.
Conclusion
Self watering for indoor plants is the most practical upgrade available to any grower who wants consistent plant health with less daily intervention. Whether a single self-watering pot for a productive herb display, a capillary mat covering a windowsill of small plants, or a full wicking setup for a large collection before a long holiday, the principle is the same — deliver water when the plant needs it, in proportion to its need, without depending on a regular human schedule. Start with a single self-watering pot for the plant you water most inconsistently and observe the difference in growth and leaf quality over a season. The results make expanding the system to more plants an easy decision.
For comprehensive guidance on irrigation and water management approaches for UK gardeners, the RHS irrigation and watering guidance covers the underlying principles that make self-watering systems effective.
FAQs
What is the best self watering method for indoor plants?
Self-watering pots with built-in reservoirs are the most reliable year-round method for individual plants — particularly for moisture-loving plants and edibles where consistent moisture has a direct effect on growth quality. For a windowsill of small plants, a capillary mat is an excellent low-cost alternative.
How does self watering work in a pot?
A self-watering pot has a lower reservoir separated from the growing medium by a barrier. A wicking section draws water upward from the reservoir by capillary action as roots absorb moisture from the compost above — the delivery rate automatically adjusts to match the plant’s uptake. The reservoir is refilled through a fill tube every 5–21 days depending on pot size and season.
Can I make a DIY self watering system at home?
Yes — the simplest effective method is an inverted water bottle with a cotton wick threaded through the cap. Fill the bottle with water, push the wick into the growing medium, and invert the bottle beside the pot. Primed cotton wick delivers water for 5–10 days per bottle, with no cost beyond a piece of cotton cord.
Is self watering suitable for succulents?
No — self-watering systems maintain too-consistent moisture for succulents, which require a pronounced dry period between waterings. Use hand watering for succulents, with a timer drip system set to very low frequency (once every 10–14 days) as the only automated alternative.
How long do self watering pots last without refilling?
Between 5 days (small pot, summer, thirsty plant) and 4 weeks (large reservoir pot, winter, slow-growing plant). Track the first few refill intervals to establish your specific plant’s consumption rate, then set a calendar reminder to check just before the reservoir would typically empty.
Do plants in self watering pots need fertiliser?
Yes — the reservoir delivers water only. Add liquid fertiliser to the reservoir water at one-quarter the normal dose every 2–4 weeks during the growing season. In winter, reduce to every 4–6 weeks or stop feeding entirely for non-edible plants that are not actively growing.
Why is my self watering pot not drawing water up?
The most common cause is a gap in the capillary chain — the growing medium has dried out sufficiently that there is no moisture contact between the compost and the wicking section. Water the plant from above (enough to wet the compost column fully) and the capillary connection will re-establish within a few hours. Also check that the growing medium type is appropriate — very coarse or gritty mixes do not wick reliably.
Can I use self watering for outdoor plants brought inside for winter?
Yes — many plants brought indoors for winter (citrus, tender perennials, frost-sensitive herbs) benefit from self-watering systems indoors, where inconsistent watering is a common cause of winter plant loss. Match the reservoir size to the plant’s reduced winter water demand and check monthly rather than weekly.