
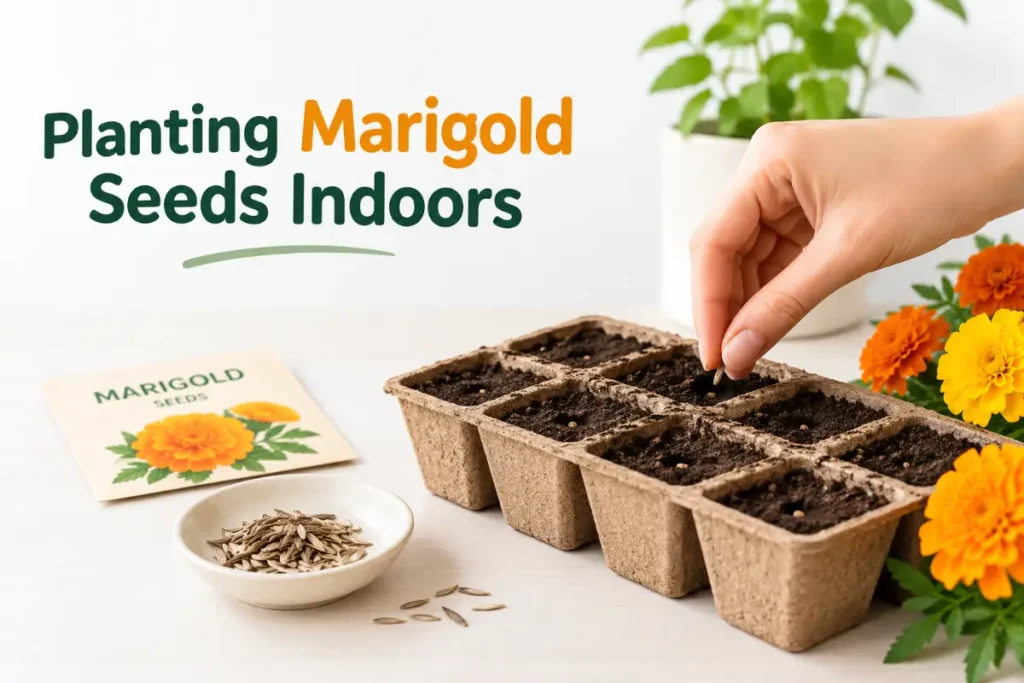
Planting marigold seeds indoors is one of the smartest moves a home gardener can make in late winter and early spring. Starting marigolds inside gives you a six to eight week head start on the outdoor growing season, meaning plants are already well established and ready to burst into flower from the moment outdoor temperatures allow. Indoor seed starting transforms marigolds from a plant you wait for into one that hits the ground running the moment conditions are right.
But planting marigold seeds indoors is not only a strategy for getting ahead of the season. Marigolds can also be grown as genuine indoor flowering plants throughout the year, adding their warm, vivid colours to windowsills and grow light setups in any season. With adequate light and a consistent care routine, marigolds flower reliably indoors and bring the same bold impact they deliver in summer borders to your indoor growing space.
This guide covers everything from timing and seed preparation through sowing technique, seedling care, and transitioning plants to their final positions — whether outdoors in the garden or continued as indoor container plants.
Why Start Marigold Seeds Indoors
The case for starting marigolds indoors is straightforward. Marigolds sown directly outdoors cannot go in the ground until after the last frost date, which in many temperate climates falls anywhere from late April to late May. Direct-sown marigolds then need six to eight weeks from germination to reach flowering size, meaning outdoor flowers from direct sowing often do not appear until midsummer at the earliest.
Indoor seed starting shifts this entire timeline earlier. Sown indoors six to eight weeks before the last frost date, marigolds germinate in warm indoor conditions, grow on to sturdy seedling stage under lights or on a bright windowsill, and are ready to plant out the moment the last frost passes — arriving in the garden already at near-flowering size and blooming within days rather than weeks.
For growers keeping marigolds as permanent indoor container plants, the timing question is different. Marigolds sown indoors with good grow light support can flower in any season. Starting seeds in autumn gives you flowering plants through winter and spring. Starting in late winter gives flowering plants from spring through summer. The indoor environment removes the seasonal constraint entirely.
Marigolds also germinate with impressive speed and reliability, making them an excellent introduction to indoor seed starting for beginners. Most seeds germinate within five to seven days of sowing — fast enough to hold the attention of even impatient gardeners and children growing their first plants.

Choosing the Right Marigold Variety
Marigolds divide broadly into three main groups, each with different characteristics for indoor growing.
African Marigolds (Tagetes erecta) are the tallest type, reaching 60 to 90 centimetres in ideal outdoor conditions. Indoors and in containers they stay more compact, but they still tend toward height. They produce large, pompom-style flowers in deep yellow, gold, and orange, and have a long flowering season. Taller varieties can become ungainly in small pots; look for compact or dwarf selections within the African type.
French Marigolds (Tagetes patula) are the best choice for indoor growing. They are naturally compact — most varieties reach 20 to 40 centimetres — and produce an abundance of flowers in single or double forms in yellow, orange, red, and bicolour combinations. Their bushy, tidy habit suits containers perfectly, and they flower for an exceptionally long season both indoors and out. Varieties like ‘Disco’, ‘Boy’, and ‘Bonanza’ are specifically bred for compact growth and are ideal for windowsill and container growing indoors.
Signet Marigolds (Tagetes tenuifolia) are the smallest type, producing masses of tiny, lacy single flowers in yellow or orange on delicate, finely cut foliage. They are edible — both flowers and leaves are used in salads — and highly fragrant. In containers they create a loose, informal, cottage-garden effect that is less bold than French or African types but charming in its own right. The edible flowers add genuine food value to an indoor growing setup.
For first-time indoor marigold growers, French marigolds in a compact variety are the recommended starting point. They are forgiving, fast to flower, and stay at a size that suits most indoor positions without requiring staking or significant space management.
When to Plant Marigold Seeds Indoors
Timing depends on your goal. For transplanting outdoors after the last frost, sow indoors six to eight weeks before your expected last frost date. In the UK, the last frost date varies from mid-April in southern England to late May in northern Scotland and upland areas. In North America, dates vary enormously by region — consult a local frost date calendar for your specific zone.
For purely indoor growing under grow lights, there is no fixed seasonal constraint. Marigolds can be sown at any time of year indoors with adequate artificial light. However, for windowsill growing, late winter and spring sowing aligns with increasing natural light and gives the best results without requiring supplemental lighting.
If you want a succession of indoor blooms across multiple seasons, sow small batches every six to eight weeks. This gives you a continuous supply of flowering plants at different stages of development, ensuring you always have plants in bloom rather than a single flush that flowers and finishes simultaneously.
What You Need to Get Started
Indoor marigold seed starting requires very little equipment. The essentials are seed compost or multipurpose compost, seed trays or small individual pots, marigold seeds, a fine-rose watering can or misting bottle, and a clear propagator lid or plastic bag to maintain humidity during germination. A bright windowsill or grow light completes the basic setup.
Seed-starting compost (also called seed compost or starting mix) is preferable to standard multipurpose compost for germination because it is finely textured, low in nutrients, and free-draining. High-nutrient compost is not ideal for germination — seedlings develop stronger root systems when they have to search slightly for nutrients in the early weeks, and excess fertility can cause soft, weak growth.
If seed compost is unavailable, multipurpose compost diluted with 30 percent perlite or vermiculite is a workable alternative that improves drainage and texture enough for reliable germination.
Step-by-Step Sowing Guide
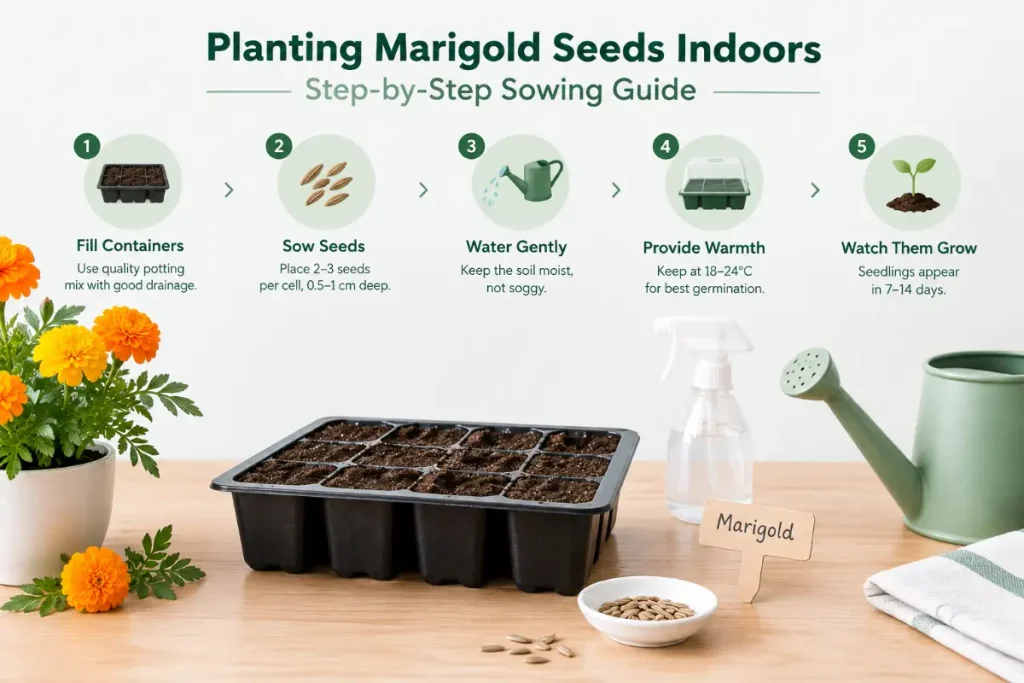
Step 1: Prepare your containers. Fill seed trays, module trays, or small individual pots to within 1 centimetre of the rim with seed compost. Firm lightly with the flat of your hand to create a smooth, even surface. Avoid compacting the compost — it should be firm enough to hold seed position but loose enough to allow root penetration.
Step 2: Water before sowing. Water the compost thoroughly before placing seeds, then allow excess water to drain. Sowing onto pre-moistened compost is preferable to watering after sowing, which can wash small seeds around and affect their final position.
Step 3: Sow seeds at the correct depth. Marigold seeds are large enough to handle individually. Sow one seed per module or cell if using a module tray, or sow seeds 2 to 3 centimetres apart in a seed tray. Press each seed to a depth of 5 to 6 millimetres — roughly the length of the seed itself. Marigolds are not surface-sown seeds; they need contact with moist compost at a shallow depth to germinate well.
Step 4: Cover and label. Cover the container with a clear propagator lid or a loosely fitted clear plastic bag. Label with variety name and sowing date. Place in a warm position — 18 to 24 degrees Celsius is ideal for marigold germination. A warm windowsill, the top of a fridge, or a purpose-made propagator all work well.
Step 5: Check daily. Check the compost surface daily and mist lightly if it appears to be drying. Most marigold seeds germinate within five to seven days. Remove the cover as soon as the first seedlings appear and move immediately to a bright, well-lit position to prevent etiolation.
Caring for Marigold Seedlings
Once germinated, marigold seedlings grow quickly and need consistent care to develop into strong, bushy plants.
Light is the most important factor immediately after germination. Marigold seedlings that do not receive enough light stretch rapidly toward any available light source, producing thin, weak stems that are prone to collapsing. Position seedlings in the brightest available window or under a grow light set 15 to 20 centimetres above the seedling tops. The goal is compact, stocky growth — if seedlings are stretching, increase light immediately.
Watering should keep compost consistently moist but never saturated. At the seedling stage, overwatering is the most common cause of damping off — a fungal condition that causes seedling stems to collapse at the base. Water from below where possible by placing containers in a shallow tray of water and allowing the compost to absorb moisture from the drainage holes, removing the tray once the surface compost feels moist.
Pricking out is necessary when seedlings sown in trays have developed their first true leaves (the second set of leaves, which look like miniature versions of mature marigold leaves). Carefully loosen each seedling from the tray using a pencil or dibber, holding the seedling by a leaf rather than the stem, and transplant into individual 7 to 9 centimetre pots of multipurpose compost. Water gently and return to a bright position.
Feeding begins two to three weeks after pricking out or once seedlings are established in individual pots. A half-strength balanced liquid fertiliser every two weeks supports steady growth without promoting the excessive leafy growth that delays flowering.
Pinching out the growing tip once seedlings reach 8 to 10 centimetres encourages branching and produces a bushier, more floriferous plant. Pinch out by removing the topmost shoot just above a set of leaves using clean fingertips or small scissors. The plant responds by producing two or more side shoots from the pinch point, resulting in a plant with many more flowering stems than one allowed to grow as a single main stem.
As referenced in the guide to growing chilli plants indoors, pinching out the growing tips of young indoor food and flowering plants is a reliable technique for producing bushier, more productive specimens regardless of species.
Growing Marigolds as Indoor Container Plants Long-Term
If your goal is to keep marigolds as permanent indoor flowering plants rather than using them as transplants for the garden, a few additional considerations apply.
Choose a final container of at least 20 to 25 centimetres in diameter for compact French marigold varieties. Larger African types need 30 to 35 centimetres. Fill with multipurpose compost mixed with 20 percent perlite for improved drainage. Water consistently and feed with a high-potassium fertiliser every two weeks once flowering begins.
Deadhead spent flowers regularly to maintain continuous flowering. Marigolds are naturally prolific flowerers, but they slow production if spent blooms are allowed to remain on the plant. A few minutes of deadheading every few days keeps plants in continuous bloom for months.
Indoor marigolds in warm, centrally heated rooms may attract spider mites, which thrive in warm, dry conditions. Check the undersides of leaves for fine webbing and dusty, stippled foliage. Neem oil spray applied weekly controls spider mites effectively and is safe for use indoors.
Hardening Off Before Transplanting Outdoors
If your indoor-started marigolds are destined for an outdoor garden bed or patio container, hardening off is an essential final step before transplanting. Plants grown entirely indoors have adapted to the stable, protected conditions of your home — consistent temperatures, no wind, no direct rain, and typically lower light intensity than full outdoor sun even in a bright room.
Moving them directly from this environment to full outdoor exposure causes transplant shock. Leaves may scorch, stems may collapse in wind, and plants can set back by several weeks while they readjust. Hardening off prevents this by acclimatising plants gradually over one to two weeks.
Begin by placing plants in a sheltered outdoor position for a few hours in the middle of the day when temperatures are warmest. A patio corner protected from direct wind and receiving dappled rather than full sun is ideal for the first few days. Bring plants back indoors overnight if temperatures are still dropping below 10 degrees Celsius.
Over the following week, gradually extend outdoor time and expose plants to increasing sunlight and air movement. By the end of two weeks, plants should be spending full days and nights outdoors (assuming frost risk has passed) and will be fully acclimatised to outdoor conditions.
Well-hardened marigolds transplant with minimal setback and often come into flower within days of going into their final outdoor position. The six to eight weeks of indoor growing time, combined with proper hardening off, delivers plants that outperform direct-sown outdoor marigolds for the entire season.

Troubleshooting Common Indoor Marigold Problems
Even straightforward plants like marigolds occasionally present challenges. Knowing what to look for and how to respond keeps small problems from becoming significant setbacks.
Damping off is the most common seedling problem. It appears as a sudden collapse of seedlings at the base of the stem, often affecting multiple seedlings simultaneously. It is caused by fungal pathogens thriving in waterlogged, poorly ventilated conditions. Prevention is the only reliable strategy — use fresh, sterile seed compost, avoid overwatering, ensure good air circulation, and water from below where possible. Once damping off occurs, affected seedlings cannot be saved, but unaffected seedlings in the same tray can sometimes be rescued by improving ventilation and reducing moisture immediately.
Failure to germinate after ten to fourteen days usually indicates seeds that are too old, a temperature that is too cold, or compost that has dried out during the germination period. Marigold seeds remain viable for two to three years when stored correctly but germination rate drops significantly beyond this. Fresh seeds from a reliable supplier germinate most reliably. Check compost moisture daily during germination and maintain temperature above 18 degrees Celsius.
Yellowing lower leaves on established plants usually indicate nitrogen deficiency as compost nutrients are exhausted. Resume or increase feeding with a balanced liquid fertiliser. If feeding is already regular, check that the pH of your compost is in the acceptable range of 5.8 to 7.0 — very acidic or alkaline conditions lock out nutrients even when they are present in the compost.
Poor or no flowering on otherwise healthy plants indicates either insufficient light or excessive nitrogen. Increase light exposure first. If the plant is very leafy and green with no flower buds forming, reduce nitrogen feed and switch to a high-potassium fertiliser to shift the plant’s energy from vegetative growth toward reproduction.
Spider mites in warm, dry indoor conditions cause a dusty, stippled appearance on leaves with fine webbing visible on the undersides. Increase humidity around the plant, improve air circulation, and apply neem oil spray to all surfaces weekly until the infestation resolves.
Conclusion
Planting marigold seeds indoors is simple, fast, and rewarding, whether your goal is to get a head start on the outdoor season or to grow marigolds as permanent indoor flowering plants. The combination of rapid germination, forgiving nature, and prolific flowering makes marigolds one of the most satisfying seeds to start indoors. For detailed guidance on marigold varieties and cultivation, the Royal Horticultural Society’s marigold growing guide covers species selection, seed sowing, and seasonal management in depth.
Choose compact French marigold varieties for the easiest indoor results, provide the brightest available light from the moment seeds germinate, pinch out growing tips for bushy plants, and deadhead consistently for months of uninterrupted colour.
FAQs
When should I plant marigold seeds indoors?
For transplanting outdoors, sow marigold seeds indoors six to eight weeks before your last expected frost date. Seeds can be sown at any time of year for indoor growing under lights. For windowsill growing, late winter through spring sowing aligns best with increasing natural light.
How deep do you plant marigold seeds?
Sow marigold seeds at a depth of approximately 5 to 6 millimetres — roughly the length of the seed. Unlike surface-sown seeds, marigolds need slight covering to germinate reliably. Press seeds to the correct depth and firm the compost gently over them.
How long do marigold seeds take to germinate indoors?
Marigold seeds are fast germinators. Most varieties germinate within five to seven days of sowing at a temperature of 18 to 24 degrees Celsius. This rapid germination makes them one of the most satisfying seeds for beginners and children to grow.
What is the best marigold variety for growing indoors in pots?
French marigolds (Tagetes patula) in compact varieties such as ‘Disco’, ‘Boy’, or ‘Bonanza’ are the best choice for indoor pot growing. They stay naturally compact at 20 to 40 centimetres, flower prolifically, and suit container conditions better than taller African marigold types.
Why are my indoor marigold seedlings tall and leggy?
Tall, spindly seedlings indicate insufficient light. Move seedlings to the brightest available window or position a grow light 15 to 20 centimetres above the seedling tops. Remove the propagator cover immediately once germination occurs and move to bright light straight away.
Can marigolds grow indoors year-round?
Yes, with adequate light. In a south-facing window with several hours of direct sun, marigolds can flower indoors in any season. Under a full-spectrum grow light set for 14 to 16 hours daily, they flower reliably regardless of the time of year. French marigold varieties are particularly well suited to year-round indoor growing.
How often should I water marigold seedlings indoors?
Keep the compost consistently moist but never saturated. Check daily and water when the top layer of compost begins to dry. Watering from below by placing containers in a shallow tray of water helps prevent damping off at the seedling stage by keeping the surface compost slightly drier than the lower layers where roots develop.
Should I pinch out indoor marigold seedlings?
Yes. Pinching out the growing tip when seedlings reach 8 to 10 centimetres encourages branching and produces a bushier, more floriferous plant. Remove the topmost shoot just above a leaf node. The plant responds by producing two or more side shoots, resulting in significantly more flowering stems.
Do indoor marigolds need feeding?
Yes, once established. Begin feeding two to three weeks after seedlings are in individual pots with a half-strength balanced fertiliser every two weeks. Switch to a high-potassium fertiliser such as tomato feed once flower buds form to support prolific flowering.
Are marigolds safe to grow indoors with children and pets?
Marigolds are generally considered non-toxic to humans and most household pets, though they can cause mild digestive upset if large quantities are ingested. Signet marigolds (Tagetes tenuifolia) have edible flowers and leaves used in salads. French and African marigolds are not typically eaten but are not significantly toxic.