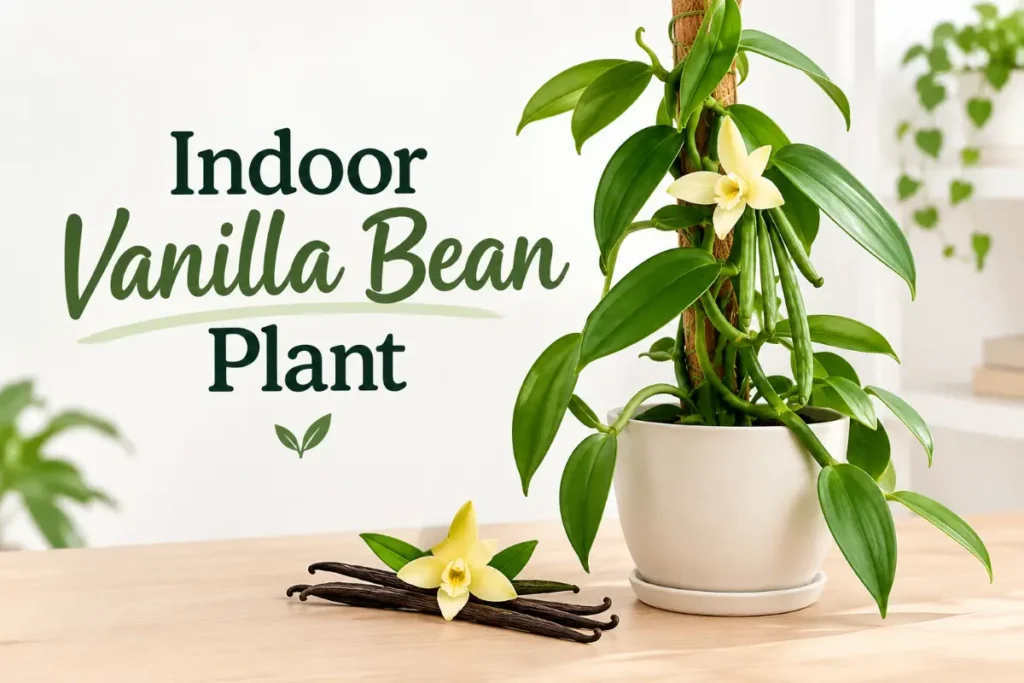
Growing an indoor vanilla bean plant is one of the most ambitious and rewarding projects in indoor gardening — a genuine challenge, but one that produces a living vanilla vine capable of flowering and, with hand pollination, producing the actual vanilla pods used in cooking. Vanilla planifolia, the species behind commercial vanilla production, is an epiphytic orchid native to Mexico and Central America. It grows as a climbing vine in humid tropical forest, producing inconspicuous green-yellow flowers that, when pollinated, develop into the long pods we know as vanilla beans.
This guide is honest about the challenge: growing an indoor vanilla bean plant to flowering and pod production requires specific conditions — very high humidity, very bright light, consistent warmth, and patient hand pollination — that most UK homes do not naturally provide. But for growers willing to create the right environment, the result is genuinely extraordinary.
Understanding Vanilla Planifolia
Vanilla planifolia belongs to the orchid family (Orchidaceae) — one of around 110 species in the Vanilla genus. Unlike most ornamental orchids, it is grown for its edible fruit (the “bean” or pod) rather than its flowers. Commercially, vanilla is grown in tropical regions — Madagascar produces around 80% of the world’s supply, with smaller quantities from Indonesia, Tahiti, and Mexico — and hand pollination of every individual flower is standard practice, because the natural pollinators (specific bees and hummingbirds) are absent from vanilla’s commercial growing regions.
The plant grows as a long, scrambling vine — reaching 30 metres or more in its natural habitat, though indoor specimens are managed at 2–4 metres. The leaves are thick, fleshy, and succulent in character — Vanilla is one of the few truly succulent orchids, storing water in its leaves and stems. The roots are aerial in nature, clinging to any available support.
Flowers are produced in clusters along the stem. Each flower opens for a single day and must be pollinated within hours of opening. The pods that develop from successful pollination take 9 months to reach harvest maturity — and require several months of curing after harvest before the characteristic vanilla fragrance develops.
What You Need to Grow an Indoor Vanilla Bean Plant
Before committing to this project, it is worth assembling the right conditions:
Light: Vanilla planifolia requires very bright indirect light — 6–8 hours of bright filtered light per day, or supplemental grow lighting. Insufficient light is the primary reason indoor vanilla vines fail to flower. A south-facing conservatory with diffused light, or a position under high-output LED grow lights, provides the intensity needed. The post on grow lights for indoor tomato plants covers grow light selection that applies equally to high-light tropical plants like vanilla.
Temperature: Keep above 20°C year-round — ideally 25–30°C during the day. Temperatures below 15°C cause growth arrest and below 10°C cause damage. A heated conservatory or grow tent maintains the required warmth.
Humidity: Very high — 70–85% relative humidity. This is the most challenging requirement for UK indoor growing. A greenhouse, humid conservatory, or dedicated grow tent with a humidifier and hygrometer is required for consistent pod production. At lower humidity (below 60%), the vine grows but rarely flowers.
Support: A climbing frame, trellis, or moss pole of at least 1.5–2 metres. The vine attaches with aerial roots and extends continuously. A horizontal run (training the vine along a horizontal support after vertical growth) encourages more lateral branching, which produces more flowering nodes.
Growing medium: A very free-draining, bark-based mix — orchid bark (medium or coarse grade) mixed with perlite and a small amount of sphagnum moss. Standard compost is too dense and moisture-retentive. Vanilla roots in nature grip tree bark and receive little more than moisture and debris — the growing medium should be open, airy, and fast-draining.

Obtaining an Indoor Vanilla Bean Plant
Vanilla planifolia plants are available from specialist orchid nurseries and some online houseplant retailers. They are sold as rooted cuttings (typically 30–60 cm in length) or as small established vines. Avoid unrooted cuttings unless you have experience with orchid propagation — rooting success from unrooted vanilla cuttings requires specific humidity conditions.
What to look for:
- Thick, fleshy, mid-green leaves — yellowing leaves indicate stress or overwatering
- Firm stems with visible aerial roots at the nodes
- No signs of rot (soft, discoloured sections) at the base of the cutting or on the stem
- Active new growth visible at the growing tip
Vanilla tahitensis: An alternative species with slightly different pod flavour (floral, anise-like) and marginally easier indoor growing requirements. Less commonly available than V. planifolia but worth seeking out if fragrance characteristics are a priority.
Potting and Initial Setup
- Choose a pot of 20–25 cm diameter with excellent drainage — terracotta is ideal for its air-permeability, which helps prevent root rot in the moisture-retentive conditions vanilla prefers.
- Fill with orchid bark, perlite, and a small amount of sphagnum moss (approximately 60% bark, 30% perlite, 10% moss).
- Position a moss pole or climbing frame in the centre of the pot before planting — disrupting the root zone after planting hinders establishment.
- Plant the cutting with the lower nodes in the growing medium and the aerial roots positioned against the moss pole.
- Water sparingly for the first 2–3 weeks — the primary objective is root establishment, which is hindered by oversaturated compost.
Watering and Feeding
Watering: Allow the growing medium to approach dryness between waterings — the thick, succulent leaves store water and the plant tolerates slight drought far better than waterlogged roots. In practice, this means watering every 7–10 days in summer, every 14–21 days in winter. Use room-temperature water — cold water shocks the tropical root system. Rainwater or filtered water is preferred, as tap water fluoride and minerals can accumulate in the bark growing medium.
Feeding: Feed with a diluted orchid fertiliser or balanced liquid fertiliser at one-quarter the normal dose, every 2–3 weeks during the growing season (spring and summer). Vanilla in its natural habitat receives nutrients from decomposing organic material on tree bark — it is not a heavy feeder. Overfeeding with nitrogen encourages vegetative growth at the expense of flowering.
Humidity maintenance: Mist the aerial roots daily (not the leaves — wet leaves in low-air-circulation conditions promote fungal issues) or maintain a humid environment with a room humidifier. Aerial roots should appear silvery-grey when dry and plump and green when adequately hydrated.
Training and Pruning
Training is one of the most important management tasks for an indoor vanilla bean plant, and understanding the flowering physiology guides the approach.
Vertical growth: Young vanilla vines grow vigorously upward toward the light. In this phase, the vine produces vegetative growth — leaves and nodes — but rarely flowers.
Horizontal training: When the vine reaches the top of its vertical support (or when it reaches approximately 1.5–2 metres), training it horizontally stimulates the flowering response. The vine is tied or wrapped along a horizontal wire or shelf, and it is from the nodes along this horizontal run that flower clusters are produced.
Why horizontal growth triggers flowering: The mechanism is not fully understood but is consistent with the behaviour of other orchid vines in cultivation — the shift from upward to horizontal orientation appears to shift the plant’s hormonal balance toward flowering and away from vegetative extension.
Node spacing: The internodes (sections between leaf nodes) on a mature vine indicate the plant’s health — long, stretched internodes indicate insufficient light; short, compact internodes indicate appropriate light levels and the plant’s readiness for flowering when horizontally trained.
Flowering and Hand Pollination
When conditions are right — adequate light, warmth, humidity, and horizontal training — an indoor vanilla bean plant typically flowers 3–5 years after planting from a rooted cutting. The wait is significant but the flowering event, when it arrives, requires immediate action.
Flower appearance: Clusters of 8–20 pale yellow-green flowers appear at nodes along the horizontal stems. Each flower cluster produces one to a few flowers open simultaneously, with successive flowers opening over several weeks.
The pollination window: Each vanilla flower opens for a single day — typically in the early morning — and must be pollinated within a few hours of opening. The flower closes in the afternoon and will not reopen. Unpollinated flowers fall from the plant.
Hand pollination technique:
- Identify an open flower early in the morning
- Using a fine cocktail stick or toothpick, gently lift the rostellum — the small flap that separates the anther (containing pollen) from the stigma
- Transfer pollen from the anther to the stigma with a gentle pressing motion — the transfer should be clearly visible as a yellow smear on the stigma
- Pollinate 3–6 flowers per cluster if possible — not every flower in a cluster will develop into a pod even with successful pollination
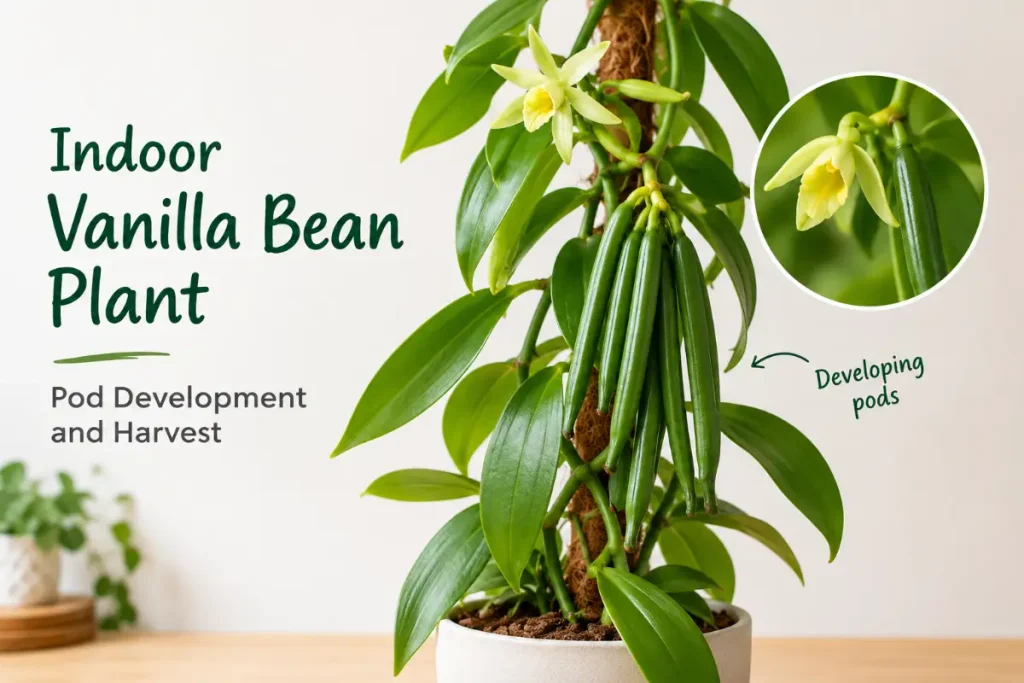
Confirmation of successful pollination: A successfully pollinated flower swells at the base within 2–3 days — the developing pod is visible as a green swelling behind the petals. Unpollinated or unsuccessfully pollinated flowers drop within 48–72 hours.
Pod Development and Harvest
Successfully pollinated flowers develop into vanilla pods over approximately 9 months. The pods grow to their full length (15–20 cm) within the first few months but take the full 9 months to reach chemical maturity — harvesting early produces pods with reduced vanillin content and inferior flavour.
Harvest timing: Pods are ready when the tip begins to turn from deep green to slightly yellow. Do not wait for pods to turn brown on the vine — post-harvest curing produces the characteristic brown colour and vanilla fragrance.
Curing Vanilla Pods
Fresh vanilla pods have little fragrance — the characteristic vanilla scent develops during curing, which converts the odourless glucovanillin compound in the pod into vanillin through enzyme activity.
The curing process:
- Killing (blanching): Immerse pods in 65°C water for 3 minutes, or place in a 65°C oven for 2 minutes. This stops further growth and activates the enzymes that produce vanillin.
- Sweating: Wrap pods in wool blankets and store in a warm, dark location (35–45°C) for 7–10 days, removing daily to check for mold. The pods sweat, soften, and begin turning brown.
- Drying: Spread pods in the sun for 2–3 hours per day for several weeks, or dry in a warm oven (40°C) for 8 hours per day for 1–2 weeks.
- Conditioning: Store dried pods in a sealed container for 30–60 days. Fragrance continues developing during conditioning.
The full curing process takes 3–6 months. Home-cured vanilla pods from an indoor vanilla bean plant — used in baking or split to extract the seeds — are the culmination of a multi-year growing project that produces something genuinely irreplaceable from a standard kitchen ingredient.
Common Problems
No flowers after several years: Insufficient light is the most common cause. Vanilla requires exceptionally bright conditions to flower — inadequate light keeps the vine in permanent vegetative growth. Evaluate the light setup critically and supplement with high-intensity grow lights if necessary. Ensure the vine has been trained horizontally.
Yellowing leaves: Overwatering or poor drainage. Allow the growing medium to dry more thoroughly between waterings and check that drainage is unobstructed.
Root rot: The bark growing medium should never stay waterlogged. If the base of the stem is soft or discoloured, remove from the medium, trim affected roots, allow to dry for 24 hours, and repot in fresh bark mix.
Aerial root desiccation: Silvery-grey aerial roots that fail to green up with misting indicate very low humidity. Increase ambient humidity to 70%+ — this may require a dedicated humidifier in a partially enclosed space.
Flower drop without pod development: Either the flowers were not hand-pollinated (pollination is not optional — there are no natural pollinators in a UK home) or pollination was unsuccessful. Repeat pollination attempts on subsequent flowers in the same cluster and future clusters.
Growing an Indoor Vanilla Bean Plant in a Grow Tent
For UK growers, a dedicated grow tent is often the most practical solution for meeting vanilla’s demanding environmental requirements. A grow tent provides a contained, controllable space where temperature, humidity, and light can all be managed independently of the wider home environment.
Recommended grow tent setup:
- Tent size: 1.2m × 0.6m × 1.8m minimum — enough to accommodate a climbing frame or trellis and allow horizontal training along the tent ceiling
- Lighting: High-output LED grow lights positioned 40–60 cm above the canopy. Full-spectrum lights with enhanced red output support both vegetative growth and flowering. The guide to grow lights for indoor tomato plants covers LED selection criteria that apply directly to vanilla
- Humidity: A ultrasonic or evaporative humidifier maintains the 70–85% target. A hygrometer positioned at canopy height (not the tent floor) gives accurate readings. Humidity fluctuations above 90% for extended periods can promote fungal issues — the target band is 70–85%, not simply “as high as possible”
- Air circulation: A small clip-on fan at low speed circulates air to prevent fungal conditions and strengthens the vine stem — do not direct airflow at the plant’s leaves
- Temperature control: A thermostatically controlled heat mat or small fan heater maintains minimum temperatures overnight; in summer, ventilation prevents overheating above 35°C
The grow tent approach concentrates the growing environment around the plant itself rather than heating and humidifying an entire room — significantly more energy-efficient for meeting vanilla’s tropical requirements in a UK climate.
Seasonal Management for Indoor Vanilla
Unlike many tropical houseplants grown strictly for foliage, an indoor vanilla bean plant benefits from deliberate seasonal management that mirrors — however loosely — conditions in its native habitat.
Spring (March–May): Begin increasing watering frequency as light levels improve. Start liquid feeding. This is the primary growing season — new growth appears at the vine tip and along established stems. Check the climbing support and tie in new growth before it reaches the tent ceiling.
Summer (June–August): The most active growing period. Water every 7–10 days, feed every 2–3 weeks. Monitor humidity carefully — outdoor temperatures can reduce relative humidity indoors, requiring increased humidifier output. This is the period when mature vines may produce flower buds — check nodes along horizontal stems daily once the vine is in potential flowering condition (3+ years from planting).
Autumn (September–November): Gradually reduce watering frequency. Maintain feeding through September, then taper off in October. Ensure the grow tent or conservatory temperature does not drop significantly — in UK conditions, heating support is increasingly necessary through October.
Winter (December–February): Minimal watering — once every 2–3 weeks, allowing the growing medium to dry thoroughly. No feeding. Maintain warmth above 18°C minimum, with 22–25°C preferred. If natural light is inadequate (fewer than 6 hours of useful light per day), increase grow light duration to 14–16 hours daily. The vine is not dormant — it simply grows more slowly. Observe for any signs of pest activity, which can increase in the warm, humid tent environment.
Integrating Vanilla with Other Edible Indoor Plants
An indoor vanilla bean plant pairs naturally with other edible tropical plants in a shared growing environment — particularly in a grow tent or heated conservatory where the required conditions overlap with other warm-growing edibles.
Compatible growing companions:
- Ginger and turmeric (Zingiber officinale and Curcuma longa) — both require similar warmth and humidity and grow in pots that can share the conservatory or tent floor space beneath the vanilla vine
- Edible passionfruit (Passiflora edulis) — a vigorous tropical climber that shares vanilla’s preference for bright light and warmth; may require separate training structures to prevent competition
- Lemon trees — the guide to growing lemon trees indoors covers the warm, bright conditions that overlap with vanilla’s requirements in a conservatory setting
- Culinary herbs — basil, Vietnamese coriander, and lemongrass all thrive in the warmth and humidity that vanilla requires, making efficient use of floor space below the climbing vine
The one consideration for companion planting with vanilla is humidity — at 70–85% RH, some plants (particularly Mediterranean herbs like rosemary and thyme) will suffer. Edibles from humid tropical climates share the space most compatibly.
What to Expect: A Realistic Timeline
Setting realistic expectations is important for committing to an indoor vanilla bean plant project over the long timeframe it requires:
Year 1: Establishment from rooted cutting. The vine grows 30–60 cm under good conditions. Focus on root establishment, training the vine to its support, and building the humidity and light conditions required for long-term success. No flowering expected.
Year 2–3: Vigorous vegetative growth. The vine extends significantly — potentially 1–2 metres per year under optimal conditions. Begin horizontal training during this phase. No flowering typical.
Year 3–5: Mature vine, potential first flowering. Once the vine has been trained horizontally and conditions are consistently met, flower clusters may appear at nodes. First flowering is unpredictable — some growers report flowers in year 3; others wait until year 5 or 6. The key variables are light intensity, horizontal training, and consistent warmth.
Year 5+ (ongoing): Established flowering vine producing pods annually. Each flower cluster may produce 2–8 pods depending on pollination success. A well-managed vanilla vine can remain productive for 10–20 years.
The return on investment: A single vanilla bean pod from a specialist retailer costs £3–8. A well-managed indoor vanilla bean plant in a productive flowering phase may produce 20–40 pods per season — a tangible material return on the years of growing effort, quite apart from the extraordinary experience of cultivating the world’s most labour-intensive crop at home.
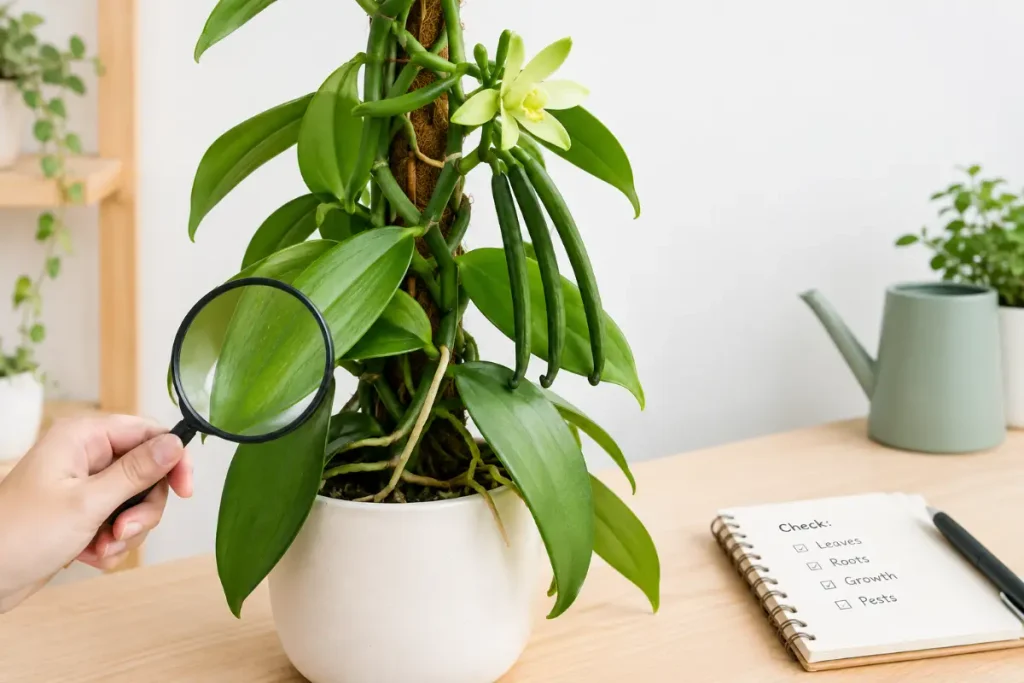
Monitoring Plant Health
Tracking growth progress in a systematic way helps identify problems early — particularly important for a long-lived plant where problems developing slowly over months can set the project back significantly.
What to monitor:
- Internode length: Measure the spacing between leaf nodes on new growth. Consistent internode lengths under 5 cm indicate adequate light; stretched internodes (>8 cm) indicate insufficient light before the vine can flower
- Leaf colour and firmness: Healthy leaves are mid-green and firm. Yellowing indicates overwatering or nutrient deficiency; pale, washed-out colour indicates too much direct sun; browning tips indicate low humidity or salt accumulation
- Aerial root condition: Healthy aerial roots should turn green within 1–2 hours of misting. Roots that remain grey-silver after misting indicate very low humidity; dark, soft roots indicate overwatering or root rot
- Vine tip activity: Active new growth at the vine tip confirms the plant is growing healthily. Stalled growth in spring and summer indicates an environmental problem — light, temperature, or humidity — worth investigating
Using a moisture meter for indoor plants to check the bark growing medium before every watering prevents the root rot that is one of the most common causes of vanilla vine failure in indoor cultivation.
Conclusion
Growing an indoor vanilla bean plant is one of the most challenging and most rewarding projects in edible indoor growing — a multi-year commitment that produces a living orchid vine, genuine vanilla flowers requiring careful hand pollination, and ultimately home-grown vanilla pods that can be cured and used in your own kitchen. The conditions required are specific and demanding, but for growers with a heated conservatory, a dedicated grow tent, or the willingness to engineer the right environment, it is entirely achievable.
For authoritative guidance on Vanilla planifolia cultivation, the RHS orchid growing pages provide a useful foundation for understanding the orchid family’s cultivation requirements that underpin vanilla growing.
FAQs
How long does it take an indoor vanilla bean plant to produce pods?
From a rooted cutting, expect 3–5 years before the first flowers appear, followed by 9 months of pod development after successful hand pollination. Full curing of the harvested pods takes a further 3–6 months. The total time from planting to using home-grown vanilla in cooking is typically 5–7 years.
Can I grow a vanilla bean plant indoors in the UK?
Yes, but it requires specific conditions: very bright light (south-facing conservatory or grow lights), consistent warmth above 20°C, and very high humidity (70–85%). These conditions are not typical of most UK homes but can be engineered in a conservatory, heated greenhouse, or grow tent.
Do indoor vanilla plants need hand pollination?
Yes — the natural pollinators of Vanilla planifolia (specific bee species and hummingbirds) are not present in UK indoor environments. Every flower must be hand-pollinated within a few hours of opening, using a toothpick to transfer pollen from the anther to the stigma.
What growing medium should I use for an indoor vanilla plant?
A very free-draining orchid bark mix — approximately 60% medium bark, 30% perlite, 10% sphagnum moss. Standard potting compost is too dense and moisture-retentive. Vanilla roots require air and drainage above all.
Why is my vanilla plant not flowering?
The most common causes are insufficient light and insufficient horizontal training. Vanilla flowers most reliably when trained horizontally after vertical growth — this shift in orientation appears to trigger flowering. Ensure light levels are very high (supplementing with grow lights if necessary) and that the vine is at least 1.5–2 metres long before expecting flowers.
How do I know when to harvest vanilla pods?
Harvest when the tip of the pod begins to yellow — approximately 9 months after successful pollination. Do not harvest early, as vanillin content and fragrance are still developing. Do not wait until pods turn brown on the vine.
Can vanilla grow in a normal pot or does it need a special container?
A 20–25 cm pot with excellent drainage and orchid bark growing medium is suitable. Terracotta pots are preferable to plastic for their air-permeability. The most important container requirement is drainage — a pot without drainage holes will kill the plant through root rot.
How often should I water an indoor vanilla plant?
Every 7–10 days in summer, every 14–21 days in winter — allowing the bark growing medium to approach dryness between waterings. The succulent leaves store water; the roots cannot tolerate waterlogging.
Is vanilla planifolia the same as a vanilla orchid?
Yes — Vanilla planifolia is an orchid species (family Orchidaceae) grown specifically for its edible pods. The flowers are orchid blooms, though inconspicuous compared to ornamental orchids. The plant is sometimes sold as “vanilla orchid” to distinguish it from the cured vanilla product.
Can I propagate my vanilla bean plant indoors?
Yes — take 30–40 cm stem cuttings with at least 3–4 nodes, allow cut ends to dry for 24 hours, and plant in moist orchid bark in a warm, humid environment. Aerial roots at the nodes are the primary rooting points. Maintain 25–30°C and 70%+ humidity during rooting, which takes 4–8 weeks.