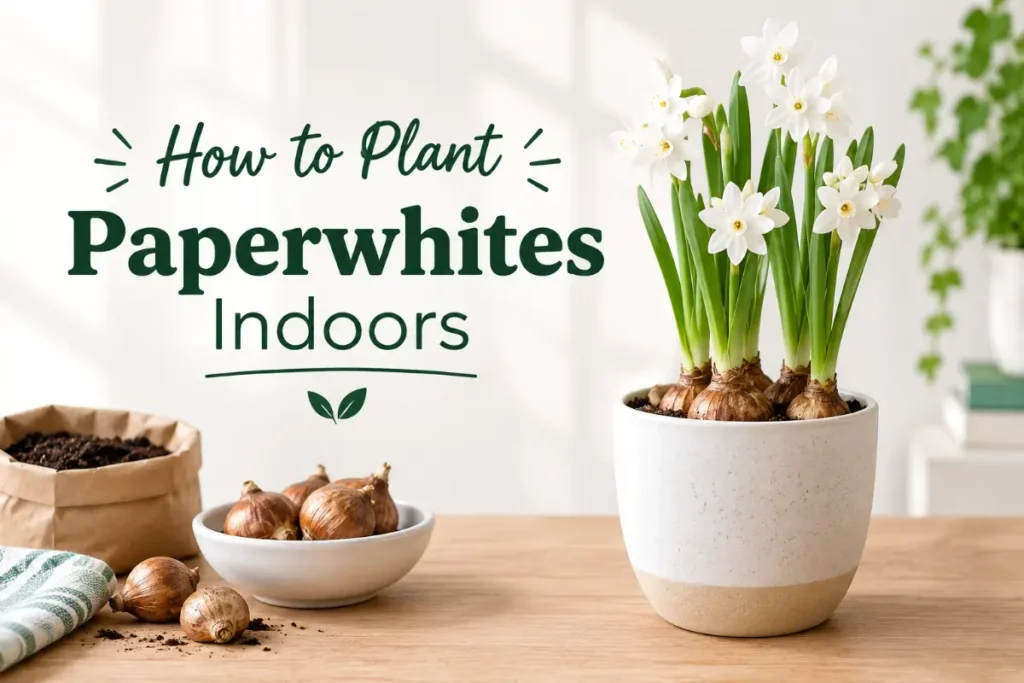
Learning how to plant paperwhites indoors is one of the easiest ways to bring fresh fragrance and pure white blooms into your home through the darkest months of the year. Paperwhites — the common name for Narcissus papyraceus — are one of the simplest bulbs you can grow indoors. Unlike most spring bulbs, they require no cold chilling period before planting. You plant them, water them, and within four to six weeks you have elegant clusters of white flowers filling a room with their distinctive sweet scent.
Paperwhites work beautifully because the barrier to entry is genuinely low. No specialist knowledge, no complex equipment, no carefully managed growing conditions. A bulb, some gravel or compost, a container, water, and a bright windowsill is all you need to go from bare bulb to bloom. They are a popular project for beginners and experienced indoor gardeners alike, and their speed from planting to flowering makes them among the most satisfying bulbs to grow.
This guide covers everything from choosing and storing bulbs through planting in soil or water, managing growth, and dealing with the occasional challenges that arise along the way.
Understanding Paperwhite Bulbs
Paperwhites are tender narcissus, native to the Mediterranean region and distinct from the hardy daffodils that naturalise in gardens across northern Europe and North America. Because they originate in a region where winters are mild rather than harsh, they have never developed the cold requirement that most spring bulbs need to initiate flowering. This is the property that makes them so useful for indoor growing — plant them at room temperature in autumn or winter and they flower without any period of refrigeration or outdoor chilling.
The flowers themselves are clusters of small, pure white blooms with a distinctive sweet, musky fragrance that fills a room quickly. Opinions on the scent divide fairly sharply — some find it intensely pleasant, others find it overpowering. If you are sensitive to strong floral scents, a few stems in a large, well-ventilated room is more comfortable than a windowsill crowded with multiple containers all in bloom simultaneously.
Paperwhite bulbs are widely available from late summer through to mid-winter from garden centres, supermarkets, and online bulb suppliers. Choose bulbs that are firm, dry, and free from soft spots or mould. Larger bulbs generally produce more flower stems per bulb and a more impressive display. Avoid bulbs with visible signs of damage, soft patches at the base, or any green mould on the surface.
If you are not planting immediately after purchase, store bulbs in a cool, dry, dark location — a garage, cupboard, or spare room that stays below 15 degrees Celsius. Avoid storing near fruit, which emits ethylene gas that can inhibit flowering. Bulbs store well for several weeks under these conditions.
Timing Your Planting for Continuous Blooms
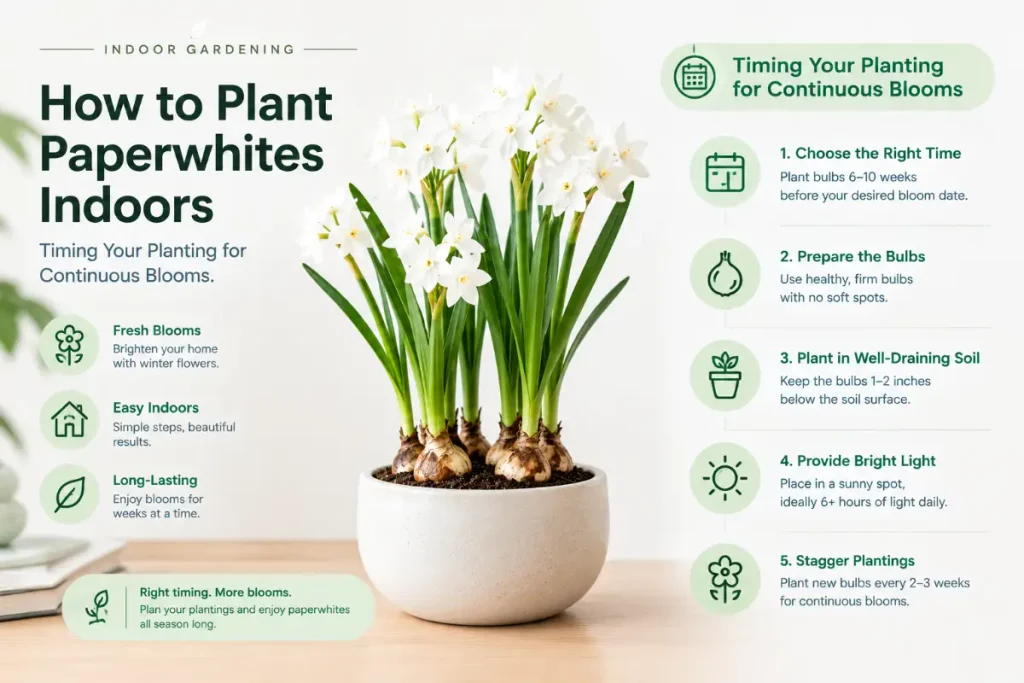
One of the most practical aspects of paperwhite growing is the ability to stagger your planting to produce a succession of blooms through the winter rather than a single flush. Plant one batch of bulbs in mid-October, another in early November, and a third in late November, and you can have fresh flowers from December through to February.
In warmer indoor conditions — around 20 to 22 degrees Celsius — paperwhites typically flower within four to five weeks of planting. In cooler conditions around 15 to 18 degrees Celsius, flowering takes five to seven weeks. This temperature-dependent timing gives you a degree of control: planting in a cooler room or garage initially slows development and extends the time to flowering, while moving plants to a warm room accelerates it.
If you want flowers for a specific occasion — Christmas, New Year, a gathering in January — work backwards from that date, allow five to six weeks as a safe average, and plant accordingly. The precision is not exact, but it is good enough to reliably land blooms within a week or two of your target date.
Planting Paperwhites in Gravel or Pebbles
The classic and most visually attractive way to grow paperwhites indoors requires no compost at all. The gravel or pebble method suspends bulbs above water, allowing roots to grow down into the moisture while the bulb base and shoots remain above it. This approach is ideal for decorative display because the materials — glass containers, smooth river pebbles, clear water — look beautiful, and the growing process is entirely visible.
Choose a container at least 8 to 10 centimetres deep with no drainage holes — you are managing water level manually rather than draining. Decorative bowls, glass vases, ceramic dishes, or vintage crockery all work well. The container should be at least 5 centimetres wider than the group of bulbs you plan to plant together.
Fill the container with 5 to 7 centimetres of small pebbles, horticultural gravel, or decorative stones. Set the bulbs on top of the gravel with their pointed tips facing upward, nestling them snugly into the surface so they stand upright without toppling. You can plant bulbs touching each other — a dense planting creates a fuller, more impressive display. Press a small amount of additional gravel between and around the bulbs to hold them firmly in position.
Add water carefully to the container, pouring it between the bulbs rather than over them. The water level should sit just at or slightly below the base of each bulb — the very bottom of the bulb can be in contact with water, but the bulb body itself should not be submerged. Submerged bulbs rot; bulbs positioned just above the water line draw moisture up through their base and root successfully without rotting.
Place the container in a cool, bright position initially. Roots will emerge from the base of the bulbs within five to seven days. Check the water level every two to three days and top up as needed to maintain the correct level just below the bulb base. Once roots are well developed and green shoots are growing strongly, move the container to your preferred display position.
Planting Paperwhites in Compost
Growing paperwhites in compost gives bulbs more nutrient access and can produce slightly more vigorous growth than the gravel method, though the visual effect is less distinctive. This approach suits conventional plant pots and window boxes and works well if you are growing paperwhites as part of a broader container display rather than as a decorative focal piece.
Choose a pot with drainage holes and fill the base with a layer of multipurpose or bulb compost to a depth that brings the tops of the bulbs level with or just below the rim of the pot when placed inside. Position bulbs with their pointed tips upward, spacing them 3 to 5 centimetres apart. Fill compost around the bulbs, pressing it firmly to hold them upright. Leave the top 1 to 2 centimetres of the pointed tip exposed above the compost surface — this is normal and helps the shoot emerge cleanly.
Water thoroughly after planting, allowing excess water to drain freely from the base. Place in a cool, bright position initially and water whenever the top layer of compost begins to dry. Keep compost consistently moist but never saturated — waterlogged compost promotes rot at the bulb base.
As with gravel planting, move to your preferred display position once shoots are growing strongly and roots are established.
Light and Temperature Management
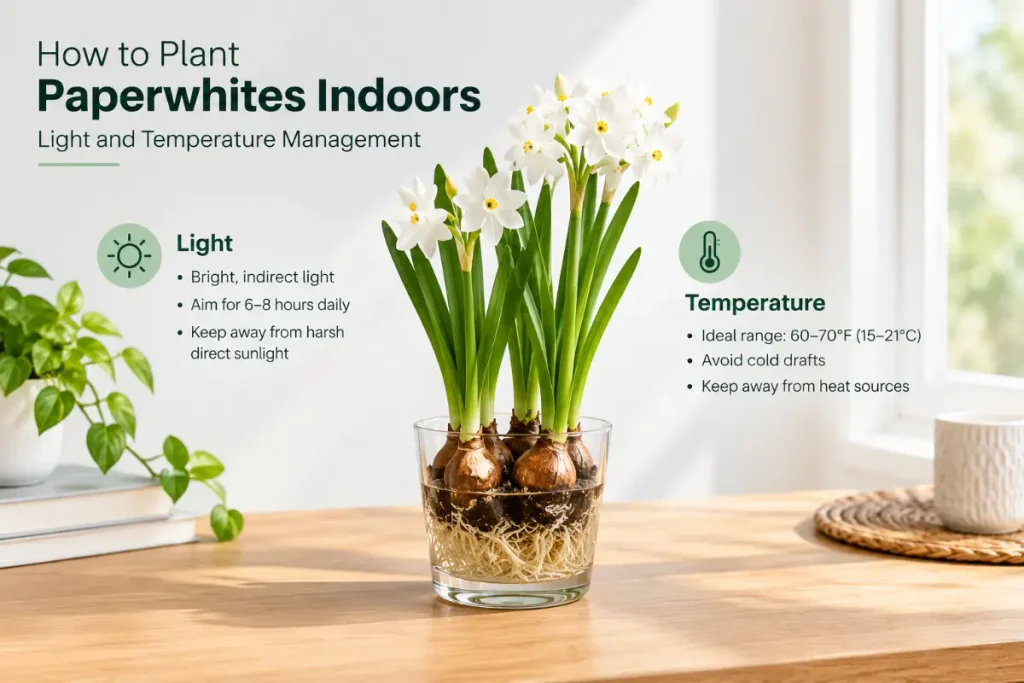
The position you choose for paperwhites through their growing period significantly affects both the speed of development and the quality of the final plant. A common problem with indoor paperwhites is stems that grow tall and then topple under the weight of the flower clusters — a condition called etiolation, caused by insufficient light causing stems to elongate rapidly in search of brighter conditions.
To prevent this, start paperwhites in the brightest available position. A south or east-facing windowsill provides enough light to keep stem growth compact and upright. Once the plant is in full flower, you can move it to a shadier position for display if you prefer, but the formative growing period in good light produces a sturdier, more self-supporting plant.
Temperature also affects stem length. The cooler the growing environment, the more compact the stems remain. Growing at 15 to 18 degrees Celsius through the early weeks, then moving to a warmer room once buds are forming, produces the best balance of sturdy stems and prompt flowering. Growing at a constant 22 degrees or above encourages rapid, lush growth that is more prone to flopping.
A traditional trick for reducing stem height is to use a dilute alcohol solution instead of plain water once shoots are about 5 centimetres tall. Mix one part vodka, gin, or rubbing alcohol with seven parts water and use this in place of plain water going forward. Research published by Cornell University found this reliably reduces stem height by 30 to 50 percent compared to water-grown controls, producing shorter, sturdier plants that need no staking. The flowers themselves are unaffected in size, number, or fragrance.
For a broader look at growing food and flowering plants indoors including light management and container techniques, the guide to growing plants in water indoors covers the principles of water-based growing that apply to bulb forcing as well.
Supporting Tall Stems
Even with careful light and temperature management, paperwhite stems sometimes grow taller than expected and need support to prevent flopping once heavy flower clusters open. Several approaches work well depending on the container and display context.
Twiggy branches pushed into the gravel or compost around the bulbs create a natural-looking support framework that stems can lean against. Birch or hazel twigs work particularly well and look attractive in rustic or natural-style displays.
For a cleaner, less visible approach, wrap a length of raffia, garden twine, or even a velvet ribbon around the stems as a loose bundle, tied at a height that provides support without constricting growth. This works well for formal or contemporary displays where visible twigs would look out of place.
Wire plant supports or small bamboo canes pushed into the compost also work, though they are more visible. For a large container with multiple bulbs, three canes and a circle of string creates an effective corral that holds all stems upright while remaining unobtrusive at the back of a display.
After Flowering
Paperwhites are not reliably hardy in most temperate climates and are typically treated as annual bulbs for indoor forcing — planted once, enjoyed through flowering, and then discarded rather than saved for a second season. Unlike garden daffodils, which replenish their bulb energy through a long growing season of photosynthesis after flowering, paperwhites grown indoors in limited conditions rarely store enough energy to produce a second season of blooms.
If you want to try saving bulbs, allow the foliage to die back completely after flowering — this takes several weeks. Keep watering and place the container in the brightest available position to maximise the photosynthesis that recharges the bulb. Once foliage is completely yellow and dry, remove bulbs from their container, dry them thoroughly, and store in a cool, dry location until autumn. Success rate varies considerably, and many gardeners find it simpler and more reliable to purchase fresh bulbs each season.
Creative Display Ideas for Paperwhites
Paperwhites are among the most display-friendly of all indoor bulbs. Their clean white flowers, architectural stems, and transparent root systems when grown in glass containers make them naturally suited to decorative arrangements that work as well in a contemporary kitchen as in a traditional living room.
Glass containers and clear vases showcase the root growth that develops below the gravel line, turning the growing process itself into a visual feature. A tall glass cylinder filled with smooth river pebbles and three or four paperwhite bulbs makes an elegant centrepiece that is interesting to look at from planting through to full flower.
Grouping multiple containers at slightly different stages of development creates a more dynamic and longer-lasting display than a single container. Place containers planted two weeks apart side by side — one just showing green shoots, one with buds forming, one in full flower — and you have a progression that remains interesting across the entire winter.
Rustic and natural containers — vintage terracotta, wicker baskets lined with plastic, wooden crates filled with moss — give paperwhites a warmer, less formal appearance that suits farmhouse or Scandi-inspired interiors very well. Pair with birch twigs for support and the overall effect is effortlessly seasonal.
Combining with other winter plants extends the visual interest around paperwhites. A grouping of paperwhites, a small potted conifer, and a cyclamen in complementary colours creates a winter display that works throughout the entire season without requiring frequent changes.
The ability to choose your own container also means paperwhites integrate naturally into whatever aesthetic your home already has, rather than requiring a separate display area or specialist planting equipment.
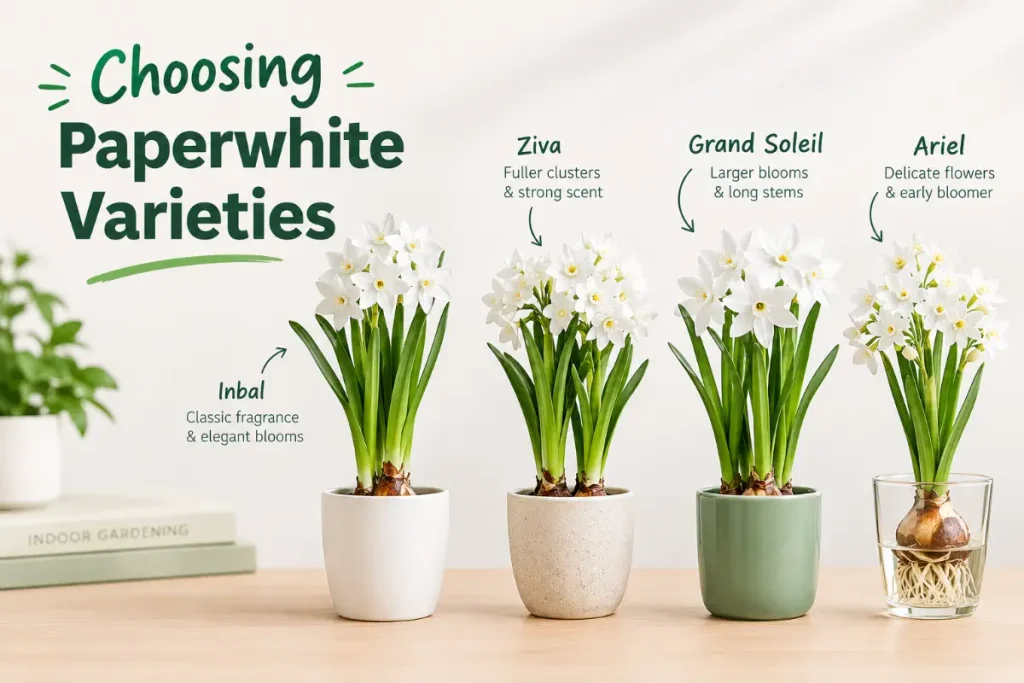
Choosing Paperwhite Varieties
While the classic Narcissus papyraceus is the most widely available variety and the one most people encounter when they buy paperwhites, several named varieties offer slightly different characteristics worth knowing about.
‘Ziva’ is the most commonly sold commercial variety, widely available in garden centres and supermarkets. It flowers reliably, produces multiple stems per bulb, and has the classic strongly fragrant white flowers most associated with paperwhites. It is an excellent all-round choice for first-time growers.
‘Inbal’ produces flowers slightly earlier than Ziva and has a marginally lighter fragrance, which some growers prefer in smaller rooms. Stem height is similar to Ziva.
‘Ariel’ produces flowers with a yellow centre cup rather than the all-white flowers of classic paperwhites. It is slightly less fragrant than Ziva and flowers a few days later, making it a good candidate for staggered plantings alongside Ziva for a succession of blooms.
‘Grand Soleil d’Or’ is a yellow-flowered variety with orange cups, technically a different variety in the tazetta group but often grouped with paperwhites by retailers. It has a lighter, more delicate fragrance than white paperwhites and produces multiple flower heads per stem, making it particularly prolific in display.
For most indoor growing purposes, Ziva is the reliable and widely available default. If you want to experiment with variety differences, combining Ziva with Grand Soleil d’Or or Ariel in a mixed container creates an interesting display with flowers at slightly different times and colours.
Conclusion
Planting paperwhites indoors is one of the most rewarding and accessible projects in indoor gardening, delivering fragrant white flowers in winter with minimal effort and no specialist knowledge. Choose firm, large bulbs, plant them in gravel or compost with the base just touching water, give them a bright cool position to develop compact stems, and enjoy four to six weeks of flowers from each planting. For further guidance on forcing bulbs indoors and managing paperwhite varieties, the Royal Horticultural Society’s guide to growing narcissus indoors is an excellent resource covering timing, varieties, and display ideas in depth.
Stagger your planting dates from October through December and you can have fresh flowers throughout the entire winter season.
FAQs
Do paperwhites need to be chilled before planting indoors?
No. Unlike most spring bulbs such as tulips and hyacinths, paperwhites require no cold chilling period before planting. They flower naturally at room temperature, which makes them one of the easiest bulbs for indoor forcing. Simply plant them in gravel or compost and they will flower within four to six weeks.
How long do paperwhites take to flower after planting?
In typical indoor temperatures of 18 to 22 degrees Celsius, paperwhites generally flower four to five weeks after planting. In cooler conditions around 15 degrees, flowering takes five to seven weeks. Starting bulbs in a cool room slows development and gives you more control over the timing of flowering.
Can I grow paperwhites in just water?
Paperwhites are typically grown with their roots in water and their bulbs resting on gravel or pebbles above the waterline. The bulb base should sit just at or slightly below the water surface but not be submerged. True water growing without any support medium is not recommended as the bulbs cannot stay upright without gravel or pebbles to anchor them.
Why are my paperwhite stems falling over?
Stems flop when they grow too tall, usually due to insufficient light causing rapid upward growth as the plant searches for brighter conditions. Grow paperwhites in the brightest available position during the early weeks, keep temperatures cool (15 to 18 degrees Celsius), and try the dilute alcohol solution trick (one part vodka or gin to seven parts water) once shoots reach 5 centimetres tall to reduce stem height.
How many paperwhite bulbs should I plant per container?
For a full, impressive display, plant bulbs touching each other — five to seven bulbs in a 20 to 25 centimetre container, or three to four in a smaller 15 centimetre container. A densely planted container produces a much more striking and fragrant display than a sparse one.
Can I reuse paperwhite bulbs next year?
It is possible but not reliably successful. Allow foliage to die back completely after flowering, keep the plant in bright light to replenish the bulb, then dry and store the bulbs until autumn. Many gardeners find fresh bulbs more reliable for consistent flowering and simply replace them each season.
How do I prevent paperwhite bulbs from rotting?
The key is ensuring the bulb base is positioned just at or slightly above the waterline rather than submerged in water. In compost, maintain consistent moisture without waterlogging. Choose firm, undamaged bulbs at purchase and avoid any with soft spots or visible mould. Good air circulation around the bulbs also reduces the risk of rot.
How long do paperwhite flowers last once open?
Individual flower clusters typically last one to two weeks once open. Cooler room temperatures extend the flowering period; warmer conditions shorten it. Keeping blooming plants away from direct heat sources and radiators prolongs the display. Once flowers fade, remove spent stems but leave foliage in place if you intend to try saving the bulbs.
Are paperwhites fragrant?
Yes, strongly so. Paperwhites have a sweet, musky fragrance that fills a room quickly. Most people find the scent pleasant but it can be overpowering in small, unventilated spaces. If you are sensitive to strong floral scents, display blooming paperwhites in larger rooms with some ventilation, or limit the number of containers in bloom simultaneously.
When is the best time to plant paperwhites for Christmas flowers?
Plant paperwhites in mid to late October for Christmas flowering, allowing five to six weeks from planting to bloom as a reliable estimate. Starting in a cool room initially and moving to a warmer position in late November can help fine-tune the timing. Stagger two or three plantings a week or two apart to increase the chances of having flowers in bloom precisely at Christmas.