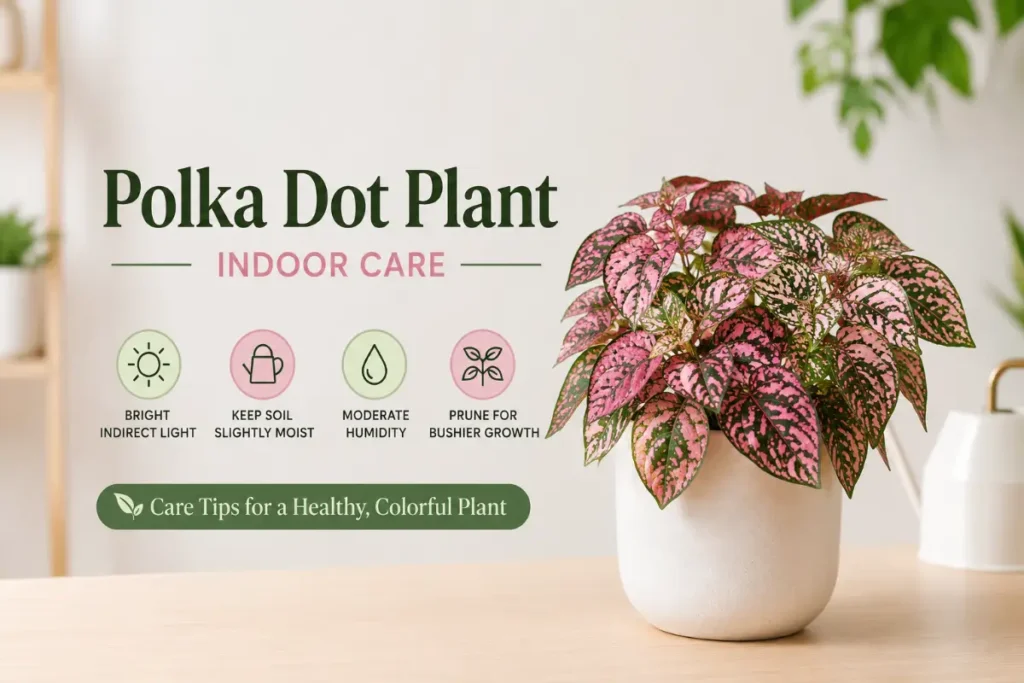
Polka dot plant indoor care is simpler than most plant guides make it sound, but two specific details separate the owners who keep their Hypoestes phyllostachya looking vibrant and bushy year-round from those who end up with a faded, leggy, disappointing plant within a few months. Those two details are light and pruning. Get them right and everything else about this plant falls into place naturally. Get them wrong and no amount of correct watering, humidity, or fertilizing compensates for the missing fundamentals.
This guide builds on the essentials to give you the expert-level detail that keeps polka dot plants at their colorful best through multiple growing seasons.
Quick Answer
Polka dot plant indoor care requires bright indirect light to maintain vivid leaf coloring, consistent moisture keeping the top inch moist but never waterlogged, temperatures between 65 and 80 degrees Fahrenheit, moderate to high humidity above 50%, biweekly fertilizing through spring and summer, and tip pruning every two to four weeks to prevent the legginess that removes the compact colorful form. Without tip pruning, plants become elongated and flower prematurely, signaling decline.
Understanding What Makes Polka Dot Plant Unique
Hypoestes phyllostachya comes from Madagascar and South Africa where it grows as a low, spreading, shade-tolerant perennial in warm, humid forest understory. The distinctive spotted and splashed leaf patterns in pink, red, white, and mixed combinations against green backgrounds exist as a genuine biological feature of these forest-understory plants, not a cultivated quirk.
The intensity of these patterns is directly tied to light. In the diffused bright light of the forest understory, the pigmentation is most vivid. In deep shade, the plant reduces non-photosynthetic pigment to maximize light capture and the spots fade toward green. In intense direct sun, the delicate leaf tissue scorches and bleaches. Indoor care essentially recreates the forest understory light quality in a pot.
The plant’s natural short lifecycle as an annual-to-biennial also explains why regular propagation from cuttings is part of long-term polka dot plant management rather than an emergency response to plant failure.
Tip 1: Match Light to the Variety’s Color Intensity
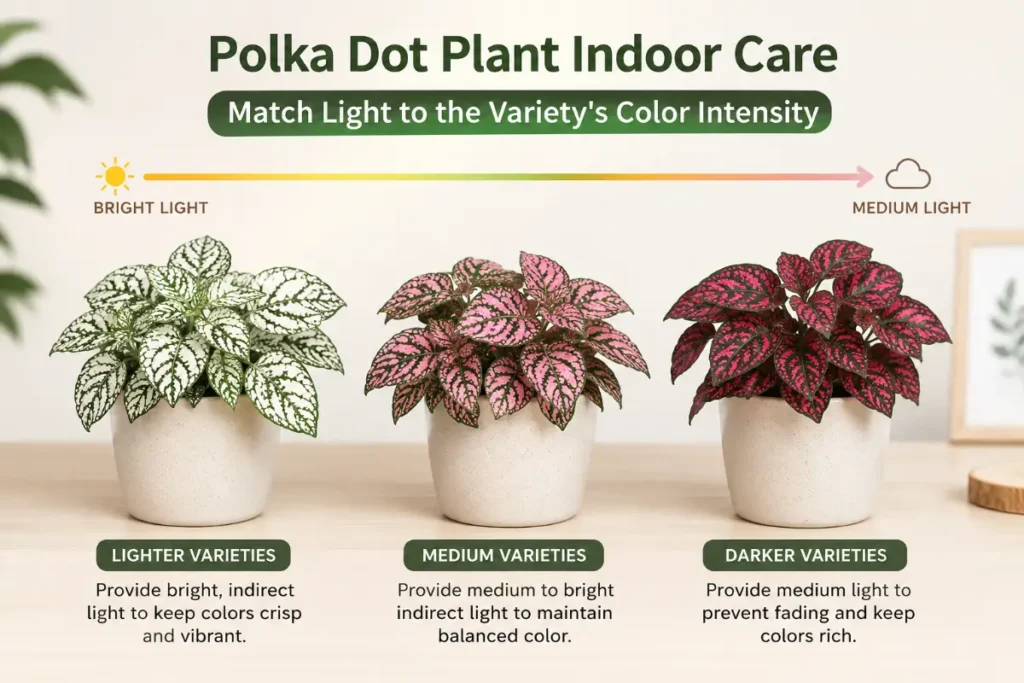
Not all polka dot plant varieties have the same light requirements. The more intensely colored the variety, the more light it needs to maintain that color indoors.
Deep pink and red varieties like Neon Robusta require the most light of any common variety. Without bright indirect light from an east or south-facing window, these varieties revert toward pale pink and eventually green within weeks. They are best positioned where they receive morning sun or where bright indirect light is strong throughout the day.
White and cream varieties like White Splash maintain their color better in medium indirect light than deep pink varieties but still show green reversion in very low light conditions. A north-facing window with good ambient light is marginal for white varieties but workable.
Mixed and tricolor varieties fall between these two extremes. They maintain reasonable color in medium bright indirect light but show their best coloring in brighter conditions.
The practical test: Stand at your plant’s position and look at a newspaper. If you can read it comfortably without squinting, light is adequate for green varieties. If you can read it easily with clear sharp text, light is adequate for most pink and white varieties. If you need to move to brighter light to read comfortably, the position is too dim for any colorful polka dot variety.
Tip 2: Water Before the Droop, Not After
Polka dot plant has a distinctive dramatic wilting response to underwatering that recovers quickly after watering. This makes it an easy plant to read but plants that wilt repeatedly before watering experience cumulative stress that shortens their productive life and reduces color intensity.
The better approach: Water when the top inch of soil feels dry rather than waiting for the visible wilt signal. This proactive approach prevents the stress cycle that repeated wilting creates without the overwatering that causes root rot.
During summer in a bright position: The top inch dries out every five to six days for most pot sizes. Check every three to four days and water as soon as dryness is confirmed rather than waiting another day.
During winter or in lower light: Water demand drops as growth slows. Every seven to ten days is more typical. Continuing summer watering frequency through winter is one of the most common causes of root rot in polka dot plants.
Water quality note: Like many tropical plants, polka dot plant benefits from filtered or distilled water in areas with heavily chlorinated or fluoridated tap water. Brown tips that appear despite adequate humidity often trace to tap water quality rather than any other care issue.
Tip 3: Prune on a Schedule, Not When It Looks Bad
Most plant owners prune polka dot plants reactively when they notice legginess or sparse growth that has already become obvious. By this point, significant recovery pruning is needed rather than the simple maintenance pinching that prevents the problem from developing.
Establishing a pruning schedule: Mark your calendar for the first and third week of every month through the growing season (March through September). On each of those dates, pinch the tip of every stem back to just above the second or third leaf node below the tip. This takes five minutes for a standard plant and prevents the stem elongation that begins the decline toward legginess.
The branching response: Each pinched tip produces two new branches from the node below the cut within seven to ten days. Over three to four pruning sessions this doubling effect creates a dramatically fuller plant than one that has never been pruned. A plant pinched consistently from its first month in your care develops into a dense, colorful mound rather than the sparse collection of long stems that unpruned plants inevitably become.
When to skip pruning: During late fall and winter when growth significantly slows, pruning can be reduced to once every six to eight weeks since the branching response is slower in lower light conditions. Pruning too aggressively during winter when recovery growth is slow can temporarily leave the plant looking sparse.
Tip 4: Humidity Is a Difference-Maker for Leaf Quality
Polka dot plant originates in humid forest environments and its delicate spotted leaves show humidity stress more quickly than thick-leaved tropical plants. The difference between a plant in 35% humidity (typical of heated winter homes) and 60% humidity is visible in leaf texture and edge condition within weeks.
Signs of chronic low humidity: Brown, crispy edges that advance inward from the margins. Leaf tips that curl upward slightly. An overall slightly dull appearance to the leaf surface rather than the slight sheen that well-hydrated polka dot leaves maintain. Faster wilting between waterings as the plant loses more moisture through its leaf surfaces in dry air.
Effective humidity management: A pebble tray with water beneath the pot provides the most low-maintenance humidity boost for a single plant. Fill the tray with pebbles deep enough that the pot sits above the water level and the drainage holes are not submerged. The water evaporates around the plant continuously as long as the tray stays filled.
A humidifier running nearby during winter heating season is more effective than a pebble tray for maintaining humidity above 55% consistently. Position it within three to four feet of the plant for direct benefit.
Grouping plants: Polka dot plant in a group of three to five tropical plants raises collective humidity through combined transpiration meaningfully compared to a single isolated plant. This is one reason why polka dot plants look better as part of a plant grouping than as solo specimens in dry indoor environments.
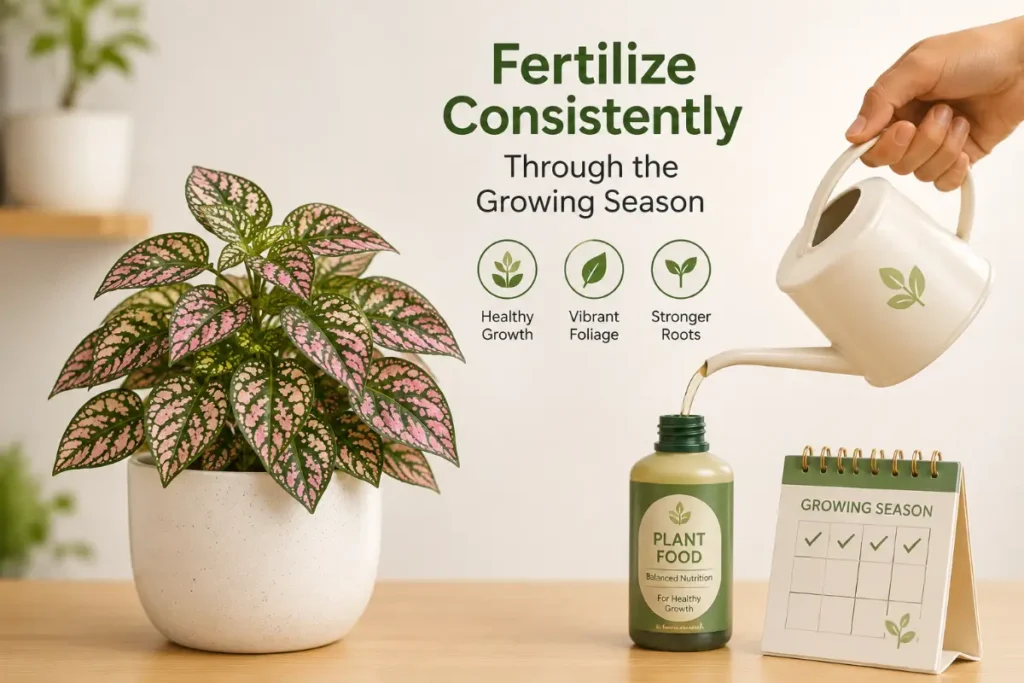
Tip 5: Fertilize Consistently Through the Growing Season
Polka dot plant’s vivid coloring and active growth through spring and summer require consistent nutritional support that many plant owners underestimate because the plant looks fine initially without it.
The visible difference: A plant consistently fertilized every two weeks through the growing season produces noticeably larger, more vividly colored leaves than an unfertilized control plant in identical light and water conditions. The color difference becomes apparent within four to six weeks of beginning a consistent fertilizing routine.
What fertilizer to use: A balanced liquid fertilizer at half the label rate suits polka dot plant’s modest requirements while providing consistent nutrition without the salt accumulation that full-rate applications create in the small pot volumes most polka dot plants occupy. Liquid formulations that include micronutrients maintain the overall health of the plant beyond the primary NPK support.
Organic options: Worm casting tea applied every two weeks provides gentle, burn-safe nutrition alongside the soil biology benefits that support the fine root systems of compact tropical plants. The gradual release and microbial benefit of worm casting tea produces sustained improvement in plant vigor that continues building through the season. For the complete worm casting application guide for compact tropical plants, worm castings for indoor plants covers every method with specific timing guidance.
When to stop: Reduce to monthly feeding in October as day length shortens and growth slows. Stop entirely from November through February when most polka dot plants significantly reduce their growth rate in response to lower light levels.
Tip 6: Start Fresh Cuttings Before the Parent Plant Declines
This tip distinguishes the polka dot plant owners who always have vibrant, young-looking plants from those who nurse aging specimens past their attractive prime. Polka dot plants are short-lived in the sense that they naturally complete their lifecycle from vegetative growth to flowering and decline within one to two years. Treating this natural lifecycle as a permanent defeat misses the simplest solution: starting fresh cuttings from the best material of the current plant before it ages beyond its most attractive phase.
When to take cuttings: When the parent plant is still in good health and producing vigorous growth, typically after one to one and a half years in your care. Do not wait until the plant has flowered and declined significantly. The best cuttings come from vigorous, actively growing parent plants.
How to take cuttings: Cut stem sections four to six inches long from the freshest growth, making cuts just below a leaf node. Remove leaves from the bottom two inches of each cutting. Place in a glass of water with the cut end submerged and change water every two to three days. Roots develop within two to three weeks. Pot into fresh slightly moist potting mix once roots are one inch or longer.
Maintaining a perpetual supply: Starting cuttings every twelve months ensures you always have a young, compact, vibrantly colored plant approaching its prime rather than an aging specimen declining past it. The cycle of parent plant to cuttings is the most practical approach to long-term polka dot plant management and costs nothing beyond a small amount of fresh potting mix per generation.
Tip 7: Manage Flowering to Extend the Vegetative Phase
Polka dot plants flower naturally as part of their life cycle transition and the flowering signals a shift from the attractive vegetative phase toward the reproductive phase that precedes plant decline. Managing flowering by removing flower spikes immediately prolongs the vibrant vegetative phase significantly.
Identifying flower spikes: Flower spikes on polka dot plant are elongated stems rising above the leaf canopy bearing small lavender to purple flowers. They look distinctly different from the regular leaf-bearing stems and are easy to identify once you know what to look for. They first appear when the plant has been in vegetative growth for several months to a year and has experienced the right conditions to trigger reproductive mode.
Removing them: Pinch flower spikes at their base where they emerge from the stem as soon as they are visible. The earlier the removal, the more energy the plant saves by not investing in reproductive tissue. Weekly inspection during the growing season allows early detection before spikes develop significantly.
What happens if you allow flowering: The plant completes its reproductive cycle, often losing leaf density and color vibrancy as energy shifts to flower and seed production. After seed set the plant typically declines rapidly. Removing flower spikes promptly interrupts this cycle and redirects energy back to the vegetative growth that keeps the plant looking its best.
For additional context on polka dot plant care as an overall care program including variety selection and companion planting in mixed tropical displays, polka dot plant care indoor covers the complete foundational care approach that all seven tips in this guide build upon.
Seasonal Polka Dot Plant Care Calendar
Spring (March through May): Resume biweekly fertilizing as day length increases. Begin the monthly pruning schedule. Check for any pests that established during lower-light winter months. Consider starting fresh cuttings from the most vigorous growth if the parent plant is more than twelve months old.
Summer (June through August): Full biweekly fertilizing and fortnightly pruning schedule. Watch for spider mites as temperatures rise and indoor humidity drops with air conditioning. Monitor for early flower spike development and remove promptly.
Fall (September through November): Reduce fertilizing to monthly. Continue pruning to maintain shape but expect slightly slower branching response. Move away from cold windowpanes as outdoor temperatures drop. Increase humidity monitoring as heating systems activate and indoor air dries.
Winter (December through February): Stop fertilizing or reduce to once every six to eight weeks. Water less frequently as growth slows. Maintain humidity since winter heating drops indoor humidity significantly. Remove any flower spikes that appear. Assess parent plant age and consider taking cuttings if the plant is approaching eighteen months of age.
Polka Dot Plant Pest Management
Polka dot plant attracts a few specific pest species that take advantage of its delicate leaf surfaces and the humid conditions it prefers. Knowing what to watch for and how to respond keeps pest problems from shortening the plant’s already-limited productive lifespan.
Spider mites are the most common pest on indoor polka dot plants and are particularly damaging because their feeding on the delicate pigmented leaf tissue creates visible stippling that reduces the color quality that makes the plant worth growing. In dry winter indoor air when mite populations surge, regular inspection of the undersides of leaves catches problems before they become severe. A fine mist of water dislodging mites from leaf surfaces followed by neem oil spray every seven days for three weeks handles active infestations. Maintaining humidity above 50% prevents establishment since mites struggle in consistently humid conditions.
Fungus gnats occasionally affect the consistently moist soil that polka dot plants need. Allowing the top inch to dry slightly more than usual between waterings reduces gnat breeding opportunity without stressing the plant. Yellow sticky traps catch adult gnats before they lay eggs. Hydrogen peroxide drench at one part 3% hydrogen peroxide to four parts water applied as a regular watering kills larvae in the soil. For the complete guide to every soil-dwelling pest that affects tropical houseplants with consistent moisture preferences, bugs in indoor plant soil covers every species with specific treatment guidance applicable to polka dot plant soil conditions.
Conclusion
Polka dot plant indoor care at the expert level is about understanding the lifecycle and working proactively with it rather than reactively against it. Bright indirect light matched to your specific variety’s color intensity. Watering before the droop rather than after. Scheduled pruning every two to four weeks rather than reactive pruning after decline has occurred. Consistent humidity above 50%. Regular biweekly fertilizing through the growing season. Fresh cuttings started before the parent plant ages past its prime. And flower spike removal as soon as they appear.
Those seven practices keep polka dot plant in its most vibrant, compact, colorful form through multiple cycles of parent plant and cutting generations. The plant’s natural short lifecycle becomes an asset rather than a frustration once you treat propagation as a routine part of care rather than a sign of failure.
Frequently Asked Questions
Why does my polka dot plant keep getting leggy despite regular pruning?
If the plant continues getting leggy despite pruning, insufficient light is the primary cause. Etiolation (stem elongation toward light) overrides the compact branching response that pruning stimulates when light is inadequate. Pruning combined with adequate bright indirect light produces compact bushy growth. Pruning without adequate light produces somewhat less leggy growth but cannot fully compensate for the fundamental light deficiency. Improve light first, then continue the pruning schedule.
How do I know when my polka dot plant needs water?
Check the top inch of soil with your finger. When it feels dry, water thoroughly. Do not wait for the plant to wilt before watering since repeated wilting stress accelerates aging and reduces color intensity. In bright summer conditions check every three to four days and water as soon as the top inch is dry. In winter or lower light check every five to seven days.
What is the best fertilizer for polka dot plant color?
A balanced liquid fertilizer at half the label rate applied every two weeks through spring and summer maintains the best combination of growth vigor and color intensity. Very high-nitrogen formulas drive leafy green growth that can dilute the colored variegation in some varieties. A balanced or moderately nitrogen formula with micronutrients included supports both growth and the pigmentation that makes polka dot plants distinctive.
Can polka dot plants grow outside in summer?
Yes, in warm weather when nighttime temperatures stay above 60 degrees Fahrenheit. Place in partial shade outdoors since direct full sun bleaches and scorches the delicate leaves. Outdoor conditions with natural airflow, higher humidity, and appropriate light produce particularly vigorous growth. Inspect thoroughly for pests before bringing back indoors in fall. The outdoor summer period produces noticeably stronger plants heading into the indoor winter season.
How do I know when to replace my polka dot plant with new cuttings?
When the plant has been in your care for more than eighteen months and multiple pruning sessions have not restored compact bushy growth, when color intensity has not recovered despite improved light, or when the plant has flowered despite flower spike removal, it is time to start fresh cuttings from the most vigorous remaining growth. A one to two year lifecycle from vibrant juvenile plant to aged flowering specimen is normal and not a care failure. Propagation is the solution.
Why are the spots on my polka dot plant getting smaller?
Spots that appear to be getting smaller are most often showing as the proportion of colored area to green area on leaves is decreasing, which indicates the plant is reverting toward more green in response to insufficient light. Improve light conditions and new leaves will emerge with larger, more prominent spots. The already-green-reverted leaves will not recover their original spotting but new growth in better light shows full pattern intensity.