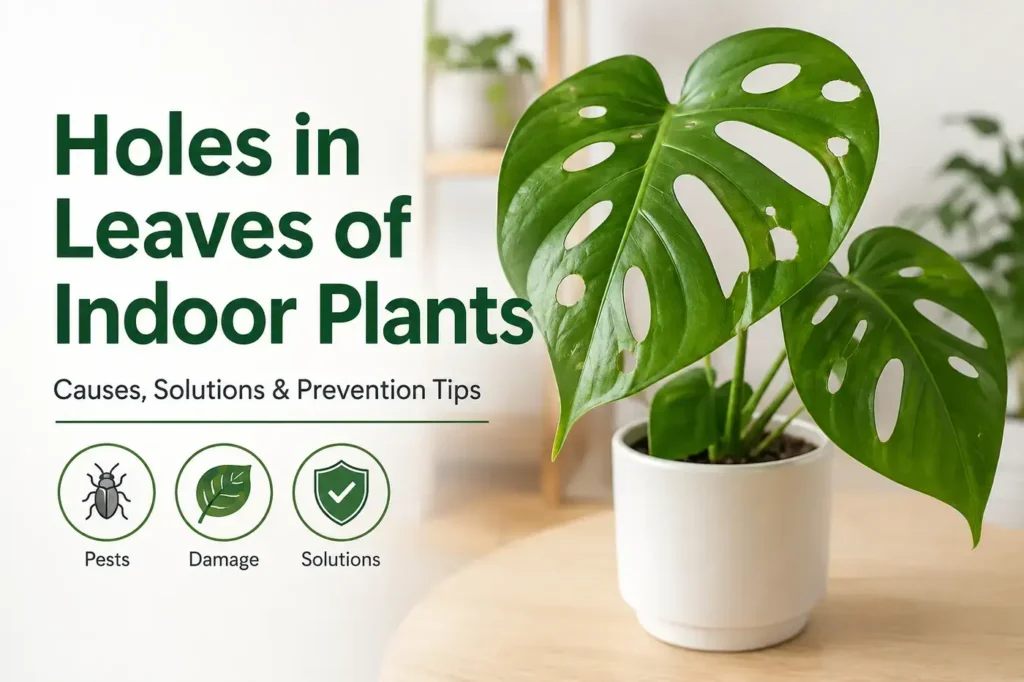
Holes in leaves of indoor plants are one of the most alarming things a plant owner can discover because visible damage to foliage signals that something is actively eating or destroying the plant you have been carefully tending. The challenge is that holes in indoor plant leaves have at least 9 distinct causes, and the right response depends entirely on identifying which cause is producing the damage on your specific plant. Treating a pest problem with a fungicide does nothing. Applying pesticide to physically damaged leaves wastes time and exposes your plant to unnecessary chemical stress. A hole caused by slug feeding requires a completely different approach from one caused by a bacterial infection or a too-close grow light.
This guide covers 9 causes of holes in indoor plant leaves, how to identify each cause accurately from the appearance and pattern of the damage, and exactly what to do to stop the damage and help the plant recover.
Quick Answer
Holes in indoor plant leaves are most commonly caused by caterpillars or earwigs feeding on foliage, slug or snail damage, bacterial leaf spot infections, fungal disease, physical damage from handling, sunburn from grow lights placed too close, spray burn from pesticides or fertilizer applied too heavily, leafminer insects tunneling through leaf tissue, and thrips rasping leaf surfaces until the damaged tissue falls out. Identifying the cause requires examining the pattern, location, and edges of the holes alongside any other symptoms present on the plant.
Why Identifying the Cause Matters Before Treating
A hole in a leaf is a symptom with multiple possible causes. The appearance and pattern of that hole tells you more about what caused it than any other single diagnostic tool available without laboratory analysis.
Pest feeding holes have irregular edges and often show a progression from partial feeding to full punctures. Bacterial and fungal disease holes start as spots or lesions that rot through the leaf, leaving holes with water-soaked, yellow, or brown margins. Physical damage produces clean-edged tears or punctures with no additional discoloration. Sunburn or spray burn creates holes with bleached, papery, or crispy edges concentrated on the leaf areas exposed to the damaging element.
Looking at these characteristics before reaching for any product tells you whether you need a pesticide, a fungicide, a change in care conditions, or nothing at all.
9 Causes of Holes in Indoor Plant Leaves
Cause 1: Caterpillars and Earwigs
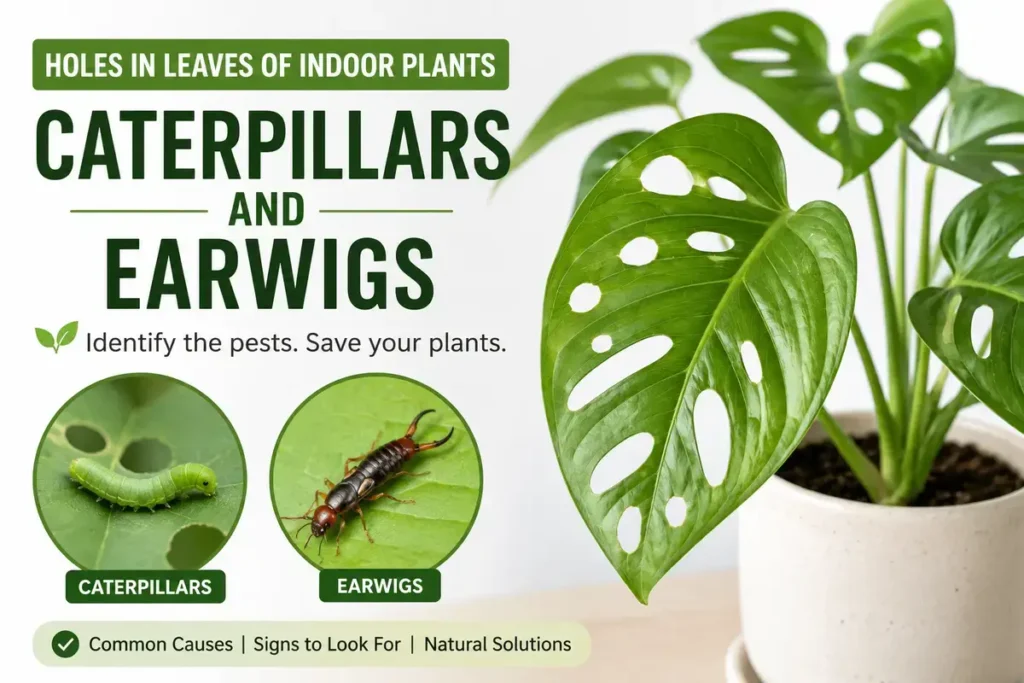
Caterpillars and earwigs are the most aggressive leaf-eating insects found on indoor plants and produce the largest, most irregularly shaped holes of any pest on this list. Both feed primarily at night, which is why you often find significant new damage in the morning without having seen any insects during daytime inspections.
Caterpillars produce holes with irregular, chewed edges that follow the pattern of the caterpillar’s feeding path across the leaf surface. Damage often starts at leaf edges and works inward. You may find dark frass (droppings) on or near damaged leaves, which confirms caterpillar feeding specifically.
Earwigs produce similar irregular holes but tend to feed in a less directional pattern. They shelter in moist, dark hiding spots during the day including inside pot drainage holes, under pot bases, and in the densely foliated centers of plants.
How to confirm: Inspect plants after dark with a flashlight. Both caterpillars and earwigs are actively feeding at night and will be visible on leaves at that time. Check under pots and in soil surface debris for earwigs during daytime.
Treatment: Hand-pick caterpillars and earwigs during nighttime inspections and dispose of them away from plants. For caterpillar infestations that are too numerous for hand-picking, spinosad-based spray (Captain Jack’s Deadbug Brew) applied to all leaf surfaces is the most effective organic treatment. For earwigs, a rolled damp newspaper placed near plants overnight attracts them into a shelter you can then dispose of in the morning. For the full range of spray treatments and when spinosad is the right choice over soap or neem oil, plant bug spray indoor covers every product with pest-matched guidance.
Cause 2: Slug and Snail Damage
Slugs and snails are less commonly encountered on indoor plants than on garden plants but do find their way inside on new plants moved indoors from outdoor positions, in contaminated potting mix, and occasionally through open windows and doors near ground level during wet weather.
Slug and snail holes are irregular in shape and often have smooth rather than jagged edges since slugs rasp rather than bite leaf tissue. The most reliable confirmation is the silver mucus trail they leave on leaves and surrounding surfaces, which is visible even after the slug has moved on. Damage typically appears on the lower leaves of plants close to the soil surface since slugs travel across soil and up plant stems.
How to confirm: Check for the distinctive silver slime trails on leaves and surrounding pot surfaces. Inspect after dark since slugs and snails feed primarily at night. Examine soil surfaces for slug eggs, which appear as small clusters of translucent round spheres.
Treatment: Hand-pick slugs and snails at night when they are actively feeding. Place a small dish of beer at soil level near affected plants, which attracts and drowns slugs overnight. Apply a ring of food-grade diatomaceous earth around the pot base since slugs cannot cross the sharp particles without damage. For plants moved indoors from outside, inspect soil and foliage thoroughly before bringing them in and consider repotting into fresh sterile mix to remove any eggs or juvenile slugs in the existing soil.
Cause 3: Bacterial Leaf Spot
Bacterial leaf spot diseases are caused by bacterial infections that enter leaf tissue through stomata, wounds, or water splash and kill cells as they spread. The progression from initial infection to holes in the leaf typically follows a consistent pattern: small water-soaked spots appear first, then turn yellow or brown as the infected tissue dies, and finally the dead tissue dries out, shrinks, and falls away from the surrounding healthy leaf, leaving holes with yellow or brown margins.
This progression from spot to hole with distinctive colored margins is the key identification feature that distinguishes bacterial leaf spot from pest feeding damage.
How to confirm: Look for yellow halos or brown margins surrounding the holes. Examine nearby leaves for early-stage water-soaked spots or yellowing lesions that have not yet progressed to holes. Check whether damage is more concentrated on leaves that receive water splash during watering, since water is the primary vehicle for bacterial spread between leaves.
Treatment: Remove and dispose of all affected leaves immediately to prevent bacterial spread through water splash to healthy leaves. Improve air circulation around the plant by increasing spacing between plants or running a small fan nearby since stagnant humid air promotes bacterial leaf spot development and spread. Water at soil level rather than overhead to eliminate the water splash that carries bacteria from infected to healthy leaves. Apply copper-based bactericide if the infection is progressing rapidly across the plant despite the above measures. Copper fungicide products available at garden centers work against bacterial infections as well as fungal ones at the label-recommended rates.
Cause 4: Fungal Disease
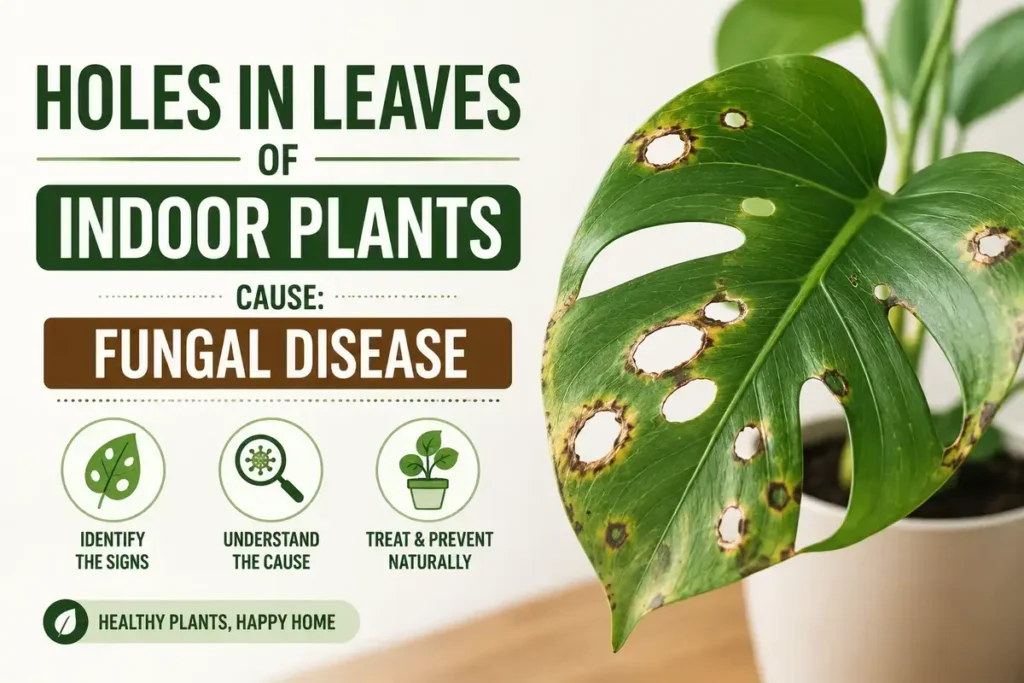
Fungal leaf diseases including anthracnose, cercospora leaf spot, and septoria leaf spot follow a similar visible progression to bacterial leaf spot but have slightly different characteristics that help distinguish them. Fungal holes typically have more defined, often darker margins than bacterial ones and may show concentric rings or darker centers in the lesion before the tissue falls away. Small black or brown fruiting bodies (the fungal reproductive structures) are sometimes visible on the dead tissue with a magnifying glass.
Fungal diseases thrive in high humidity, poor air circulation, and consistently wet leaf surfaces, which makes indoor plant conditions during winter heating seasons particularly conducive to their spread.
How to confirm: Look for concentric rings in lesions, dark margins around holes, or tiny black dots on dead leaf tissue that indicate fungal fruiting bodies. Check whether damage is more concentrated on the lower leaves where humidity tends to be higher and air circulation lower.
Treatment: Remove all affected leaves and dispose of them away from the plant. Avoid overhead watering and improve air circulation. Apply a copper-based or sulfur-based fungicide according to label instructions. Neem oil spray applied to all leaf surfaces every 7 days has antifungal properties alongside its insecticidal action, making it useful for plants dealing with both pest and disease pressure simultaneously. For neem oil application guidance that covers both pest and disease situations, insecticidal soap for indoor plants covers how soap and neem oil combine most effectively for multi-problem situations.
Cause 5: Physical Damage
Physical damage from handling, brushing against other objects, pet activity, or children is a frequently overlooked cause of holes in indoor plant leaves. Physical damage holes have clean, often straight or smoothly curved edges with no discoloration, water-soaking, or progression over time. They appear suddenly rather than developing from a spot or lesion. They do not spread to new leaves.
Large-leaved plants like monstera, peace lily, and bird of paradise are particularly prone to physical damage holes because their large leaf surface area creates more opportunity for contact damage during normal handling and plant movement.
How to confirm: No pest activity visible on the plant. No disease symptoms on surrounding leaves. Holes appeared suddenly after the plant was moved, repotted, or in an area with regular pet or foot traffic. Edges are clean rather than chewed or rotted.
Treatment: No pest or disease treatment needed. Physical damage holes do not heal and the affected leaf area will not recover, but the hole does not spread and the rest of the plant is unaffected. Improve the plant’s position to reduce future contact damage. Clean cuts of badly damaged leaves at their base improve the plant’s appearance without harming growth.
Cause 6: Sunburn and Grow Light Burn
Grow lights placed too close to plant foliage or sudden exposure to intense direct sunlight for plants accustomed to lower light levels cause cell death in the exposed tissue that eventually dries out and creates holes with a distinctive bleached, papery, or crispy appearance.
Grow light burn holes are typically concentrated on the uppermost leaves closest to the light source. Sunburn holes from direct sun exposure through windows are concentrated on the side of the plant facing the light source. The surrounding tissue often shows yellowing or bleaching before the dead tissue falls away.
How to confirm: Holes concentrated on leaves closest to the light source or window. Bleached or papery edges rather than chewed or rotted margins. No pest activity visible. Damage worsened or appeared after a light was repositioned closer or the plant was moved to a brighter location.
Treatment: Move the grow light further from the plant or reduce its daily run time. Transition plants acclimatizing to higher light gradually rather than moving them directly from low to high light intensity. Existing burn holes will not heal but new damage stops once the light intensity is corrected. Remove severely damaged leaves at their base to improve plant appearance and redirect the plant’s energy to healthy foliage.
Cause 7: Spray and Fertilizer Burn
Insecticidal sprays, fertilizer solutions applied at excessive concentration, and foliar feeding products applied during bright light conditions or to drought-stressed plants can cause cell death in leaf tissue through chemical burn. The affected tissue dries out and falls away, leaving holes with crispy, bleached edges similar to light burn but distributed across the leaf surface based on where the spray or solution contacted the leaf rather than based on proximity to a light source.
How to confirm: Holes appeared within 24 to 48 hours of a spray or fertilizer application. Edges are crispy and bleached rather than chewed or water-soaked. Damage corresponds to spray contact patterns rather than pest feeding routes across the leaf.
Treatment: Rinse the plant thoroughly with plain water immediately if the spray or fertilizer application was recent. Dilute future spray applications to the correct concentration and test on a single leaf before full plant application. Avoid applying any spray to drought-stressed plants or during direct bright light conditions. For guidance on correct soap spray dilutions that minimize burn risk on sensitive plants, how do you get rid of aphids on indoor plants covers the application technique and dilution rates that minimize plant damage risk across all spray types.
Cause 8: Leafminers
Leafminers are the larvae of various fly, moth, and beetle species that hatch inside leaf tissue and tunnel through it as they feed, creating distinctive winding, blister-like trails in the leaf surface. When leafminer tunneling reaches the leaf edge or a tunnel collapses, the result can appear as holes in the leaf surface rather than the more recognizable serpentine trails visible when tunneling is still active in the interior of the leaf.
Leafminer damage is most easily identified from the tunneling trails rather than from the holes themselves. These trails appear as pale, winding lines or blister-like patches visible through the upper leaf surface where the green tissue has been consumed.
How to confirm: Look for the characteristic serpentine tunnel trails visible through the leaf surface alongside any holes. Check whether any trails lead directly to the edge of a hole, which confirms the hole is the exit point of a completed tunnel rather than a feeding wound from an external pest.
Treatment: Remove and dispose of affected leaves immediately to eliminate larvae tunneling inside them. Neem oil spray applied to all leaf surfaces discourages egg-laying adults from treating the plant as an egg-laying site and disrupts larval development in early-stage infestations. Spinosad spray is the most effective organic treatment for active leafminer infestations since it targets the larvae through ingestion as they tunnel through treated tissue.
Cause 9: Thrips Damage Progressing to Holes
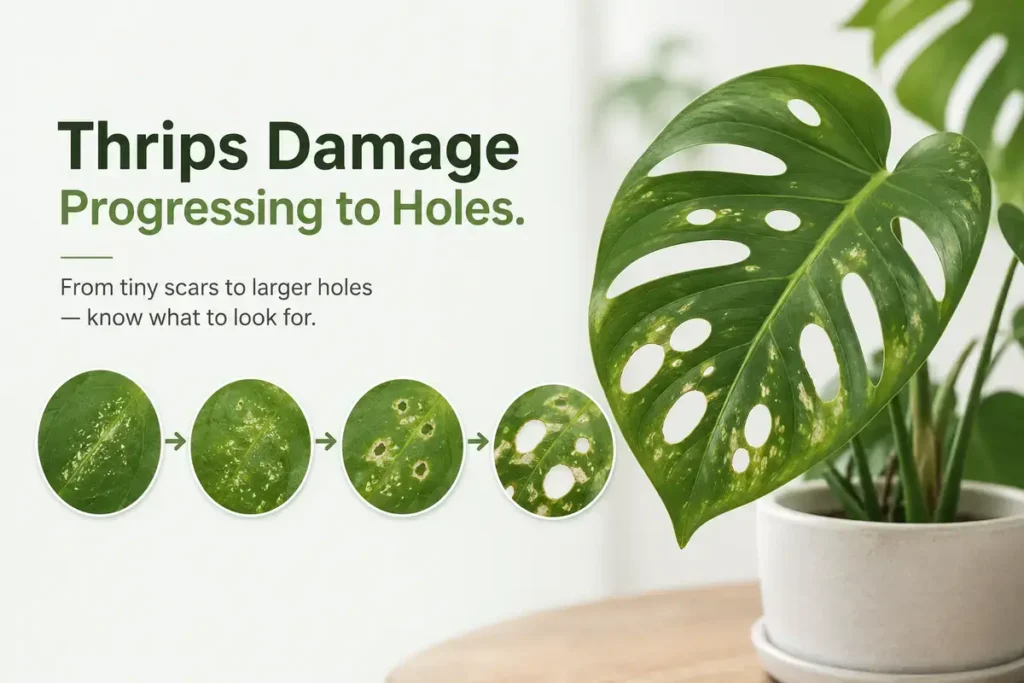
Thrips cause damage through a rasping feeding method that scrapes the surface of leaf tissue and consumes the cell contents, leaving a silvery, streaked appearance where feeding has occurred. In advanced infestations or on thin-leaved plant species, the tissue damaged by thrips feeding dries out and falls away completely, leaving irregular holes with a papery or crispy appearance similar to spray burn but distributed in the streaked pattern characteristic of thrips feeding.
The presence of tiny black fecal spots on leaves alongside the holes is one of the most reliable confirming signs of thrips damage since the dots are a consistent byproduct of their feeding and remain visible even after the insects themselves have moved on.
How to confirm: Look for silvery or bronze streaking on surrounding leaf areas that have not yet progressed to holes. Check for tiny black dots on leaf surfaces. Examine with a magnifying glass for the tiny, fast-moving, slender insects that may still be present on leaves and flowers.
Treatment: Spinosad-based spray is the most effective organic treatment for thrips at every life stage including the soil-dwelling pupal stage that soap and neem oil cannot reach. Blue sticky traps are more effective than yellow ones for thrips specifically since the species shows stronger attraction to blue. Apply spinosad every 7 to 10 days for three weeks while using blue sticky traps continuously to catch adults between spray applications. For the full picture of how thrips damage compares to other pest damage on indoor plants and the complete treatment escalation, bugs in indoor plant soil and do indoor plants attract bugs both cover thrips identification and the conditions that make plants attractive to them in detail.
How to Diagnose the Cause of Holes in Your Plant’s Leaves
Work through these diagnostic questions in order when you find holes in your indoor plant leaves:
Are the hole edges chewed and irregular? Pest feeding from caterpillars, earwigs, slugs, or snails. Check for slime trails, frass, or visible insects at night.
Do the holes have yellow or brown margins, or did they start as spots before becoming holes? Bacterial or fungal disease. Look for water-soaked halos, concentric rings, or progression from surrounding lesions.
Are the edges clean and the holes appeared suddenly without any progression? Physical damage. No treatment needed.
Are the edges bleached, papery, or crispy and concentrated near a light source? Light or spray burn. Correct the light distance or spray concentration.
Are there silvery or bronze streaks alongside the holes with tiny black dots? Thrips. Use spinosad spray and blue sticky traps.
Are there winding pale trails in the leaf surface near the holes? Leafminers. Remove affected leaves and apply spinosad spray.
How to Help Plants Recover After Leaf Damage
Holes in leaves do not heal. Damaged tissue does not regenerate once it is gone. Recovery means stopping new damage from occurring and supporting the plant’s production of healthy new growth to replace what was lost.
Remove severely damaged leaves at their base since heavily damaged foliage contributes little to photosynthesis and diverts the plant’s resources from producing new healthy growth. Keep the plant well-watered and appropriately fertilized during the recovery period since adequate nutrition supports faster new growth production.
For pest-caused damage, complete the full treatment course before expecting significant new growth since continued pest pressure during treatment will damage new leaves as fast as they emerge. For disease-caused damage, ensure the environmental conditions that promoted disease development, primarily poor air circulation and overhead watering, are corrected before new growth appears so the new foliage does not immediately become infected.
Keeping plants well-nourished during and after any damage event significantly speeds recovery since a plant with adequate nutrition produces new growth faster and with stronger cell walls that are more resistant to both pest feeding and disease infection. For the natural fertilizer options that support recovery without the chemical overload that can add stress during an already challenging period, natural fertilizer for indoor plants covers the organic feeding options that support long-term plant health and recovery.
Conclusion
Holes in indoor plant leaves have 9 distinct causes ranging from caterpillar feeding through to grow light burn, and the right response is entirely different for each one. Examining the edges of the holes, the pattern of damage across the plant, and any secondary symptoms alongside the holes gives you enough information to identify the cause accurately in most cases without any specialized equipment.
Chewed irregular edges point to feeding pests requiring pesticide treatment. Yellow or brown margins progressing from spots point to bacterial or fungal disease requiring fungicide and environmental correction. Clean sudden holes with no other symptoms point to physical damage requiring nothing except position improvement. Bleached papery edges point to burn requiring care condition adjustment rather than any chemical response.
Identify accurately, respond to the actual cause, remove damaged leaves to redirect plant energy, correct any underlying care conditions that contributed to the problem, and support recovery with appropriate nutrition. That sequence resolves every cause of holes in indoor plant leaves more effectively than any single spray product applied without a confirmed diagnosis.
Frequently Asked Questions
What is eating the leaves of my indoor plants at night?
Caterpillars and earwigs are the most common nighttime leaf-eaters on indoor plants. Both feed primarily after dark and shelter in protected spots during the day. Slugs and snails also feed at night and leave the distinctive silver slime trail on leaves and surrounding surfaces. Inspect plants after dark with a flashlight to catch these pests actively feeding since daytime inspections often reveal the damage without finding the insect responsible for it.
Can holes in indoor plant leaves spread to other plants?
It depends on the cause. Holes from pest feeding can spread if the pest moves between plants or if winged adults lay eggs on neighboring plants. Bacterial and fungal disease can spread between plants through water splash during watering or through infected tools used on multiple plants. Physical damage, light burn, and spray burn cannot spread to other plants since these are environmental rather than biological causes. Identifying the cause determines whether isolation and treatment of neighboring plants is necessary.
Do holes in leaves mean my plant is dying?
Not necessarily. A few holes on otherwise healthy foliage rarely signals a dying plant. The plant’s overall health, the rate at which new damage is appearing, and whether the cause has been identified and addressed are more meaningful indicators of plant health than the presence of holes in older leaves. A plant producing healthy new growth while showing old leaf damage is recovering well. A plant where new leaves emerge already damaged or fail to develop normally indicates ongoing active damage that needs more aggressive intervention.
Should I cut off leaves with holes in them?
Remove leaves that are severely damaged, more than 50% of the surface affected, since these contribute little to photosynthesis and the plant’s resources are better directed toward producing new healthy growth. Leave partially damaged leaves that still have significant healthy green surface area since they continue contributing to photosynthesis during the recovery period. Always use clean, sharp scissors or pruners to make cuts at the leaf base and clean tools between cuts if disease is the confirmed cause.
Why do my indoor plant leaves have tiny holes rather than large ones?
Tiny holes in indoor plant leaves most commonly indicate thrips damage where small sections of rasped tissue have dried and fallen away, early-stage leafminer damage where tunnel exit points create small punctures, or early bacterial leaf spot where small sections of infected tissue have dropped out. Very tiny holes in a regular pattern sometimes indicate insect eggs that have hatched, with the emerging larvae creating small punctures as they enter or exit the leaf. Examining the surrounding leaf tissue closely for associated symptoms narrows down which of these causes is responsible.
How do I prevent holes from appearing in my indoor plant leaves?
Preventing pest-caused holes requires regular weekly inspection of leaf undersides and new growth to catch infestations before they cause significant damage, quarantining new plants for one week before introducing them to your collection, and maintaining plants in good health since stressed plants attract pest species preferentially. Ensuring good air circulation around plants, and avoiding overcrowding that creates the humid stagnant air conditions where bacterial and fungal diseases spread. Preventing physical damage requires thoughtful plant placement away from high-traffic areas, pet activity, and locations where they are regularly brushed during daily household movement.