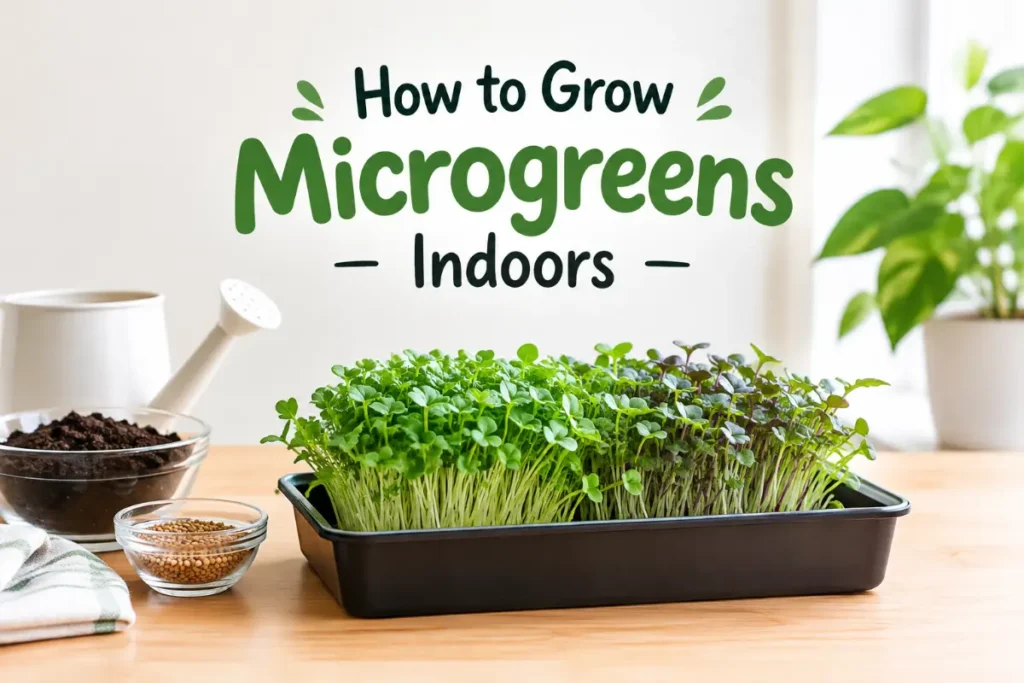
How to grow microgreens indoors is the fastest-return food growing project available indoors, with the first harvest possible seven to fourteen days after sowing depending on the variety. No other indoor food crop produces edible results this quickly. Microgreens are seedlings harvested at the first true leaf stage before they develop into full plants, and at that stage they pack a concentrated nutritional punch alongside flavors that range from mild and grassy to spicy, peppery, and intensely aromatic depending on the variety.
The equipment requirements are minimal compared to every other indoor food growing method in this cluster. No grow lights are strictly necessary for many varieties, no containers larger than a standard cafeteria tray, and no special soil preparation. Microgreens are the most accessible entry point to indoor food growing for anyone who has not grown food indoors before.
Quick Answer
To grow microgreens indoors: fill a shallow tray with one to two inches of potting mix or a dedicated microgreen growing medium. Sow seeds densely across the entire surface. Cover with a thin layer of soil or a second tray placed on top for the first three to five days to maintain darkness and moisture during germination. Move to bright indirect light or a south-facing windowsill once sprouts are visible. Water gently by misting the surface or bottom-watering through drainage holes. Harvest with scissors when seedlings reach one to three inches with their first true leaves visible, typically seven to fourteen days after sowing.
Understanding Microgreens
Microgreens are not sprouts (germinated seeds eaten with their root and seed coat) and not baby greens (more developed seedlings grown for several weeks). They occupy the specific developmental stage between full germination and the first true leaf growth, typically seven to twenty-one days depending on the variety.
At this stage the seedling contains the concentrated nutritional reserves of the seed alongside the beginning of photosynthetic nutrient production from its first leaves. Multiple studies have documented that microgreens contain significantly higher concentrations of vitamins, minerals, and antioxidants per gram than the mature plants they would develop into, making them one of the most nutritionally dense foods available from any kitchen growing method.
The flavor range: Different microgreen varieties produce dramatically different flavors that make them versatile as toppings, additions to salads, garnishes, and ingredients in their own right. Pea shoots are mild, sweet, and grassy. Sunflower is nutty and substantial. Radish is spicy and peppery. Basil microgreens are intensely aromatic. Beet microgreens are earthy with a hint of sweetness. Corn shoots are delicately sweet. The variety of flavor experiences available from a single windowsill operation is greater than most small outdoor gardens provide.
Step 1: Choose Your Varieties
Variety selection for microgreens is primarily about flavor preference, growing speed, and whether the variety is a good fit for beginner growers. The following categories cover the range from easiest and fastest to more interesting and slower.
Beginner varieties (fastest, most reliable):
Radish: The fastest-growing common microgreen, ready in five to seven days. Distinctly spicy and peppery flavor that enhances any salad or avocado toast. Red and daikon radish varieties produce attractive colored stems. One of the most reliable microgreens for first-time growers.
Mustard: Ready in six to eight days. Strong, spicy, mustard flavor. Bright green with purple-stemmed varieties providing visual interest. Good for growers who enjoy assertive flavors.
Pea shoots: Ready in eight to twelve days. Mild, sweet, grassy flavor that works with almost any dish. One of the most universally appealing microgreen flavors for people new to growing and eating them.
Sunflower: Ready in ten to fourteen days. Nutty, substantial flavor with thick, substantial stems. One of the most visually impressive and most satisfying microgreens to grow and eat.
More interesting varieties for experienced growers:
Beet: Ready in ten to fourteen days. Striking deep red stems with green leaves. Earthy, slightly sweet flavor. Requires attention to moisture since seeds can mold if overwatered during germination.
Basil: Ready in twelve to sixteen days. Intensely aromatic. Requires warmer germination temperatures than most varieties (above 70 degrees). Reward of fresh basil flavor from a single tray makes the extra care worthwhile.
Corn shoots: Ready in twelve to sixteen days. Delicately sweet, very tender. Unusual and visually distinctive. More expensive seed than most varieties.
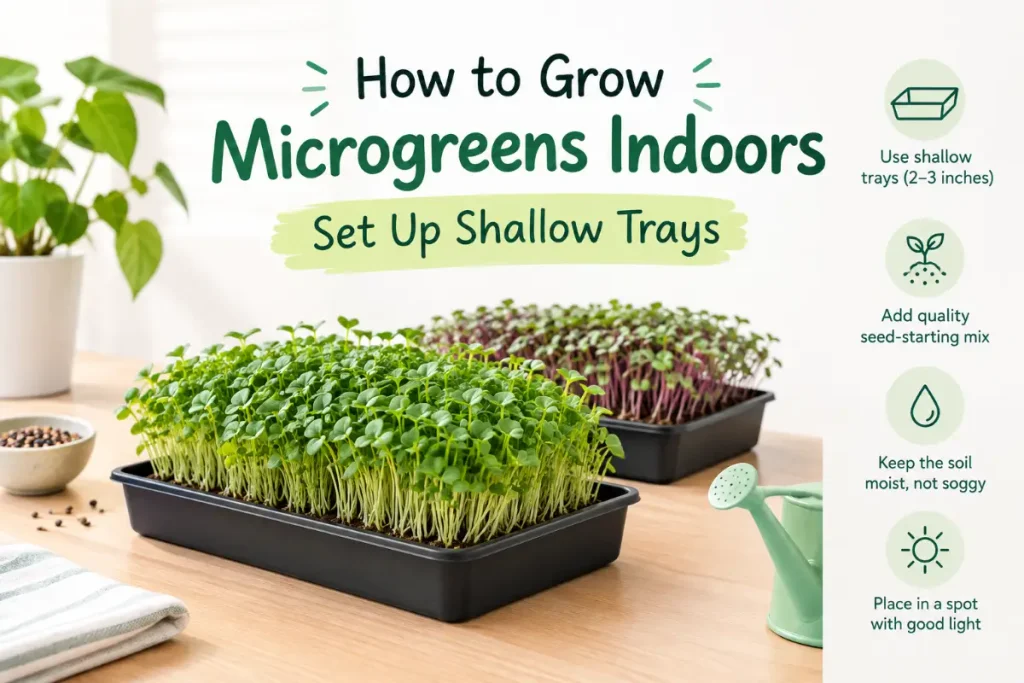
Step 2: Set Up Shallow Trays
Microgreens require less growing depth than any other food crop in this cluster. The seed itself provides the initial energy for germination and the first leaf development, meaning the roots only need to anchor the seedling rather than sourcing nutrients from depth.
Tray selection: Standard 10-by-20-inch seedling trays (the size used in commercial horticulture) are the most economical and most practical microgreen growing containers. These shallow trays with and without drainage holes are used together: a tray with holes sits inside a tray without holes for bottom watering.
Soil depth: One to two inches of growing medium is sufficient. More depth wastes growing medium without benefit.
Growing medium options:
Standard potting mix: Works well and is the most accessible option for home growers. The nutrient content in standard potting mix is more than microgreens need but does not harm them.
Dedicated microgreen growing medium: Specialty microgreen mixes or compressed coco coir pucks provide a cleaner growing medium with lower nutrient content that suits the specific needs of microgreens better than nutrient-rich standard potting mix. These are worth the additional cost for growers producing microgreens regularly.
Coco coir alone: Compressed coco coir blocks expanded with water provide an excellent, pathogen-reduced growing medium at low cost. Works well for most microgreen varieties and produces cleaner, easier-to-rinse microgreens than soil-based mixes.
Step 3: Sow Seeds Densely
Microgreens are sown at far higher density than mature plants. The goal is a dense, even mat of seedlings rather than the spaced individual plants that would develop if allowed to grow to maturity.
Density: Cover the entire tray surface with seeds in a single even layer. Seeds can touch but should not pile on top of each other in thick clumps. The right density looks like you have sown far too many seeds compared to any other gardening context.
Pre-soaking larger seeds: Larger seeds including peas, sunflowers, beets, and corn benefit from soaking in clean water for six to twelve hours before sowing. This softens the seed coat and accelerates germination by one to two days. Small seeds including radish, mustard, and basil do not need pre-soaking.
Sowing technique: Scatter seeds evenly across the dampened soil surface. Press gently to ensure good seed-to-soil contact. Do not cover with soil for most small-seeded varieties. Larger seeded varieties including peas and sunflowers benefit from a thin covering layer of growing medium.
Step 4: Create Darkness for the First Three to Five Days
The blackout phase, placing a second tray upside down over the seeded tray or covering with a breathable cloth for the first three to five days, accelerates germination and produces longer, more uniformly developed stems compared to immediate light exposure.
Why darkness works: In darkness, seedlings grow toward any available light with the etiolation response that extends stems. In microgreen production this controlled etiolation produces the longer, more substantial stem length that makes microgreens more visually appealing and more useful as a garnish or salad ingredient. It also keeps humidity high around germinating seeds without the need for misting during this phase.
The transition to light: Once most seeds have germinated and are visible beneath the tray cover (lift to check after three to four days), remove the cover and move to light. The seedlings transition from pale or yellow to vibrant green within twenty-four to forty-eight hours of light exposure as chlorophyll develops.
Moisture during the blackout phase: The covered tray maintains humidity without additional watering for most of the germination period. Check after two to three days and mist lightly if the surface looks dry. Most varieties need no additional water during the three to five day blackout phase if the growing medium was thoroughly moistened before sowing.
Step 5: Provide Adequate Light
Microgreens are the most light-flexible food crop in this cluster. Many varieties produce acceptable results in bright window light without dedicated grow lighting, making them the most accessible indoor food crop for growers without grow light investment.
Window light: A south or east-facing window with bright indirect to some direct morning light produces good microgreens in most varieties. Growth is somewhat slower than under grow lights but the quality of flavor and nutrition is equivalent.
Grow lights: A modest grow light running twelve to fourteen hours daily produces faster, more uniform microgreen development than window light and allows microgreen growing in any room regardless of natural light access. Even a small grow light appropriate for a single ten-by-twenty-inch tray makes indoor microgreens practical year-round in any apartment.
Light duration: Microgreens do not need the sixteen-hour light periods that fruiting crops like tomatoes and peppers require. Twelve to fourteen hours of bright light daily produces the fastest, most vigorous microgreen development.
Rotating trays: For window-grown microgreens, rotate the tray one hundred eighty degrees daily so both sides receive equal light and the microgreens grow straight rather than leaning dramatically toward the window.
Step 6: Water Without Overwatering
Watering is the most technically specific aspect of microgreen growing because the dense seeding and shallow growing medium create conditions where both overwatering and underwatering cause problems faster than in any other indoor growing context.
The bottom-watering method: Pour water into the outer solid tray (without holes) so that the inner tray (with holes) sits in water that wicks upward through the growing medium. This is the most reliable watering method for microgreens since it moistens the medium evenly from below without wetting the seed surface and stems where mold establishes most readily.
Top watering technique: A fine mist spray bottle directed at the soil surface (not the seedling stems) provides moisture without the concentrated stream that can knock seedlings over or displace growing medium. Top water only when bottom watering is not possible.
Signs of overwatering: White fuzzy mold on the soil surface or at stem bases. This is the most common microgreen growing problem and indicates too much surface moisture. Improve air circulation, reduce watering frequency, and ensure the growing medium has drainage.
Signs of underwatering: Wilting seedlings that do not recover after being placed in light. Soil surface that is completely dry to the touch rather than just surface-dry. Water immediately when seedlings show wilting signs.
Step 7: Harvest at the Right Stage
Harvesting at the correct developmental stage produces the best flavor, texture, and nutritional density from each tray.
The right moment: When most seedlings have developed their first true leaves (the second set of leaves that emerge after the initial seed leaves or cotyledons) and reach one to three inches in height. This is typically seven to fourteen days after sowing depending on variety and temperature.
Harvesting technique: Using clean, sharp scissors, cut stems just above the soil surface in a single clean cut. Harvest the entire tray in one session rather than partial harvests since cut microgreens begin deteriorating immediately.
Washing: Rinse harvested microgreens in cool water and dry gently in a salad spinner or on paper towels. Excess moisture accelerates deterioration after harvest.
Storage: Store harvested microgreens in a loosely sealed container or bag in the refrigerator for five to seven days. Fresh microgreens taste significantly better eaten within one to two days of harvest.
Succession sowing: Start a new tray every seven to ten days to maintain a continuous supply of fresh microgreens rather than harvesting all trays at once and having a gap before the next crop is ready. Two to three trays at different stages provide weekly harvests without interruption.
For guidance on how microgreen growing complements the longer-cycle indoor food crops covered throughout this cluster — including the lettuce succession sowing approach that shares microgreens’ continuous rotation philosophy — how to grow lettuce indoors covers the complementary leafy green approach for growers who want both rapid microgreen harvests and ongoing cut-and-come-again lettuce production from adjacent growing spaces.
The Best Microgreen Varieties by Use
- For salads and bowls: Pea shoots, sunflower, mild mix blends, broccoli, and cabbage provide the mild, versatile flavors that suit everyday salad use without overpowering other ingredients.
- For spice and intensity: Radish, mustard, arugula, and wasabi radish provide the sharp, spicy, peppery flavors that elevate dishes where you want a punch rather than a mild green backdrop.
- For visual impact: Red cabbage, beet, amaranth, and red clover provide striking colors in deep red, purple, and pink that make any dish visually distinctive.
- For aromatic cooking applications: Basil, cilantro, dill, and fennel microgreens provide concentrated aromatic flavors that suit specific culinary applications where the full aromatic profile of the mature herb is wanted in a delicate, tender form.
Setting Up a Continuous Microgreen Operation
For growers who want a steady weekly supply of fresh microgreens rather than occasional batches, setting up a systematic rotation produces the most consistent results with the least effort per harvest.
The three-tray rotation: Maintain three ten-by-twenty-inch trays at staggered stages simultaneously. Tray 1 is in the blackout germination phase. Tray 2 is in the light growth phase. Tray 3 is ready to harvest or just harvested and being replaced. Each week, one tray is harvested, cleaned, refilled, and started as the new Tray 1. The cycle produces one tray of harvestable microgreens every seven to ten days without interruption.
Variety rotation: Rotating which variety occupies each successive tray provides flavor variety in each week’s harvest and prevents palate fatigue from eating the same microgreen continuously. A simple rotation of pea shoots, radish, and sunflower produces three distinctly different flavor experiences in a repeating three-week cycle.
Equipment investment for regular production: Two sets of ten-by-twenty-inch trays (with and without holes), a bag of coco coir, a range of microgreen seeds, a fine-nozzle watering can or misting bottle, and a salad spinner for rinsing harvests covers the complete equipment need for a continuous three-tray operation. The total equipment cost is under fifty dollars and the ongoing cost is primarily seed and growing medium replacement.
Commercial microgreen economics: High-quality microgreens sell for fifteen to twenty-five dollars per pound at farmers markets and specialty grocery stores in most US cities. A single well-managed ten-by-twenty-inch tray of sunflower or pea shoot microgreens produces four to eight ounces of harvestable greens per cycle. For growers interested in small-scale commercial production, microgreens represent one of the highest-return-per-square-foot growing operations available indoors with modest equipment and space requirements.
Microgreens Versus Sprouts: The Practical Differences
A common question from first-time microgreen growers concerns the difference between microgreens and sprouts, which share some visual similarity but are grown and consumed very differently.
Sprouts are seeds germinated entirely in water or in a jar with a mesh lid, eaten with their root system and seed coat still attached within three to five days of starting. They require no growing medium and very little space. The food safety concern specific to sprouts is that the warm, moist conditions of sprout production favor bacterial growth including E. coli and Salmonella, which is why commercially produced sprouts carry food safety warnings and why home-grown sprouts require careful attention to sanitation.
Microgreens grow in soil or growing medium, are harvested above the soil line leaving roots and medium behind, and the cut stems and leaves are rinsed before eating. The growing medium provides a physical separation between the edible portion and any soil contamination. This production method has significantly lower food safety risk than sprouts and is the recommended approach for home growers.
Which to grow: For speed and no growing medium required, sprouts are faster. For food safety, flavor variety, nutritional density, and the more refined culinary application that microgreens provide as a garnish, salad ingredient, and dish component, microgreens are the more versatile and more recommended choice for regular kitchen growing. For the complete guide to growing basil from seed indoors — which complements microgreen basil growing with the full-plant basil approach for growers who want both the instant harvest of basil microgreens and the ongoing mature plant production of established indoor basil, growing basil indoors covers every step from seed to continuous harvest.
Conclusion
How to grow microgreens indoors is the simplest, fastest, and most immediately rewarding of all indoor food growing projects. A first harvest in seven to fourteen days, minimal equipment, no grow lights required for many varieties, and nutritionally dense results that are genuinely superior to anything available from a grocery store in freshness and flavor make microgreens the ideal starting point for anyone new to indoor food growing and a continuous, practical source of fresh greens for experienced growers.
Sow densely in shallow trays. Maintain darkness for the first three to five days. Transition to bright window light or grow lights. Bottom water carefully. Harvest at the first true leaf stage. Succession sow every seven to ten days for uninterrupted weekly harvests. Those six practices produce the fastest and most consistently rewarding indoor food growing results available from any crop at any scale.
Frequently Asked Questions
How long do microgreens take to grow indoors?
Seven to fourteen days from sowing to first harvest for most common varieties at typical indoor temperatures of 65 to 75 degrees Fahrenheit. Radish is among the fastest at five to seven days. Sunflower typically takes ten to fourteen days. Basil and corn shoots take twelve to sixteen days. Temperature significantly affects speed: warmer conditions above 70 degrees produce faster germination and growth than cooler conditions below 65 degrees.
Do microgreens need a grow light?
Many common microgreen varieties grow acceptably in bright window light from a south or east-facing window without a dedicated grow light. Grow lights produce faster, more uniform results and allow microgreen growing in rooms without adequate natural light. For windowless spaces or for maximum year-round production consistency, a modest grow light running twelve to fourteen hours daily is the reliable solution.
Can I regrow microgreens after cutting?
Most microgreens do not regrow after cutting since they are harvested at the seedling stage before the plant has developed the secondary growing points from which regrowth would occur. Pea shoots are one exception that produces some regrowth after the initial cut. For continuous supply, succession sowing new trays every seven to ten days is the practical approach rather than attempting to regrow cut trays.
Why is there mold on my microgreens?
White fuzzy mold on microgreen stems or soil surface is caused by excess moisture combined with insufficient air circulation. Improve air circulation by spacing trays away from walls, running a small fan nearby, and avoiding enclosing trays in covered spaces without airflow. Switch from top misting to bottom watering which moistens the medium without wetting stems. Reduce watering frequency and allow the surface to approach dryness before the next watering.
What is the most nutritious microgreen?
Broccoli, red cabbage, and sunflower microgreens consistently appear in nutritional studies as among the most nutrient-dense microgreens per gram. Broccoli microgreens specifically contain exceptionally high concentrations of sulforaphane, a compound with well-documented antioxidant properties. Pea shoots provide concentrated vitamin C and amino acids. All microgreens are nutritionally superior to their mature plant counterparts per gram but the specific nutritional profile varies by variety.
How many seeds do I need for a tray of microgreens?
Coverage varies by seed size. For a standard ten-by-twenty-inch tray: radish requires approximately two ounces of seed. Peas require approximately eight ounces due to their large seed size. Sunflower requires approximately four ounces. Basil requires approximately one ounce since the seeds are very small and expand when moistened. Purchasing seed in bulk (four to sixteen-ounce packages) is more economical than small seed packets for regular microgreen production.